
Who pays the bills?
This site is run as a, not-for-profit exercise on my own behalf, you won't see any advertising here, donations are neither sought nor accepted.
I am semi-retired and I have a lifelong interest in woodworking, lately I have gotten interested in 19th Century British Saws. Hopefully this site will be of some small benefit to others.
|
Welcome to the official site for supporting documentation relating to the book British Saws and Sawmakers from 1660 by Simon Barley. I will be posting here any reviews, additions, errata and revisions as well as providing a forum for ongoing discussion. Regular visitors to the site will be already aware of Simon Barley's long anticipated new book on British Saws and Saw makers from 1660. The standard reference for many years has been Handsaw Makers of Britain, by Erwin L Schaffer and Don McConnell, abbreviated as HSMOB. British Saws and Saw Makers (abbreviated as BSSM), will rapidly become the new standard reference work. It's not easy for someone new to the somewhat arcane world of researching British saw makers to really appreciate fully the amount of work that goes into creating such a reference work. The many thousands of hours of painstaking trawling through trade directories and publications of the time. Organizing thousands of details into a coherent whole. Our congratulations go to Simon Barley for a truly outstanding contribution to research on British saws and sawmakers. I commend the book to anyone interested in the history of toolmaking.
Regular updates on the book with reviews, additions, errata and revisions will be available on here as the need arises. Feedback and questions for Simon may be posted in the forum as usual. The details of how to purchase the book can be found on the TATHS web site http://www.taths.org.uk/barley-saws.htm
Historians of the various tool trades have long wanted a work specifically on saws and this, the first, is an attempt to match the detail and scholarship of the best that cover planes, cutlery, spanners and measuring tools. The author is a frequent writer and lecturer on saws and the history of their manufacture, and is able to base his work on 15 years of original research and the building of a personal collection of saws - possibly the largest in the world - which is housed with the renowned Ken Hawley Collection in Sheffield's Kelham Island Industrial Museum. Together, these collections form a unique research base and visitor attraction. This scholarly book is illustrated with almost 2000 photographs, the majority by the author, and with its listings of saw makers and dealers forms the most comprehensive directory to date of British names in the tool trades.
Errata.( In page order ) Page 28, col 1: 9 lines from bottom, for Old Street, read London Page 43, col 2, 3rd para: for Figure 2.4 and Figure 2.5, read Figure 2.8 Page 49, caption to Figure 3.1 should read 1840, not 1820 Page 56, 5 and 6 lines from the end of the second paragraph, change "the distal six inches of two-man cross-cuts..." to one-man cross-cuts". Page 69, In paragraph 4, Figures 3.66 should be 3.62 and 3.67 should be 3.63. In paragraph 5, Figure 3.68 should be 3.64 Page 74, 5th line, for chapter 3, read chapter 5 Page 278, The line of text "Took over premises of J.C.Millard" belongs under the Grainge and Smith entry; on the opposite page. Page 293, line 4 Insert ‘more’ between much and often Page 421, Superfluous "and" in line 1 of the third paragraph. Page 522, The initial S of Sheffield Steel Products should be inserted Page 723, under Manwaring for 39 read 37. |
Evolution of the Backsaw
When did the backsaw first appear? This is a question that at first sight, it would appear to be simple to answer. Not so. I imagined that I would just refer to the available literature for answers. It is a curious and sparsely researched area of Archaeology, plenty of material relating to axes, hammers and so on, going all the way back to the stone age. If you want to know about stone axes, there is an abundance of material. But saws seem to have slipped mostly below the radar. Saws go back to the early Egyptians who had hardened copper pull saws as early as 4900BC, but I am going to focus here on just backsaws. (A complete history of the saw would be a much more ambitious undertaking).
The earliest possible candidate which may have been a backsaw, is a Roman saw found at Mont Auxois, a Gaulish camp, this saw is in the museum at St.-Germain.
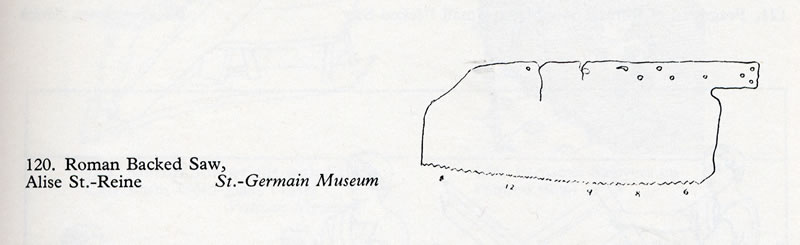
W.L.Goodman "A History of Woodworking Tools" pp117
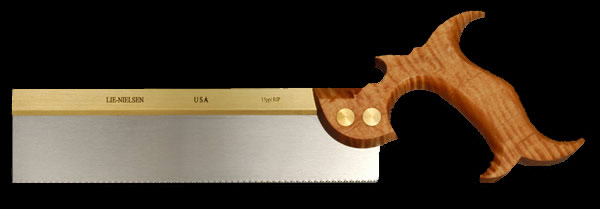
The author suggests that this may have been a backsaw, because of the row of holes along the back of the blade look as if a wooden stiffening rib could have been attached, also it looks as though the handle was attached with rivets, rather than a tanged handle, he also points out that the teeth are progressive in pitch, that is closer at the toe, and wider spaced at the heel. So the earliest backsaw was progessive pitch (this saw is obviously the Lie Nielsen of the Roman world!). Nothing is ever entirely new apparently.
Following the collapse of the Roman Empire, the handsaw seems to pretty much dissapear from history, the Bayeaux Tapestries which illustrate the process of ship building from felling trees to launching the ships shows not a single saw. All work is done with axes, adzes and other tools.
I suspect that the handsaw was still in there somewhere, hiding, in the medieval toolbox, maybe only dusted off for special jobs that couldn't be handled by the bow-saw or frame-saw. The only evidence I have for this assertion is a 13th Century saw found when excavating a midden near Windcliff.
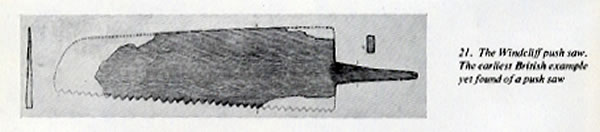
British Push Saw from 1200's found in a midden at Windcliff "Story of the Saw" P.d'A.Jones and E.N.Simons.
It is interesting not only because of it's age, but it appears to be intended to cut on the push stroke, rather than the pull stroke. However it's not a backsaw, but it is a wide blade. Also it is evidently intended to be fitted with a tanged handle.
Moving forward, our next clue, is found in H.C. Mercer's "Ancient Carpenters Tools" pp139 where he says that the tenon saw is first mentioned in the 1549 edition of the "New English Dictionary" and is so thin that it is stiffened with a metal rib. He may have been referring to a saw that is mounted in a metal frame, rather than our moden concept of a backsaw (see MissingLink1) (Thanks to Brian Welch for this insight). The only hand saw images of this time generally depict a sword like two handed saw, with a long thin serrated blade, sometimes curved. The bow saw, frame saw and the pit saw also appear frequently. throughout the medieval period.
The next mention of backsaws appears in J Moxon's 1680's "Mechanick Exercises or The Doctrine of Handy Works" unfortunately he doesn't illustrate the backsaw and his reference appears out of context. As many others have noted, it's a pity Moxon's proof reader missed the oversight. He only shows two saws, one looks more like a serrated long knife, and this one. (actually the page (plate 4) shows 6 saws, including whip-saw, pit-saw, frame-saw and one being sharpened.) Only two candidates for our concept of a back saw however.
A re-reading of the relevant chapters of Moxon, it appears that he was referring to a bow saw with the blade turned at right angles, although why that should make it a "tennant" saw is still unclear. What is clear is that Moxon's proof reader didn't make a mistake, it was just mis-interpreted.
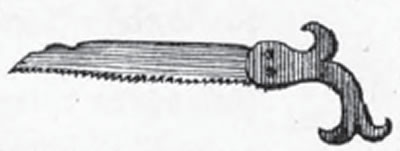
Moxon 1680's "Mechanick Exercises or The Doctrine of Handy Works"
This looks more like a pruning saw, rather than the saw's we are familiar with today. The hand position is actually below the line of the teeth. We now move into the 1700's and still no sign of a backsaw anywhere, but everyone seems to know about them.
The 1736 publication "City and County Purchaser's and Builder's Dictionary" published by Richard Neve mentions the tenon saw or tenant saw as "used for fine stuff, with a back to it; so called from being used to make tenons for Mortises".
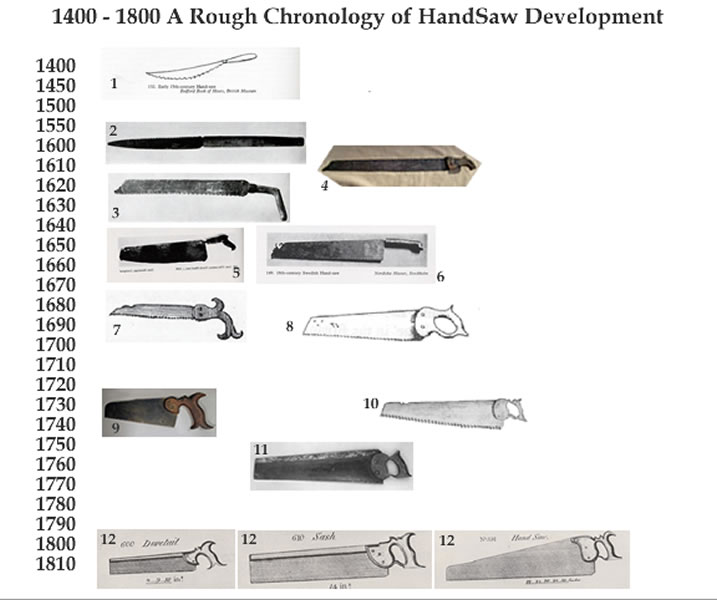
If we take an overview of the period from 1400 to 1800 we can get a sense of the the evolution taking place.
References:-
1.2.3.5.6. Goodman, W.L. "The History of Woodworking Tools" pp 126,pp146.
4 Courtesy Tony Seo (estimated to be circa 1600).
7. Moxon, J . "Mechanick Exercises" London 1683 (Courtesy Mike Wenzloff).
8. Ralamb, A.C. "Skeps Byggerij" [Ship Building] c1691 (Courtesy Don McConnell).
9. Davistown Museum http://www.davistownmuseum.org/toolSaws.html c1750.
10. Trade card of John Jennion London 1732-1757 (Courtesy Don McConnell)
11. John (or Alice) White London mid 18th Century (Courtesy Don McConnell).
12. Smith, J. "Explanation or Key to the Various Manufactures of Sheffield" 1816
By the time Smith's Key was published in 1816, all of the handsaws we are familiar with today had evolved to the forms and functions that we use today. However this evolution appears to have mostly taken place over the period 1700-1800, I suspect that this is a misleading impression we get simply because of the lack of surviving examples. We know that something called a tenon-tennon-tennant-tenant saw was around in the mid 16th Century, we just don't know what it looked like. However we can make some educated guesses that it could have looked a bit like the swedish saws illustrated in 5 or 6 above. Probably with a tanged handle, or it may have looked something a bit like our modern hacksaw. Which "Missing Link 1" was Moxon referring to as a "tennant" saw?
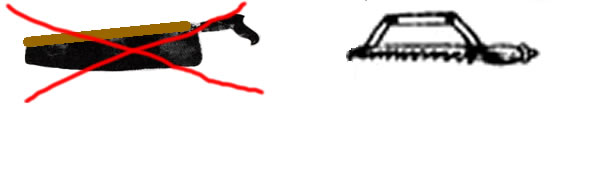
Missing Link Number 1 Circa 1550
(Thanks to Brian Welch for the image on the right: Randle Holme 1688)
We can guess that the change to a rivetted handle possibly occurred around the mid 1600's when commercial saw production began. Changing to rivetting the handle to the blade would have enabled the development of the closed handle. Putting a closed handle on a tanged blade doesn't seem practical . Also the hand position is now clearly above the tooth line. This "Missing Link Number 2" is what I imagine an early 1700's dovetail saw to look like. As yet it hasn't been found. (it might not exist)
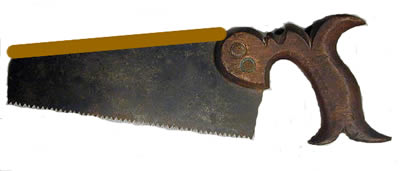
Missing Link Number 2 Circa 1700
This example below is from 1750, but the A.C. Ralamb saw pictured in (8) above (1698 or earlier) is very similar to this from, just add a piece of folded steel to the back to the A.C.Ralamb saw and you have the J.Harrison of the 1750's
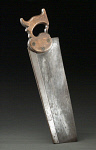
J Harrison 1750-1770
This J. Harrison and the J. White (11 above) are both steel backed, it appears that larger (early) backed handsaws were generally steel backed and the smaller ones brass backed, the Peter Nicholson writing in the 1832 "Mechanics Companion" , says that the tenon saw has a steel back, and the smaller sash saw has a brass back. I suspect this may have been for cost reasons or perhaps production tooling limitations. Either way the large early backsaws seem to have steel backs rather than brass.
When saw production began in Sheffield, the improved steel production processes led to thinner plate, better quality steel and competition between the various saw makers would have created an environment where improvements in manufacturing technique would have spread rapidly. From 1800 onwards we have many more manufacturers and many more surviving saws to compare. The Sheffield saw industry was well placed to take saw manufacturing to the high art that developed in the years from 1800-1900.
So, when did the first backsaw appear? (apart from the Romans):
The only hard evidence in the form of real saws however, is from the 1750's but we have a description of a tenon saw from 1736 (Richard Neve), which is perhaps a little less ambiguous than Moxon's 1680 reference.
So my answer is a cautious....sometime before 1736....possibly as early as 1700.
I wouldn't be at all surprised to find out it was 1650 however.
That's called having a bet each-way. Further research may help refine the answer.
Ray Gardiner July 2008
Edit 18/10/2008: Fixed link for Davistown Museum
Edit 01/12/2008: Added reference to Richard Neve 1736
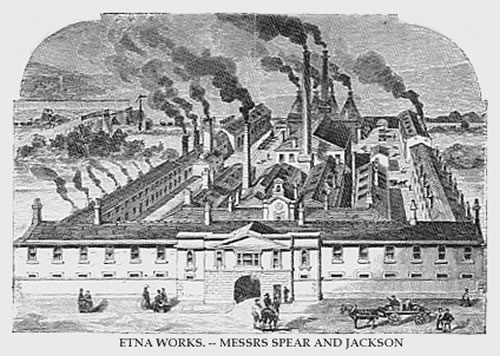
Illustrated Guide to Sheffield 1879
It is assumed that working conditions in industrial England in the 19th Century was dominated by child labour, greedy Simon Legree type bosses and starvation wages, while conditions were nothing like as good as todays industrial workplace, perhaps it is worthwhile to see what it was really like. You might be surprised.
This is an excerpt from "The Vital Statistics of Sheffield" by G Calvert Holland Esq MD Physican Extraordinary to the Sheffield General Hospital from 1843. The book is out of copyright, as far as I can tell. I have re-formatted it slightly for the web page, but the content is unaltered.
CHAPTER XII.
SAW MANUFACTURE.
The workmen in this branch of trade are, perhaps, in no degree inferior in intelligence, sobriety and general good conduct to those in the manufacture of which we have just treated. They have both equally their respective unions, which regulate wages, the introduction of apprentices and which, in time of sickness, afford a weekly allowance. The following answers to the subjoined questions will convey a correct idea of the condition of the artisans.
1. What are the principal branches of the saw-making department?
The saw trade is divided into three branches saw-making, saw-handle making, and saw-grinding.
2. What parts are usually executed by boys or women ?
Boys in the saw-making branch attend first to toothing and filing. Women are employed to rub and scour saws, and, also, to oil and wrap them up.
3. What number of workmen is there in the different branches ?
In the saw-making branch, there are two hundred and eight journeymen,—about twenty of them not in union.
4. What number of boys or apprentices ?
The number of boys is about one hundred and thirty, which exceeds what is allowed by the rules of the trade.
5. What number of women ?
There is one female to about every eight men.
6. Were girls or women much employed in the trade thirty or forty years ago ?
Always as at present.
7. What are the rules regulating the admission of apprentices ?
The master is allowed two apprentices to five journeymen. During the bad time of trade, this regulation has not been strictly attended to by the masters.
8. What is the average of the wages in the different branches, supposing an individual to labour eleven hours per day ?
There is so great a difference in the work, and such diversity of talent in the workmen, that it is scarcely possible to give an average. The following statement is not far from the truth:— The few who are datal earn from 24s. to 82s. per week. The piece-work varies very much in its kind. Some departments will allow a person to earn from 85s. to 45s. per week, whilst others restrict the earnings to between 28s. and 80s.—28s. is about the average of the wages.
9. Are the workmen usually by the piece or *datal?
Both by the piece and datal, but generally by the piece.
* Datal means paid by the day or week—piece, for the amount of work executed.
10. What proportion of the adults can read ?
Nineteen out of twenty.
11. What proportion can write?
Nearly nineteen out of twenty.
12. What proportion of boys can read or write ?
We are not aware that there are any that cannot do both.
13. Are the different branches of the trade in the same or different unions? If in different unions, is each under a separate and independent management
In different unions, and their management is quite independent of each other
14. What changes have taken place in the prices since 1814?
The saw-making branch, for making the best article, receives about the same as in 1814; but there is twenty per cent, more work in the articles than in 1814.
15. What proportion of men are in sick clubs ?
About nine-tenths.
16. What proportion in secret orders ?
About one-sixth.
17. Are the men, in sickness, or when out of work, relieved from any fund belonging to each branch of this trade ?
Workmen belonging to the saw-making branch, in case of sickness, or when out of employment, receive a weekly allowance; and in case of death, a certain sum is paid towards defraying the funeral expenses. During the past two years, this branch has paid about £2000, principally to workmen out of employment It has been in union, and regularly organised above forty years.
18. What proportion of the workmen are depositors in the Savings' Bank?
From the depression of trade, during the last two years, we doubt whether any deposits remain in the Savings' Bank.*
* In 1840, it is shewn, at page 133, that there were 34.
19. Are the prices as strictly enforced, in time of bad trade, as in time of good ?
We have had great difficulty in maintaining the prices, but have generally been successful.
1. What is the number of men employed in this department of trade?
The number of men employed is about 120.
2. What is the number of boys employed, and what are the rules regulating their admission?
The number of boys is about 100, and there is no particular rule regulating their admission.
3. What is the number of females employed ?
Women are not employed in this department of trade.
4. Are the men datal or by the piece ?
The men work always by the piece.
5. What is the average of the weekly wages, and when were the present prices fixed ?
The average earnings, 26s. per week. The prices were fixed in 1821, but many men are working at prices lower than at that time?
6. Are the men in union ?
The men are in union, but one very imperfectly formed and conducted.
7. What proportion of the men can read ?
About eighty.
8. Are the apprentices the property of the masters or the journeymen ?
With few exceptions, they are the property of the journeymen.
1. What is the number of men employed in this department of trade?
The number of men in this department of the saw trade is nearly one hundred and twenty.
2. What is the number of boys employed, and what are the rules regulating their admission ?
The number of apprentices is about 90. No journeyman is allowed to have more than one apprentice, unless the apprentice be in his twentieth year.
3. Are the men datal or by the piece ?
With few exceptions, the men work by the piece.
4. What is the average of the weekly wages?
The average earnings are from 40s. to 50s. per week, out of which sum the grinder pays wheel rent, and the cost of stones and other articles required in grinding.
5 Are the men in union ?
The men, with the exception of about 12, are in a union which was formed in 1819.
6. What proportion of the men can read ?
About one hundred.
In the consideration of the silver and silver-plated manufacture, several conditions are stated which appear to be favourable to the workmen—such as restrictions on the introduction of apprentices, and the difficulty, from the capital required, for journeymen to become masters. The same exist, but not to an equal extent, in the saw trade. This is more liable to fluctuations from the greater competition resulting from this circumstance, and likewise from the manufacture depending largely on foreign markets. The well-being and intelligence of workmen will always be most marked in those branches in which the demand is the most regular. Neither inordinate prosperity nor adversity is conducive to the improvement of the artisan.
Many of the facts in the foregoing answers redound greatly to the credit of the operatives. Not to be able to read and write, is the exception and not the rule. It is also stated, that nine-tenths are in sick-clubs, which is perhaps a greater proportion, with the exception of the silver-plated branch, than in any other in the town. In some of the occupations, the proportion is little more than one-half. Men who are insufficiently remunerated for their labour, yet liable to the frequent vicissitudes of trade, cannot be expected to be provident, nor have they generally' either the means or the inclination to improve their minds.
The researches of Mr. Felkin into the condition of the workmen in Nottingham, during the depression of trade in 1837, afford some valuable facts on this subject, and are evidence of the vastly superior circumstances of the artisans employed in the manufactures of this town.
Out of 452 stocking makers, 91 only were in sick clubs; about one in five. In 498 lace makers, 128; rather more than one in four. Of the smiths, one in five. How different are these proportions from what are furnished by the saw trade ! Were there no other facts, on which to form an estimate of the condition of the artisans in the latter, these would be sufficient to establish the comparative comfort of the one class, and the comparative misery and degradation of the other.
The saw-making branch may be regarded as generally healthy. It is an occupation in which considerable muscular exertion is required, and yet the labour is not so severe as to make an undue call upon the energies of the system. The men art mostly well formed and strong, and live to a fair average age, taking into consideration that the employment is entirely within doors. The saw-grinders are among the most powerful of the artisans, either in this or any other manufacturing town. A great part of the labour is heavy, but several circumstances concur to prevent this exhausting the vital powers. The wheels in which they work are mostly propelled by water, being placed upon the streams, in the exquisitely beautiful situations within a few miles of the town; consequently, the artisans are liable to numerous interruptions, either from too much or too little water. The frequency of these interruptions has led many of them, to add to this employment the cultivation of the soil.
They have frequently either small farms, or plots of ground for garden purposes. The wheels, moreover, are always well ventilated, in consequence of dilapidated windows and roofs, for they are proverbially in a bad condition. The workmen, also, generally live in the country, and the wages they receive, which is an important circumstance, enable them to command the substantial necessaries of life. The combination of these conditions, satisfactorily explains the strong muscular frames which they possess. Further, the branch does not admit of the employment of boys at a tender age or of delicate constitution, the articles being too heavy for either to hold with advantage. Saw grinding is also entirely done on a wet stone, and the position of the grinder, when at work, is standing, so that the lungs have free play, which is not the case in other branches of grinding.
The saw grinders are peculiarly liable to accidents, from the breaking of stones and from becoming entangled in the machinery. This arises from two circumstances, the largeness of the stones on which they work, as well as the great length and weight of many of the articles which they grind. The larger the stones, combined with the rate of motion, and the more liable they are to break; and it is manifest that a saw, five or six feet in length, is much less under the command of the grinder than a penknife; hence greater the chance of becoming entangled in the machinery. Of the 42 deceased, since 1821, of which we have returns, five were killed by the breaking of stones; and the following are a part of the accidents which have happened to 78 living members in union.
1. Lame nine months, from the breaking of a stone.
2. Lame six months;—drawn over the stone.
3. Arm broken, from being entangled in the machinery.
4. Skull severely fractured;—was incapable of work for nine months, and the individual has broken eleven stones.
5. Drawn over the stone;—severely hurt;—in bed nine months.
6. Severely hurt—confined two months;—has broken seven stones.
7. Hand cut;—confined one month.
8. Leg entangled in the machinery;—for twelve months unable to work.
9. Arm severely lacerated;—lame three months.
10. Lamed, from the stone breaking;—ill three months.
11. Hand lacerated;—incapacitated from work.
12. Hand lacerated;—lame two months.
13 Leg broken, and now a cripple.
In this branch, there are only four affected with the disease peculiar to grinders, and these cases are more likely to have arisen from exposure to wet and cold, than from the inhalation.
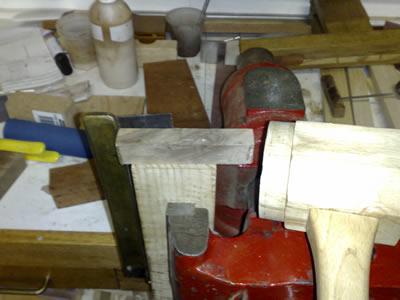
Canted Blades (tapered in width)
You can taper the thickness, or you can taper the width, here I am talking about tapered width. Thickness is another matter altogether. You will often see old saws where the blade is decidedly narrower at the toe than the heel. Here is an idea of what I am talking about.
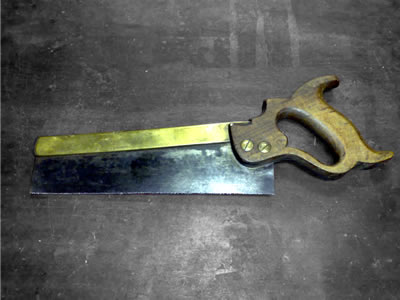
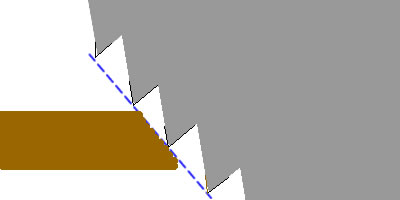
Spear and Jackson Dovetail Saw, showing canted blade
Notice the rather steep angle between the back and the cutting line, some have theorized that this cant has been created by incorrect jointing over many years, some say the back has just slipped and need to bash the brass back down into line. (I have heard stories of tool dealers bashing away at saws to make the blade parallel to the back.) Both theories have some merit, and could cause the same cant (taper). The purpose of this article is to investigate what could cause the canting and why. But before we start, it is a good idea to do some homework and bring everyone up to speed on the state of the discussion.
Joining in the Discussion
For those who are coming late to the party, here is a quick catch-up.
Recently there have been a few articles written on this subject, the first is by Phillip Baker writing in the "Saw Talk" column over at wkfinetools.com http://www.wkfinetools.com/contrib/pBaker/parallelTaper/parallelTaper-1.asp
He concludes, (correctly in my view), that some saws are made with cant (taper), and some made with no canting, but get that way over time.
Chris Schwartz writing in his (always informative) blog over at woodworking-magazine, discusses why having a canted (tapered blade) helps cutting dovetails.
http://www.woodworking-magazine.com/blog/Tapered+Sawblades+Thats+Not+A+Defect+Its+A+Feature.aspx
He also points out that "Smith's Key" a pattern book published in 1816, clearly shows canted (tapered) blades. Thus proving that at least some saws were made with a canted blade.
An alternate view of why smaller saws tend to be more canted is illustrated here:- http://www.disstonianinstitute.com/dovesharp.html
Here Eric Von Sneidern, argues that the canting is induced over time, and repeated jointings because of the difficulty of clamping small saws in a standard saw vise. I am sure that this is a factor, at least in some saws. and should not be discounted.
The next contribution to the discussion, comes courtesy Spear and Jackson's 1915 catalogue.
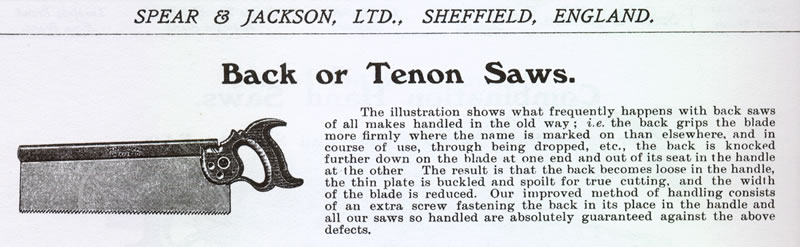
It looks as though my 2 screw Spear and Jackson must be earlier than 1915, I wonder if they can give me an upgrade?
Late Additions:-
The Norse Woodsmith has written a blog on canted blades, you can read it here: http://www.norsewoodsmith.com/blog/1
Now that we are all up to speed on the current state of the discussion, let's take a closer look at that saw we showed above, we will start by dissassembling it, I am going to restore it (eventually) as best I can.
First we look to see if the back has slipped up, and lo and behold, it's about 3/8: higher than the depth of the slot on the handle would indicate.
Looks like Spear and Jackson's 1915 sales pitch was at least partially correct.
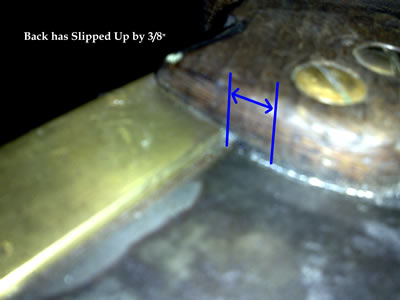
It looks pretty grungy, and there is a lot of gunk filling the gap, but the brass back has clearly lifted by 3/8. So let's move on and take the back off.
To remove the brass back, clamp the blade between two blocks of scrap and and then using a block of wood and a mallet, GENTLY tap the brass back
Most of them are not actually that tight as a rule, and come off easily.
Now let's see what we have.

Dissassembled
First off notice that the blade isn't actually tapered at all. It is rectangular. The canting is just an illusion created by the way the blade is assembled into the brass back. and the correct degree of cant is about 1 inch. Ok, so three things we can conclude so far.
1. The brass back had slipped up slightly, increasing the canting.
2. The saw was made with a deliberate cant, that cant being created by inserting the blade at an angle to the back.
3. Repeated sharpenings have not induced any additional canting. (the blade would not be rectangular if it did).
So let's look back a little in time, to see where the canting originated and why it is there. Following Chris Schwartz's lead let's have another look at Smith's Key.
Joseph Smith "Explanation or Key to the Various Manufactories of Sheffield" 1816
Clearly, this is how dovetail saws were intended to be made in 1816, what is not clear is when did the change to parallel backs occurr, If we look at the
1889 illustrated Trade List of Prices for Sheffield Goods. We see the following.
Illustrated Trade List of Prices of Sheffield Goods 1889
Again, this illustration is intended to show what a dovetail saw should look like.
So sometime between 1816 and 1889 the "standard" changed from canted (tapered) to parallel, no wonder people get confused!. The question as to why it changed I suspect has more to do with the manufacturing processes than with the usability of the saw. Again I should caution against generalizations, this only illustrates part of the picture. We haven't attempted yet to deal with why a canted (tapered) blade would be a desirable feature.
What caused the canting (taper) on my saw?
So If you have a saw with a canted (tapered) blade, is it an artifact caused by repeated incorrect jointing during sharpening?
Well, yes it could be.
The only way to know is to remove the back and see if the blade is rectangular or not. I suspect if you have a post 1900's saw with only a slight cant (taper), say less than 1/4" I would expect that could be caused by incorrect jointing over repeated sharpenings.
On the other hand if you have an 1850's saw with say 1/2" or more of canting and the back is firmly seated in the handle, it probably was made that way.
It may be that earlier saws actually had canted (tapered) blades and the practice of putting the blade in the back at an angle came along later, I would be curious to find out.
What would the advantage of having a canted blade be?
Let's go back to basics and see what the "correct" technique is for ripping a board with a standard panel saw. Notice the angle between the line of the teeth and the board. The starting cut is at a very shallow angle, then moves to a more upright angle.
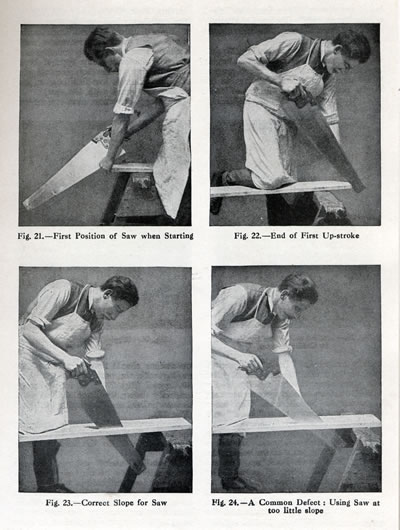
Using a Rip Saw, "The Practical Woodworker" Bernard E Jones pp 50 Vol 1
"The Art and Practice of Woodworking"
Imagine if you will what happens when the board is vertical, as it usually is when cutting dovetails or tenons, what is the correct angle for sawing?
the angle of the line of teeth will be tilted towards the handle, it is more comfortable to get closer to this angle with a tapered blade. But now we are
at an angle to our desired finish cut, so when we hit the line at the front, simply tilt up slightly for the final strokes.
Why is this angle important (if indeed it is?) well, consider what a rip tooth with zero rake looks like, now imagine that chisel like cutting edge cutting accross a bundle of wood fibres, it is easier to slice at an angle rather than straight down. Cutting at an angle tends to lift the fibres in front of the edge and makes for a cleaner cut with less effort. (I really need to do a drawing to illustrate this..)
Ripping at an angle (exaggerated)
Here I am trying to illustrate that when you are ripping, the teeth are cutting the bundles of wood fibres at an angle, (imagine a bundle of straws if that helps), now as you cut through this bundle, if you are cutting at a slight angle, then the fibres will tend to lift up in front of the tooth and thus make for an easier and cleaner cut. If you are chopping down at right angles to the fibres, then they won't lift and the excercise becomes a bit like scraping end-grain. I think the above illustration also show there must be some correlation between the cutting line and the rake angle of the teeth.
Something for future study...
Conclusions
So blades are canted because it makes sawing at an angle to the board more comfortable, also makes sawing to a line easier.
There are many reasons why backsaws blades appear canted. From repeated incorrect jointing, back slippage and of course "made that way"
Have a close look at that vintage backsaw with the canted blade and see if you can tell which is true for you.
Addtional Note: I should of course mention that Gramercy backsaws and Mike Wenzloff's Saws are sold with canted blades.
Following a suggestion from Joel Moskowitz (Tools for Working Wood) I have adopted the term "canted/cant" when referring to tapering blade width. Joel informs me that, Tim Corbett - Gramercy Tools originated the term. Thanks Tim, it's the ideal word.
I am not aware of any nomenclature that already covers this, and using "canted" instead of "tapered", removes some confusion from a subject already fraught with more than enough confusion already. Plus, "canted", is a very descriptive and accurate term for this subject.
Ray Gardiner 2008
Edit: RG 4th August 2008: Changed tapered to canted in main text where relevant.
Edit: RG 30th August 2008:Fixing typo's and some spelling. Some instances where tapered / canted were missed.
Edit RG 18th September 2008: Added Link to Leif's Blog.
Trade Marks are an important in the unambiguous identification of a particular maker. With backsaws especially, the trade mark is usually stamped on the back of the saw and so provides a permanent method of identification.
This list of trade marks is taken from Kellys 1901 trade directory. I will add others here are they become available.

Allen Edgar & Co. Limited, Imperial steel works Tinsley.

Brittain S. S. & Co St George's Works Shoreham Street
Brooksbank Abram & Co. Malinda Street

Atkinson Brothers Limited, Milton Works,

Beardshaw J. & Son, Ltd Baltic steel works, Effingham road,

Beckett Alfred & Sons, Ltd, Brooklyn works, Green Lane,

Bedford John & Sons Limited Lion works, Mowbray street,

Burys & Co. Lim. Regent Works, Penistone road & Philadelphia works Rutland road.
Other Marks: "WM.ASH & Co.", "REGENT"
Colquhoun & Cadman, Douglas works, Arundel Street

Carr J. & Riley, Bailey Lane works,

Colver Bros. Lim. Pilot works, Cotton Mill row

Cook Williams & Sons, Glasgow Steel and File Works Washford road, Attercliffe; and Glasgow and London,

Drabble & Sanderson, Ebenezer Works, Morpeth St.
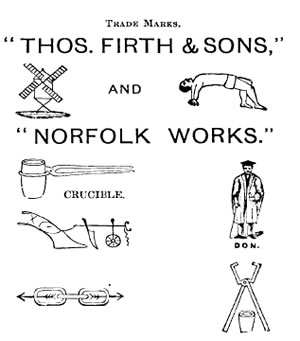
Firth Thos. & Sons, Ld. Norfolk Works, Savile street east,

Flather W. T. Limited, Standard steel works, Love street.

Glauert L. & C. Wallace works, Furnival Street,
Hansell F. L. & Co The Hansell Canal Steel and Wheel works, 47 Eyre Lane,

Hearnshaw Brothers 50-52 Sorby Street,

Howarth James & Sons, Bath Street

Ibbotson Brothers & Co Lim. Globe Steel works, Alma St; and 7 Victoria Street, Westminister, London, s.w

Jackson William & Co Sheaf Island works Pond hill,

John Wilson, Marsden Bros. & Co. Portland works, Trafalgar street
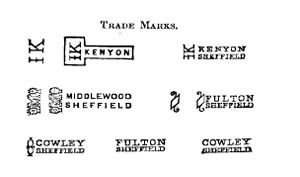
Kenyon John & Co. Mill Sands steel works, Mill Sands,
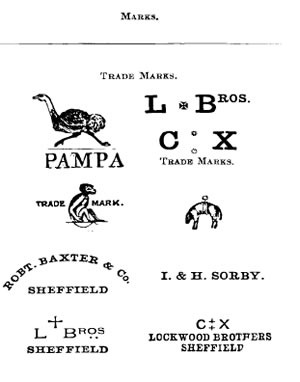
Lockwood Bros. Limited, Spital Hill works, Spital hill.

Makin Thomas & Son, Castle works 105 Edward street,
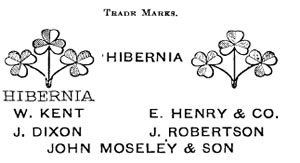
Marples William & Sons Limited, Hibernia Works, Westfield terrace.

Marsden & Beeten, Middlesex works, Newcastle st.
Moss & Gamble Bros. Franklin works, Russell street; & Wadsley Bridge works, Wadsley Bridge,
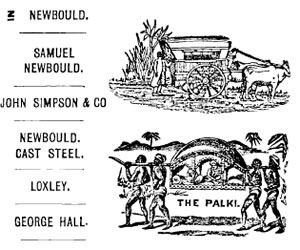
Newbould Samuel & Co. Lim. Newhall road,

Osbaldiston Louis & Co. Challenge works, Arundel street,

Osborn Samuel & Co. Clyde steel and iron works, Wicker; 184 Brook hill, Blonk street and Rutland works, Penistone road; and London,
Peace Joseph & Co. Lim. Lancaster street,
Peace W. K & C. Limited, Eagle works, Mowbray street; London offices 61 St. Mary Axe, E C.
Pearson F. G. & Co. Hope Works, Furnace hill.
Warranted Superior
Priest & Co. Pea Croft brass works, 60 Solly street.
While not strictly a saw maker, this medallion appears on many secondary product lines.

Russell, Horsefield & White; Canada works, Charles street,

Sanderson Bros. & Co. Lim. Newhall road,

Slack, Sellars & Co. Townhead works, Lancaster street, Neepsend

Sorby I. (now Turner, Naylor & Co Ltd), John street

Sorby Robert & Sons Ltd. Trafalgar street.

Spear and Jackson, Etna works, Saville street east,
Sybry, Searls & Co. Carlisle street

Taylor Brothers. Adelaide works, Mowbray street.

Turner, Naylor & Co. Ltd. (late I Sorby), Northern tool works, John street.

Turner Thomas & Co. Suffolk works, Suffolk road
Turton Bros & Matthews Lim. Steel, file & spring works, Wentworth street, Neepsend lane;
and 34 Gracechurch street, London E C, N.T. No 1045 T.A. "Matthews Sheffield"

Tyzack Joseph & Son Lim. Meersbrook, Sheffield

Tyzack, Sons & Turner, Little London works, Heeley

Tyzack W. A. & Co. Stella works, Hereford street

Ward & Payne, Ward's works, West street & Limbrick works, Hillsboro,
Wheatman & Smith Ltd. Russell works, Kelham Island,

Wilson, Hawksworth, Ellison & Co. (now Kayser, Ellison & Co. Ltd.), Carlisle wrks.

Wilson William F. H. Hermitage lane
Saws Making, like many other industries has it's own jargon, which as far as I am aware has been sparsely documented over the years, so in order to provide a consistent framework for discussion and research, I am presenting here a starting point, to which others can refer so that we can all agree on what that thing, you know the bump just above the whatsit, what's that called again! If you have a different name for something listed here let me know about it.
The subject of nomenclature is fraught with inconsistencies, local variations, colloquial usage, traditional usage, words invented to cover specific features and so on. It is my intention, to provide a starting point, so that we can have a common language for research and discussion. I am aware that words like "split nuts" are probably a late addition to the jargon, and would perhaps not have been understood by a 19th Century sawmaker. But, the term has gained currency through usage. And the current usage is what I am attempting to document.Research into the etymology and historic usage may provide a more complete lexicon over time.
Saws come in a bewildering array of various sizes, different tooth patterns and pitch etc. See end of this article for some more information on names of different saw types.
Starting with the basics.
The Basic Handsaw.
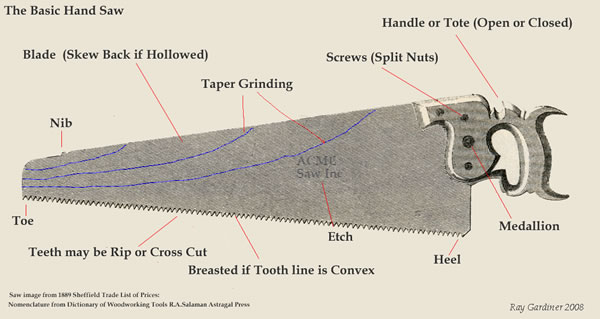
Saw image from "Sheffield Trade List of Prices 1889 Edition"
Nomenclature (with additions) from R.A.Salaman "Dictionary of Woodworking Tools"
(Keywords:Nib,Toe,Rip,Cross-Cut,Breasted,Taper,TaperGround,Etch,Heel,Medallion,Handle,Tote,Skew Back)
Ok, so if someone says they have a straight backed handsaw with eagle medallion and split nuts, slightly breasted, with intact nib, you will know exactly what they are on about. Also note that some early saws are stamped rather than etched. Whatever you do, never never ask what the nib is for, not if you value your sanity.
No moving on, my favourite
The Backsaw.
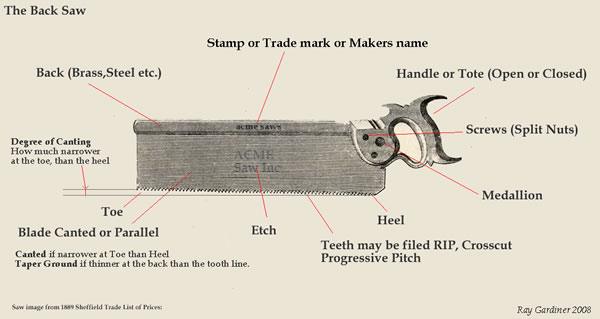
Saw image from "Sheffield Trade List of Prices 1889 Edition"
Nomenclature from various sources, Thanks to Tim Corbett - Gramercy Tools for "Canted"
(Keywords: Cant,Canted,Canting,Toe,Etch,Heel,Medallion,Screws,Split Nuts,Handle,Tote,Back,Stamp,Makers Mark)
Now, you can start to really pretend you know about saws, just say it's an open handled dovetail saw with brass back with 1/2" cant and R.Groves and Sons Trademark. With "USE" Medallion and split nuts with a beech handle. (better than saying, it's a short little saw with a funny looking handle)
Now we move into more advanced territory, starting with the Handles... First up the Closed Handsaw Handle. Fishtail or Dolphin Pattern.
The Dolphin Pattern Closed Handle
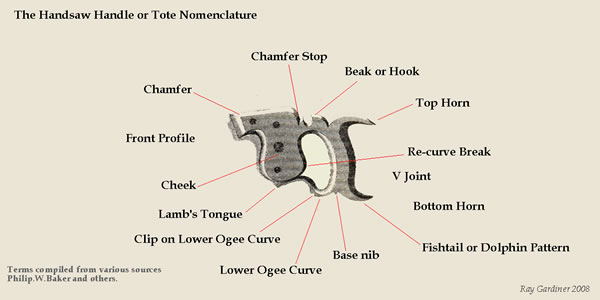
Saw image from "Sheffield Trade List of Prices 1889 Edition" digitally modified
Nomenclature from various sources, notably Philip W Baker
(Keywords: Cheek,Lamb's Tongue,Lower Ogee,Chamfer,Beak,Recurve,Bottom Horn,Top Horn,Fishtail,Dolphin,Base Nib)
Now we come to a variation on the closed handle called the London Pattern, this one has a flat bottom, rather than the "fishtail" or "dolphin" pattern.
This one however is a backsaw handle, rather than a handsaw. The grip position is higher up and more angled, but we'll get to that in a later article.
The London Pattern Closed Handle
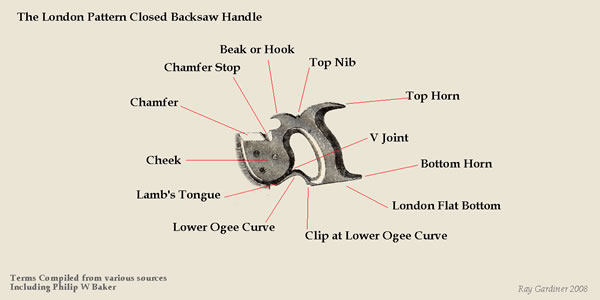
Saw image from "Sheffield Trade List of Prices 1889 Edition" digitally modified
Nomenclature from various sources, notably Philip W Baker
(Keywords: Cheek,Lamb's Tongue,Lower Ogee,Chamfer,Beak,Recurve,Bottom Horn,Top Horn,Fishtail,Dolphin,London Flat, Top Nib)
The open handled dovetail saw with a handle tailored to suit your own hand can be a joy to hold and a delight to use, and possibly the most elegant of all the saw handles.
The Open Handle
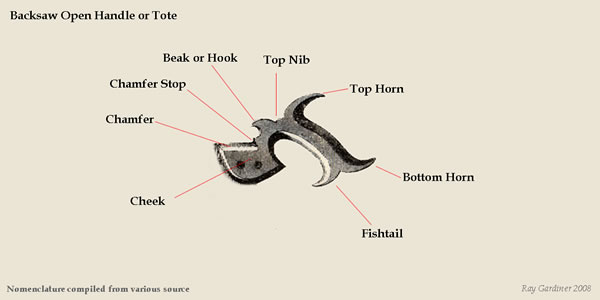
Saw image from "Sheffield Trade List of Prices 1889 Edition"
(Keywords: Cheek, ,Lower Ogee,Chamfer,Beak,Recurve,Bottom Horn,Top Horn,Fishtail,Dolphin,London Flat, Top Nib)
Saw Tooth Nomenclature
The components of a saw tooth are the face, the point or tip, the back of the tooth, and the gullet, teeth that we will consider here are standard rip and cross cut teeth, but be aware there are many other tooth patterns and variations, from Japanese pull saws to large 2 man cross cut saws. The main variables we have to define for handsaws are the pitch (how many points per inch), the rake, set, and fleam, standard gullets are constrained by the triangular (60 degree) saw files. So this is just the basics you should know for handsaws. First off the simplest is the rip saw.
The Rip Saw Tooth Pattern.
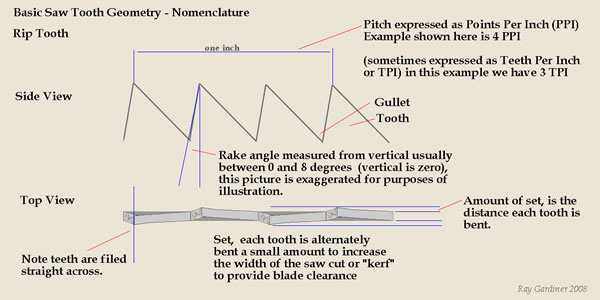
(Keywords: Gullet, Rake, Set,Kerf,Tooth)
Next, we look at the rip saws more complicated brother the cross cut saw, the main difference here is that the teeth are filed at an angle to the blade, that angle is called the "fleam angle"
The Cross Cut Tooth Pattern.
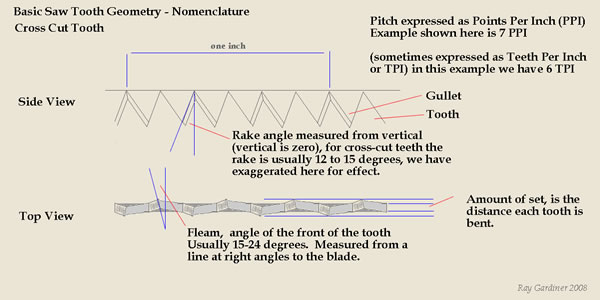
(Keywords: Gullet, Rake, Set,Kerf,Tooth,Fleam)
Choice of PPI, rake, fleam and set are dependant on whether you are cutting hard or soft timber, how thick and so on, a discussion of those choices is not within the scope of this document. Here we just tell you the names. (it is about nomenclature after all).
Now let's fill in a few gaps, the names for handsaws of various types, has changed over the years, let's look back and see what names were used in 19th Century Britain. That's what we are interested in after all.
The most often quoted authority for naming the different saw types is Holtzapffel (London 1846) so let's have a look at that first.
| Name | Length | Width at heel | Width at Toe | Points Per Inch |
| Rip Saw | 28 - 30 | 7 - 9 | 3 - 4 | 3 1/2 |
| Half Rip Saw | 26 - 28 | 6 - 8 | 3 - 3 1/2 | 4 |
| Hand Saw | 22 - 26 | 5 - 7 1/2 | 2 1/2 - 3 | 5 |
| Fine Hand Saw | 22 - 26 | 5 - 7 1/2 | 2 1/2 - 3 | 6 |
| Panel Saw | 20 - 24 | 4 1/2 - 7 1/2 | 2 - 2 1/2 | 7 |
| Chest Saw | 10 - 20 | 2 1/2 - 3 1/2 | 1 1/4 - 2 | 6-8 |
| Table Saw | 18 - 26 | 1 3/4 - 2 1/4 | 1 - 1 1/2 | 7-8 |
| Compass Saw | 8 - 18 | 1- 1/2 | 1/2 - 3/4 | 8-9 |
| Key Hole Saw | 6 - 12 | 1/2 - 3/4 | 1/8 - 1/4 | 9-10 |
| Pruning Saw | 10 - 24 | 2 - 3 1/2 | 1/2 - 1 1/4 | 4 -7 |
Table of Backsaw Names and Sizes
| Name | Length | Width |
Points per Inch |
|
| Tenon |
16 - 20 |
3 1/4 - 4 |
10 | |
| Sash | 14 - 16 |
2 1/2 - 3 1/4 |
11 | |
| Carcase | 10 - 14 |
2 - 2 1/2 |
12 | |
| Dovetail | 6 - 10 |
1 1/2 - 2 |
14 - 18 |
Compiled from R.A.Salaman "Dictionary of Woodworking Tools"
It will be immediately obvious that the names of many saws have changed since 1846, there are some that have dissapeared from general usage and some where the name has changed from earlier usage. Today's tenon saw for example is more like a carcase saw from the 19th Century. Whereas a 19th Century tenon saw would be called a mitre box saw today.
I will edit and add to this periodically, so check back every so often. Think of this as a first draft.
Ray Gardiner 2008
Many thanks to Peter Evans, The Tradional Tools Group (Sydney) for making this list available.
Some References on Saws and Saw Sharpening --- Compiled for The Traditional Tools Group Inc by Peter Evans
The Web is a growing source of information – and disinformation. A good start is:
vintagesaws.com/library/primer/sharp.html, this includes references, and is a good primer on saw sharpening
geocities.com/plybench/shop_projects.html and
geocities.com/plybench/saw_sharpen.html, some useful information.
members.cox.net/wcrittner/sharppage.htm, a beginner’s experiences
http://www3.telus.net/BrentBeach/sawjig/index.htm Brent Beach is obsessive on sharpening, would probably take you a few hours to fully explore his web site. This is a detailed guide to his approachl
norsewoodsmith.com, a lot of information on saws and sharpening, excellent
members.brandx.net/free/websites/bbrode/woodwork/sharp.html had a good primer on sharpening, and covers other issues of saw refurbishment
wkfinetools.com has many references including a lot of Disston material, rather than the specific web addresses below you are probably better off starting at the home address.
oldtoolsshop.com/index.asp; note the specific references below, may be better to access through the home page, rather than type in a long address
disstonianinstitute.com provides an in-depth look at Disston saws and has extracts from a number of Disston publications.
[if you see something you like on a website, download it because either the material or the site may not be there tomorrow]
Books:
Currently in Print:
Keeping the Cutting Edge: Setting and Sharpening Hand and Power Saws, Payson, Harold H., Wooden Boat Publications, 1988
The Complete Guide to Sharpening Leonard Lee
Classic Hand Tools by Garrett Hack, chapter 10
The Handsaw Catalog Collection – A compilation from the following catalogues E.C. Atkins & Co. of Indianapolis 1919, Henry Disston & Sons of Philadelphia 1918, Simonds Manufacturing Co. of Fitchburg, Mass. 1910, and Spear & Jackson of Sheffield, England 1915, Astragal Press 1994, 136 pp
Henry Disston & Sons Company General Line Catalog 1876, Henry Disston & Sons Company. 86 pp (reprint)
Simonds Saw Mfr. Co. General Line Catalog, Simonds Saw Mfr. Co., 195pp (reprint)
Patented American Saw Sets, An illustrated patent directory 1812-1925, 2nd ed, Todd L. Friberg, Osage Press
Hand-saw Makers of North America, Schaffer, L. Erwin, 1999, Osage Press
Hand-Saw Makers Of Britain: A Checklist Of Hand-Saw Makers, Schaffer, Erwin L. and Don McConnell, Osage Press, 151pp
Saws & Sawing, Ian Bradley (Workshop Practice Series), Trans-Atlantic Publications, 1986, 96pp
Saga Of The Saw Filer, Holbrook, Armstrong Mfg. Co. 2006 (1st publ 1952), 45pp
Saw Filer’s Handbook, PS Quelch, Armstrong Mfg. Co. 2006 (reprint), 130pp
Out of Print (where available on-line as PDF files, the web location of the file is noted):
Toolmera Collection of Books on Sharpening (Downloadable PDF's)
Toolmera Collection of Trade Catalogues (Downloadable PDF's)
Disston
A good selection of Disston Literature can be found at:-
http://www.wkfinetools.com/hUS/saws/Disston/pubs/index.asp
The Saw in History, published by Disston, many editions up to at least 9th in 1978, 4th in 1916,
http://www.wkfinetools.com/hUS/saws/Disston/pubs/pg/1916-TheSawInHistory.asp
also available at http://www.archive.org/details/sawinhistory00henrrich
Disston Saw, Tool and File Manual, Henry Disston & Sons, many editions until 1955. A number of editions at
http://www.wkfinetools.com/hUS/saws/Disston/pubs/index.asp
The Hand Saw, how to use it, how to choose it, how to keep it, Henry Disston & Sons, 1st edition 1876, last edition 1955 (by which time Disston was a subsidiary of HK Porter), a number of editions available at http://www.wkfinetools.com/hUS/saws/Disston/pubs/1875-TheHand-Saw/1875-TheHand-Saw.asp
and also at:- oldtoolsshop.com/storageBin/index.asp
Disston Tool Manual For School Shops A Book of Practical Information on the Construction, Use and Care of Saws, Tools, and Files, Disston, many editions beginning 1927
http://www.archive.org/details/disstonlumberman00henrrich
Disston Lumberman's - Containing a Treatise on the Construction of Saws and How to Keep Them in Order, Disston, 1st edition 1888 and many later editions until ?, the 1902 edition reprinted by Astragal Press in 1994. the illustration is the cover of a booklet (probably WW2 period of an extract from the Lumberman title.
Disston Handbook on Saws, Disston, 1st edition 1907, and several later editions. 1914 and 1919 editions available at
http://www.wkfinetools.com/hUS/saws/Disston/04pubs/pg/1914-HandbookOnSaws.asp
also the 1912 edition is at http://rosetools.bizland.com/id66.html
Disston Catalogues, many editions, including 1876, 1887, 1906, 1911, 1914, 1920, 1949; 1914 reprinted by Roger Smith in 1976, some extracts from this catalogue are on the web at http://mysite.verizon.net/dastrom/oldtools/disston/toc.htm
THE HAND-SAW. How To Use It, How To Choose It, and How To Keep It, Henry Disston & Sons, 1875, available at
http://www.toolemera.com/Trade%20Catalogs/vintagecatalogst.html
Proper Care of your Hand Saws, Disston Division of HK Porter Australia
The Disston Crucible - A Magazine For The Millman, Disston & Sons; vol III No. 8 September, 1914 is available at:-
http://www.wkfinetools.com/hUS/saws/Disston/pubs/pg/1914-HandbookOnSaws.asp
there were a number of issues up to 1928 at least; they are rare and expensive to acquire; they probably ended up in the furnace when read.
Why a Saw Cuts, F.M. Bassler, Henry Disston & Sons, 1916
The New Line of Disston Handsaws, Henry Disston & Sons, 1928, 21pp, http://www.disstonianinstitute.com/1928brochure.html.
The Pruning Book, Roland B Gilman, Henry Disston & Sons, 1921 and later editions, 105pp
DISSTON saws ∙ tools ∙ files ∙ knives ∙ steel, 1950’s booklet with ads + 22 blank note pages for the tradesman
Disston Illustrated Trade Price Sheet, 1954, shows there is a still a fairly wide range of saws listed, available at
http://www.wkfinetools.com/hUS/saws/Disston/pubs/hD-price1954/index.asp
Carpenter's Notebook, 1950s, brochure with a few pages of saws, plus note sheets for the carpenter to make notes – about timber perhaps? Available at
http://www.wkfinetools.com/hUS/saws/Disston/pubs/1950-CarpNotebook/1950s-HD-carpenterNotebook.asp
Better and More Economical Sawing, Disston Steel - Henry Disston & Sons
The Mysteries of Disston, Disston
Simonds
The cross-cut saw, Simonds Saw and Steel Co, Fitchburg, MA, 1929
The Simonds Saws & Knives, Catalogue No. 19, 1919, reprinted by Roger smith in 1994
There are a number of catalogues over the years; Simonds still exists as a company, but no longer makes hand saws. http://oldtoolsshop.com/z_pdf/1Simonds/1923-SimondsCatalog-HandSaws-ne.pdf
How to file a cross-cut saw, Simonds Saw and Steel Company, 1937
How to File a Hand Saw, Simonds Manufacturing Co
The Professor and the Saw: a Little Story for Those Who Like to Use Tools, Simonds 1915, Pamphlet 47 pp
Hack Saws and How to Use Them, Simonds Saw & Steel Co, 1958, 31pp
Simonds Guide For Carpenters, Simonds Saw & Steel Co, 64pp
Simonds Guide for filers and Sawyers, Simonds Manufacturing

Simonds "The Circular Saw"
http://www.archive.org/details/circularsawguide00simorich
The Care and Use of Circular Saws in Woodworking Plants, Simonds Manufacturing, 1946, 88 pp, available online and also as a reprint archive.org/details/circularsawguide00simorich
The Circular Saw, Simonds
Atkins
Saw Sense, E.C. Atkins & Co, 32pp, available at oldtoolsshop.com/z_pdf/1Atkins/Atkins-SawSense-ne.pdf
E. C. Atkins Silver Steel Saws - Saw Sense, E.C. Atkins & Co, available at oldtoolsshop.com/z_pdf/1Atkins/AtkinsSilverSteelSawSense-ne.pdf
The Atkins Saw Book for Home Craftsmen, E.C. Atkins & Co, 1930, 32pp
Atkins Metal Cutting Saws, Atkins Metal Cutting Hand Saws, Atkins Circular Metal Cutting Saws blades, Hack Saw Blades, Hack Saw Frames Atkins Kwik-kut Power Hack Saw Machines, etc, early 1900s
Saws in the Filing Room, E.C. Atkins & Co, c 1910, 64pp
The Saw Its Ancient and Modern Development, E.C. Atkins & Co, nd
Atkins Catalogs, a number of editions including 1914, 1919, 1928, 1941 (Atkins Saws, Saw Tools, Machine Knives & Files Catalog, 155 pp)
Atkins & Co Saws – Saw Tools Mill Specialities No 18, 1919, E.C. Atkins & Co, 246pp
Atkins Mill Saws, E.C. Atkins & Co, booklet, nd c.1920’s
Atkins Saw Book for the Farm Workshop and Woodlands, 1931, http://www.roseantiquetools.com/id220.html
Other US
Winchester Catalogue 1923, http://www.roseantiquetools.com/id220.html
The filers' success, J H Miner, 1915, 24pp
Miner's Manual of Saw Hammering and Filing, J. H. Miner, B.F. Ulmer Company, 1905, 60pp
Spear & Jackson
The story of the saw, P. Jones and E. Simons, 1961, Spear & Jackson, Ltd., Sheffield, 80pp
Concerning Saws, Spear & Jackson Ltd,
Saws, Knives & Tools For Sawmills, Spear & Jackson Ltd, 1924, 58pp
Spear & Jackson Saws and Tools Catalogue No. E7, 1953, 132 pp
Some Hints on the Care and Maintenance of Handsaws, Spear & Jackson Ltd, 1960’s ?, 11pp
Tyzack
Servicing Your Saws. W. Tyzack, Sons & Turner LTD., Sheffield c1950, 20pp
What You Should Know about Handsaws, Sanderson Brothers and Newbould Ltd, Sheffield
The Tyzack Family History Site
http://www.tyzack.net/download.htm
Nicholson
Sawology: A Nicholson handbook, Nicholson File Company, 1959
"---being a brief account of the History, Manufacture, Variety and Uses of saws for the cutting of ferrous and non-ferrous metals, hard plastics and rubber, wood, and other dense materials . . . A useful handbook and guide for the shop superintendent, production foreman, mechanic, or home craftsman."
Australian
Service Manual, Maintenance of Circular Saws, Wiltshire File Co., Melbourne, 20 pp
Service Manual for Maintenance of Handsaws Prepared by the Service Department, The Wiltshire File Co. Pty. Ltd, 20pp
Turner Atkins Quality Saws, Saw-Blade Information, booklet
Early Texts
Saw Dictionary - The Care, Selection and Proper Fitting of Handsaws, Charles Johnson 2nd ed, 1909, 50pp
Saws : their care and treatment, HW Durham, William Rider & Son, London, 1916, 272pp (a US edition in 1917), State Library of NSW S621.93/1
The saw doctor's handbook, Drabble & Sanderson, 1925
Boynton's Improved Patent Lightening Saws. New York, E. M. Boynton, Sole Proprietor And Manufacturer. No. 80 Beekman Street. 1872, 24pp.
HAND SAWS. Their Use, Care and Abuse. How To Select, and How To File Them. ... Fred T. Hodgson. Philadelphia, David McKay, 1888. Available at http://www.toolemera.com/Books%20%26%20Booklets/library-sharpeni.html
SAWS: the history, development, action, classification and comparison of saws of all kinds, by Robert Grimshaw, the 1880 edition reprinted by Astragal Press as Grimshaw on Saws
http://www.archive.org/details/sawshistorydevel00grimrich
Saw Filing and Management of Saws, R. Grimshaw, The Norman Henley Publishing Co., NY, 1912 archive.org/details/sawfilingmanagem00grimrich
The Art of Saw-Filing, scientifically Treated & Explained on Philosophical Principles, H.W. Holly, John Wiley, Y, 1st ed 1864, a number of revised editions, 56pp. Get it at (1882 ed) http://www.toolemera.com/Books%20%26%20Booklets/library-sharpeni.html
Suggestions On The Care Of Saws, By C.C. Taintor: Inventor Of The Taintor Saw Set. Taintor Mfg. Co, NY, 1908, 23pp
Saws and Sawing, by Sydney Lister, 1st edition 1937, Lomax, Erskine & Co., London, 150pp, picture of a later edition 1946 cover
Saw Efficiency, Ohlen-Bishop Saws, Columbus, Ohio, 1937, 60 pp
The Art of Saw Doctoring, Wide Bandsaws, by Arthur Simmonds, 208 pp
Monagen Saw Works Price List, 1860 catalogue reprint 1976, 36 pp
COVEL-HANCHETT Saw and Knife Fitting MANUAL, Covel-Hanchett Co. Big Rapids, Michigan, 1943, 472pp
Magazines
Woodworking magazines occasionally print saw and saw sharpening articles:
Fine Woodworking #68, Sharpening Handsaws, It's a matter of knowing all the angles, Harold H. Payson
Fine Woodworking #39, The Backsaw, How to buy, use and sharpen this basic tool, Ian Kirby
Fine Woodworking #125, Sharpening Handsaws, Make your saws cut straight and fast, Fred Wilder
Fine Woodworking #121, Soup up a Dovetail Saw, Refile teeth and reduce set for better cuts, Mario Rodriguez
Fine Woodworking #183, Sharpening a dovetail saw, Chris Gochnour
Fine Woodworking #22, Sharpening saws, principles; procedures and gadgets, J. Paquin
The Woodworker, 1920 Volume XXIV, Woodworking tools – The Saw, a series of chapters across issues starting at p120.
Many old woodworking texts (few in print, but generally available 2nd hand) have a chapter on saw sharpening; some good ones are:
Audels Carpenters and Builders Guide, many editions, vol 1, ch 15 “Saw Filing” 24pp
The Woodwright’s Companion, Roy Underhill, University of North Carolina Press, 1988
DVD/Video
Hand Saw Sharpening, Tom Law, ALP Productions
Sharpening a Dovetail Saw
Tune up a dull saw to cut fast and straight in five steps, with Chris Gochnour
http://www.taunton.com/finewoodworking/SkillsAndTechniques/SkillsAndTechniquesArticle.aspx?id=24976
A Tool Kit for Sharpening Handsaws, find out which tools are required to revive a dull handsaw with Chris Gochnour taunton.com/finewoodworking/SkillsAndTechniques/SkillsAndTechniquesArticle.aspx?id=24977
The Roy Underhill TV shows for 2006 are now available on the web, whilst the picture is small, they are pretty clear (on high speed). There are bound to be some saw related shows in previous years, hopefully archive shows will become available over time: pbs.org/wws/schedule/26season_video.html. Note that you are not able to download the videos.
------------------------
This is a work in progress; if you see errors in any of the above or have additional material please send it to This email address is being protected from spambots. You need JavaScript enabled to view it., thank you
Additional saw references to 1st version – March 2008
Text Book of Atkins Silver Steel Saws Hand Rip and Panel How to Care for and Use them for Manual Training Schools Mechanics Farmers and all Users of Saws, E.C. Atkins., 1927, 28pp
More information:
The Saw Its Ancient and Modern Development, E.C. Atkins & Co, 1906, 58pp. A history of Atkins in a historical context, published by the Atkins Advertising dept, which probably says it all.
Saws and Sawing Machinery, Eric N. Simons, 1946 [Powerhouse Library]
US forestry Service reference list:
http://www.fhwa.dot.gov/environment/fspubs/04232822/page24.htm
Revision History
Initial check that links were working and prune/update any dead links. Ray 3rd August 2008
Fixed links for changes at wkfinetools. Ray March 2009
Downloadable PDF http://www.backsaw.net/SawHandles101.pdf
This is a tutorial of how to make a saw handle, I will probably refine and update as time goes by, however for anyone embarking on this process for the first time, it's a good idea to first review the existing on-line literature.
The most often quoted reference is Leif Hansen's Backsaw Project at http://norsewoodsmith.com/node/68 I recommend downloading the pdf file as a general reference.
The second one is Tim Hoff's two part How to make a handsaw.
Part 1. http://www.cianperez.com/Wood/WoodDocs/Wood_How_To/INDEX_How_To_pages/TimHoff_MakingSawBlades.htm
Part 2. http://www.cianperez.com/Wood/WoodDocs/Wood_How_To/INDEX_How_To_pages/TimHoff_MakingSawHandles.htm
Tim now has a blog which can be found (the saw handle making part) here:- http://sprucemill.blogspot.com/2008/12/making-saw-handles.html
There are no doubt other tutorials I have missed, if you let me know I will link to them from here.
A good site to also check is http://pedder-altedamenauskiel.blogspot.com/ Look for "Griffbau"=Handle Maker in the links section.
Here are the links...
Derek Cohen http://www.inthewoodshop.com/ShopMadeTools/Small%20Tenon%20Saw.html
Philly Edward http://www.philsville.co.uk/sawhandles.htm
Alice Frampton http://www.leevalley.com/newsletters/Woodworking/1/5/article3.htm
Alan DuBoff http://traditionaltoolworks.com/making-saws/
Mike Wenzloff http://wenzloffandsons.com/saws/kits/index.html
Thanks Pedder for the links.
This is part one of a multipart series that will cover making the back, making the handle and sharpening. The first part is making the handle. A downloadable pdf of the handle making process (much the same as this page) can be obtained from http://www.backsaw.net/SawHandles101.pdf
I bought my split nuts from Mike Wenzloff http://www.wenzloffandsons.com but you could make your own from 3/16 threaded brass rod and 1/2 brass rod, using Leif's "Poor Boy Split Nuts" from here.. http://www.norsewoodsmith.com/node/108
Personally, I love the split nuts from Mike, they are a work of art in themselves.
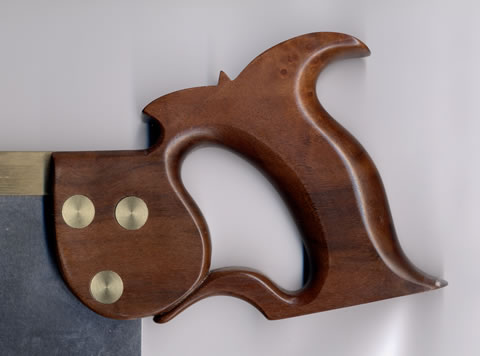
Now we have reviewed the available literature, it's time to get started. You want to choose a timber that is close grained and durable, among the traditional timbers are Beech and Apple, but modern saw makers tend to use more exotics, whatever you choose make sure you have a piece large enough to orient the grain correctly, especially if you are planning an open handle. A piece 6" x 6" is a good start.
The first step is to thickness the timber to 7/8" you could go a little thicker (maybe 1") if you have long fingers or big hands and that feels better in your hand, but whatever you decide, this is going to be the final thickness of the handle.
The next step is to decide the layout, I have an acrylic template than allows you to position the template and see the grain direction, and any figure that might be worth highlighting. If you have a paper template, then trace the outline onto a piece of clear plastic and get the orientation right before glueing the paper onto the wood.
In this case I have a split that I need to avoid.
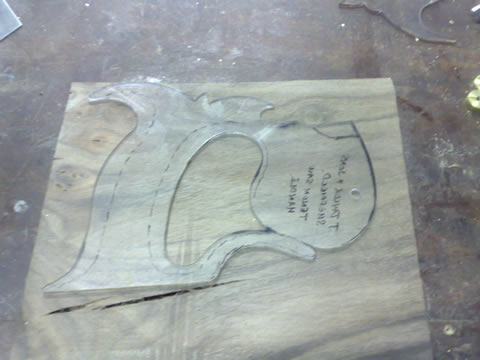
Decide the template position.
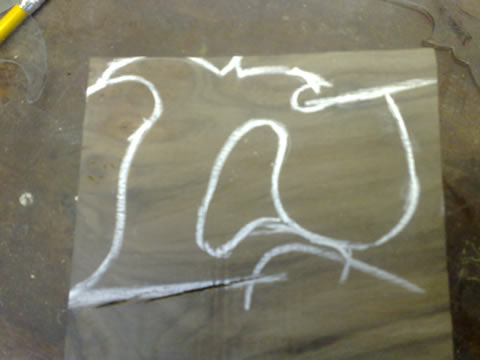
The next step is to mark the layout, I highlighted it with chalk, so it would be easier to see, a white marker would probably be better, there is a pencil line there but it doesn't show in the pictures too well.
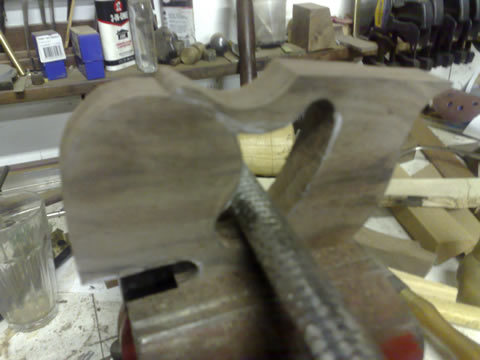
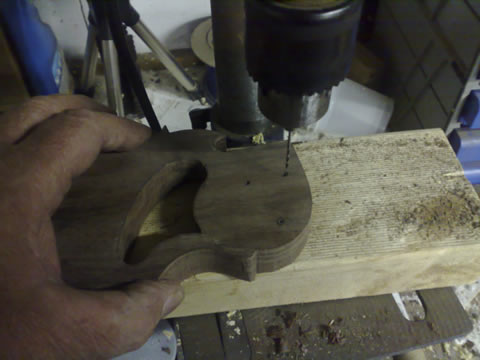
The next few steps are just to rough cut the outline. We start by drilling the corners out with forstner bits, mainly so we don't have to deal with sharp corners on the saw
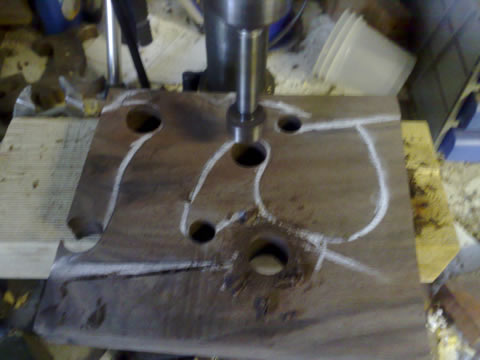
Drill out the corners.
None of these holes are critical, but you can go as close as you like to the line without problems.
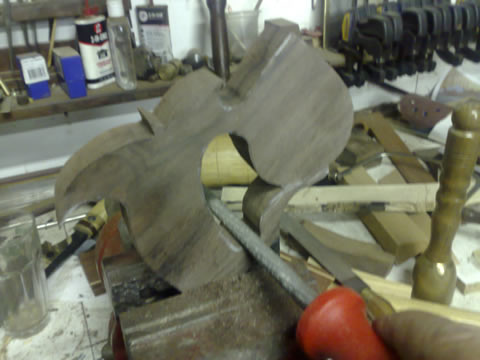
Then it's off to the bandsaw to kill a few electrons, you could use a scroll saw or a jig saw, or even a coping saw, of course the traditional turning saw is good as well.
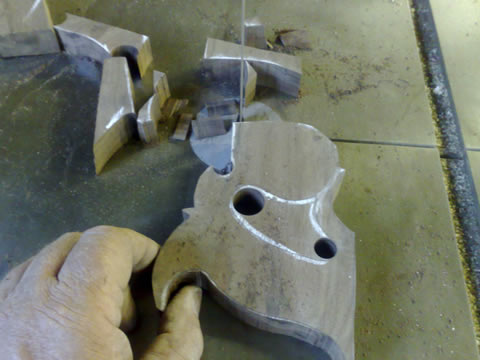
Keep the cut close to the layout lines.
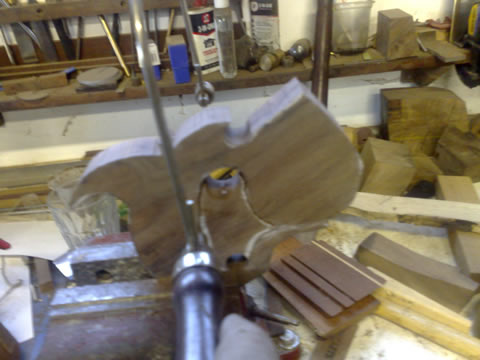
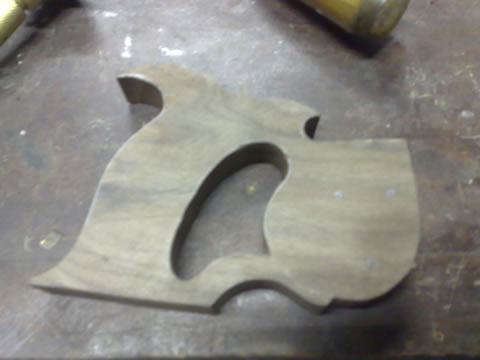
The center bit is best done with a coping saw.
Now we have a rough outline, we can start to refine the outline, DON'T get carried away and start any shaping, just stick to the outline for now. Use whatever you have, rasps, files, microplanes, bits of dowell with 80 grit paper glued to them work just as well. Take you time with this outlining, these are all final cuts, and work right up to the layout lines. Take care to blend any curves nice and smooth. Use a chisel to refine any sharp corners. Like the top nib, don't do any other shaping however we want the handle nice and flat for a bit longer yet, we have other stuff to do yet that is easier when it's nice and flat.
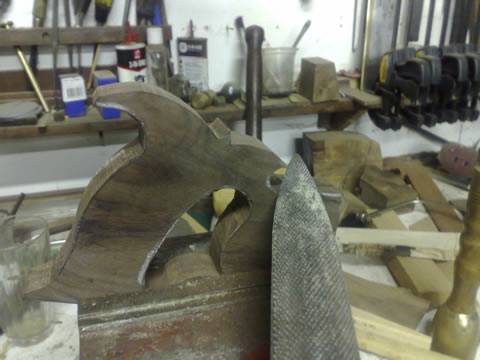
A good rasp is handy but, really, use whatever you have.
Microplanes cut fast and leave a pretty good finish.
For tighter curves a round file works just fine.
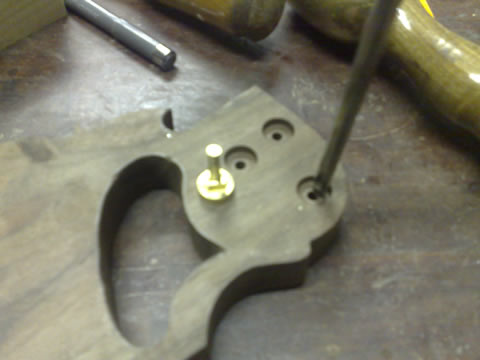
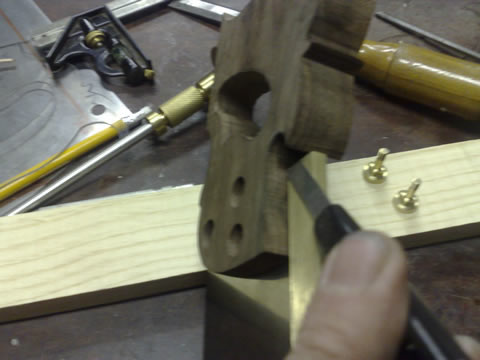
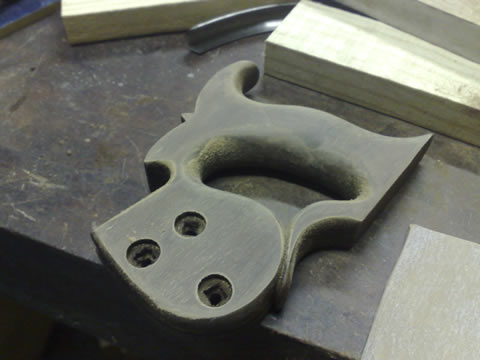
We already have our saw plate drilled and now carefully transfer the hole locations onto the handle blank, taking care to get the hang angle correct, if you mark the holes wrong in this step, there's no way back. So take you time and get it right.

Locate the saw screw holes
Take note of where the blade will finish in relation to the lambs tongue and the top beak. I have laid this one out to be in line with the brass back, but it doesn't have to be.
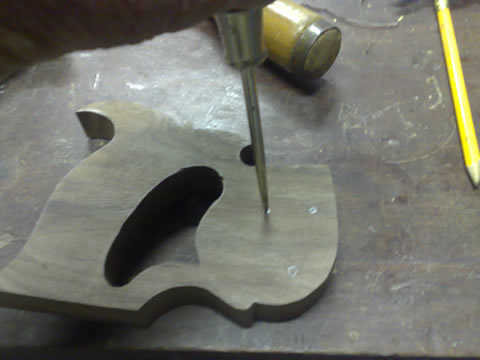
Mark the holes
Now mark the centers with an awl, and recheck against the saw plate that the holes are accurately centered.
Mark through to the other side
Now it's off to the drill press to kill a few more electrons, make sure your table is set up nice and square and then drill a small hole all the way through. I used a 1.5mm drill that was to hand, but 1/16 would do fine. The goal here is just simply to mark accurately through to the other side.
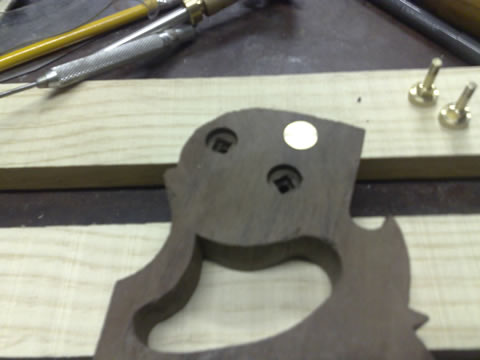
Once you've drilled through, recheck both sides against the saw plate to make sure you've got it right.
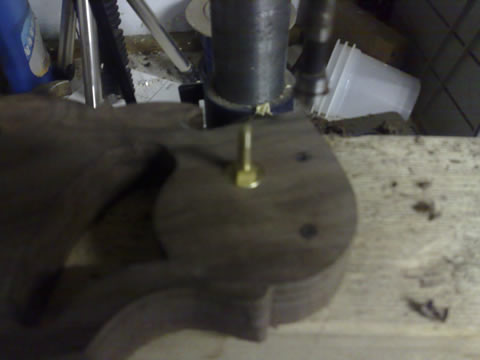
Now, change to a forstner bit that is the same diameter as the saw screws, I used 1/2" I thought I took a picture of drilling the recesses, but I can't find it. The only thing you are missing is the forstner bit has a line drawn with a marker pen showing the correct depth, drill just shy of the the full depth, and check the depth with a saw screw. Do both sides and take care to center the forstner bit on the small marker hole each time.
Now we have drilled the recesses both sides to just a little shy of the full depth.
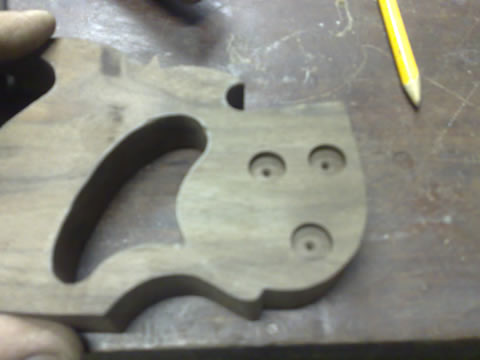
Drill each hole to suit the shank if the saw screw, drill half way from each side taking care to center the drill in the center of the recess. It's important that this is done accurately and carefully. Get it wrong and it's back to square one....
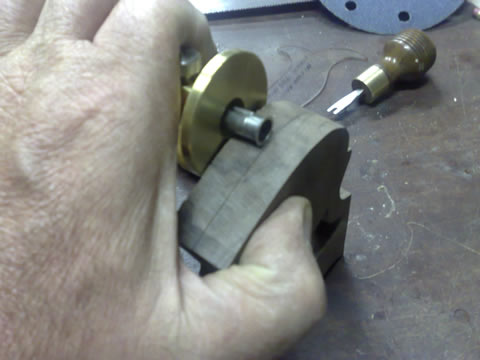
Now we have to cut the square recesses for the saw screws. Place a saw screw in the hole and tap firmly to mark the square section.
Now, with a 1/4" chisel chop out the recess for the square shank.
Test fit the saw screws and rework the square holes if needed.
The next bit is tricky, so take a break and relax the nerves....
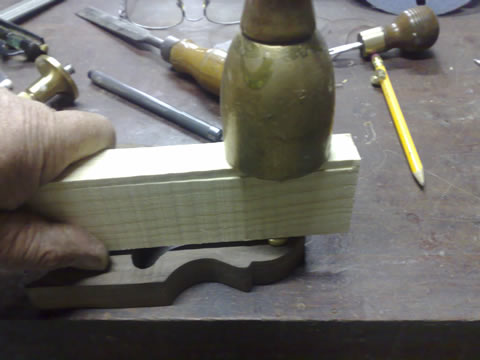
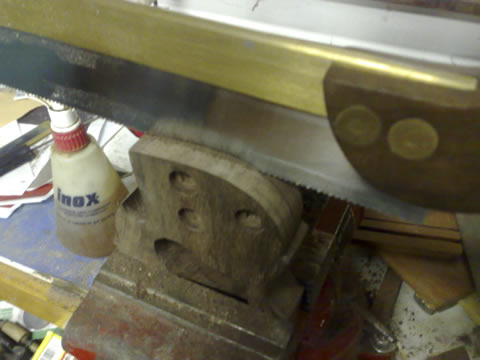
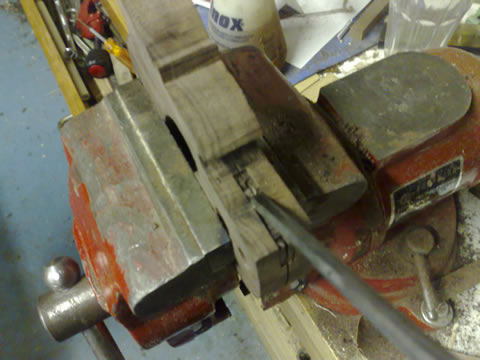
Cutting the saw kerf must be done precisely, I have seen all different ways of doing it, the method shown here takes time and you must work slowly and keep checking constantly.
First we mark a center line
Mark from both sides to ensure we are centered, and carry the line all the way around the blank where the saw plate will be going.
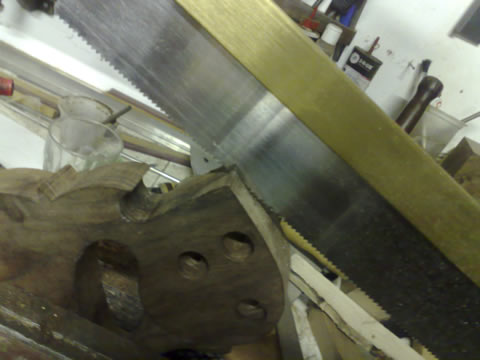
Start the cut on a corner, but don't cut too deep, maybe 1/8" or so, use a saw with a narrow kerf close to the thickness of the saw plate you are using.
Now gradually work the line around the handle taking care not to cut too deep and keep watching that the cut is nice and centered.
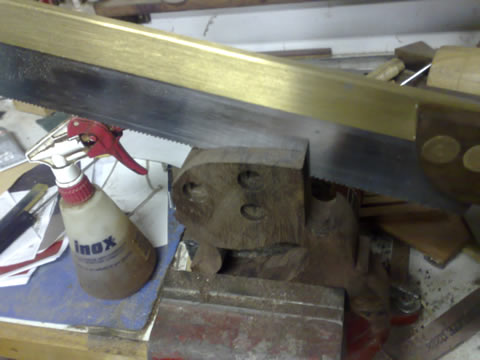
Gradually deepen the cut
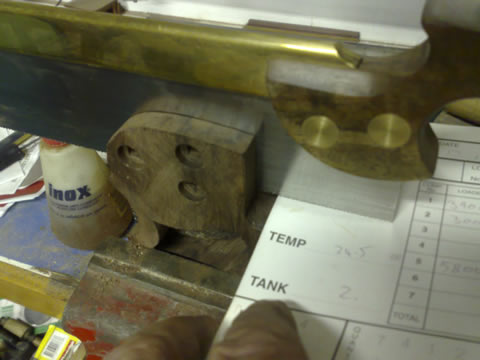
I ran out of depth with the dovetail saw, so swapped to another with a bit deeper saw plate. Still same kerf however.
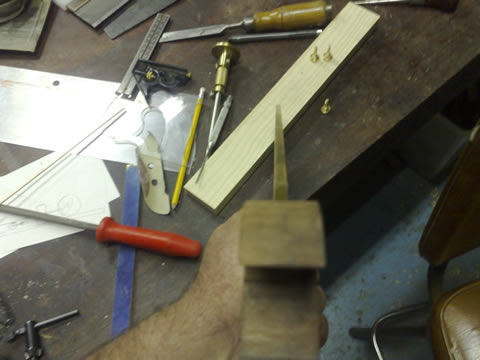
Test fit the blade and sight along the handle to make sure we are nice and straight..
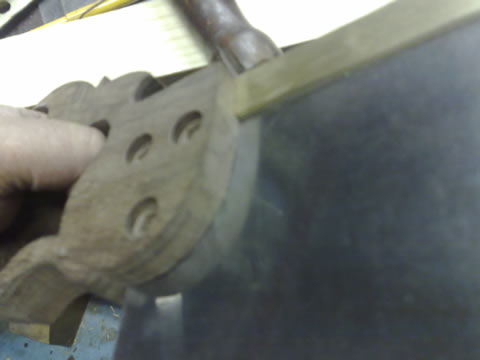
Now breathe a sigh of relief, it gets easier from here on. Next task is to inlet the brass back.
Mark for inletting the brass.
Start by marking the cut we need to make directly from the back.
A sharp knife with a thin blade works best here, mark tight to the brass on both sides.
Now with a 1/4" chisel, or rather a chisel the same width as the back, work carefully staying off the lines and chop down.
You want to end up with a tight fit against the brass, so take care when working close to the edges
Keep test fitting and work slowly to make sure you don't over cut it.
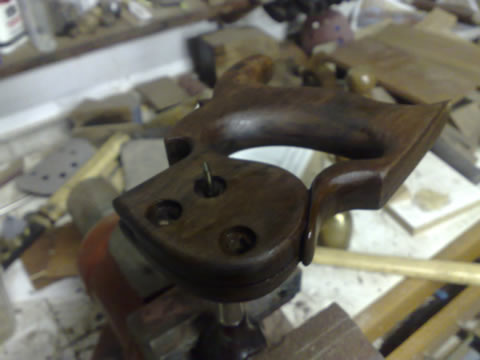
Now we are ready for a trial assembly, to see if we got it nice and straight.
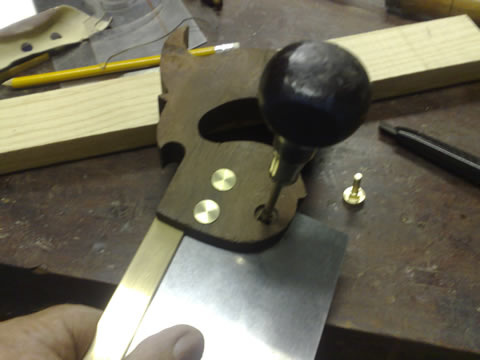
Use a tapered awl to line the plate up with the holes
All three screws should fit cleanly and sit just a little proud of the surface. They will pull down a bit when we tighten everything up later.
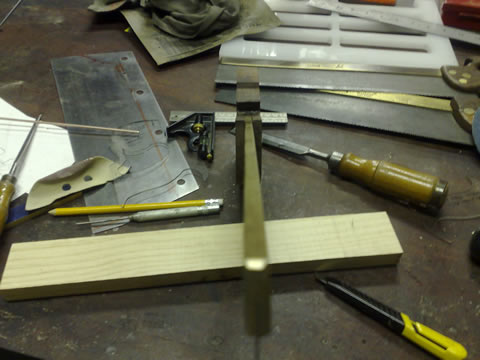
Recheck that everything is still nice and straight.
Now pull it all apart and we can start shaping the handle, (this is the fun part, right!)
Start by highlighting the areas we are going to shape
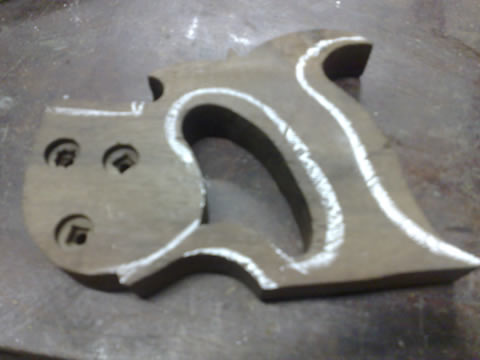
Note the line for the lambs tongue follows the curve of the boss.
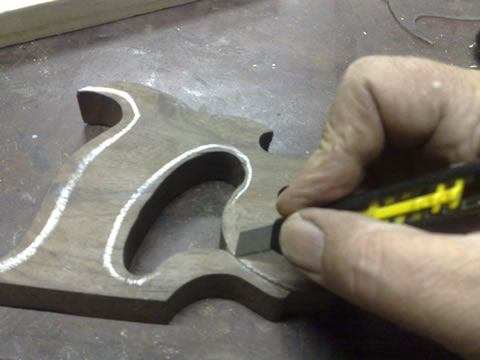
Use a sharp knife to define the line for the lambs tongue.
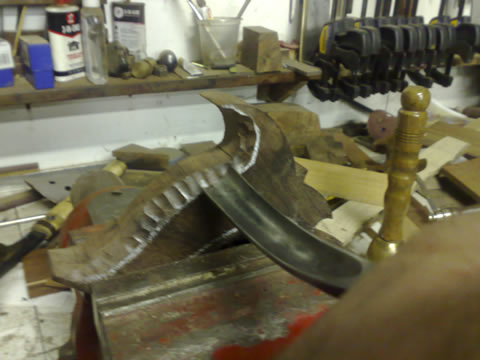
A gouge is more tolerant of grain direction.
Remove as much material using a chisel, or gouge if you have one. This is just to make for less work with the rasp later.
Just work to the lines and remove excess material
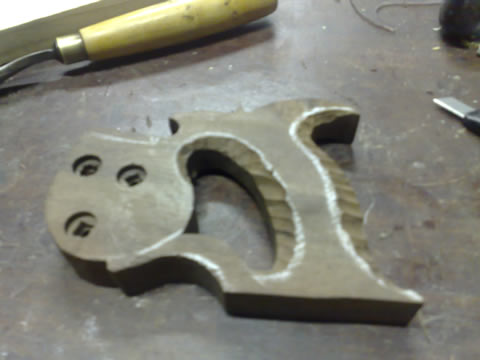
Define the rough shape, it's important that you keep eveything symetrical and don't over do it.
Now we can start refining the shape with a rasp.
Gradually work the profile and keep smoothing out lumps and bumps and refining the shape.
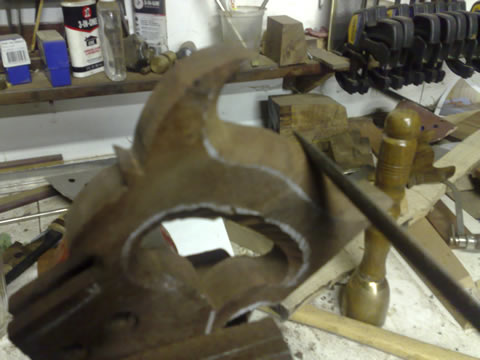
Use a sharp knife or chisel to refine the sharper corners and details. When you are happy with the general shape, it's time to start smoothing.
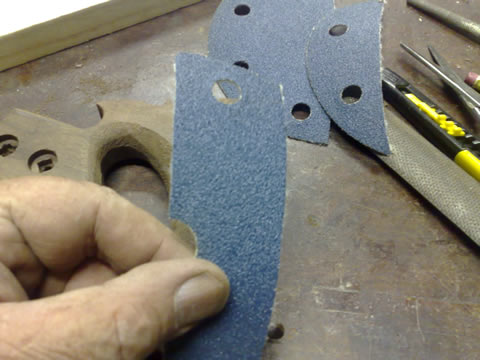
I cut up sanding disks, they are stiff enough, that they don't follow the bumps too easily and course enough to cut reasonably fast, what we are trying to do is smooth the shape and remove rasp marks, (by replacing the rasp marks with sanding scratches!)
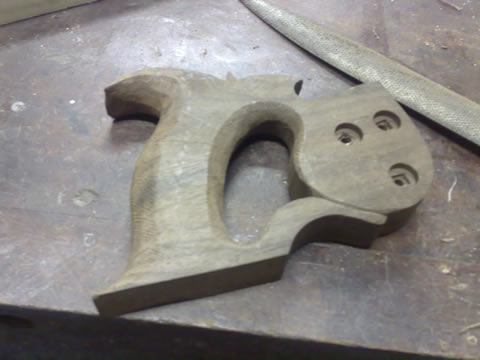
Gradually smooth the profile and remove the rasp marks
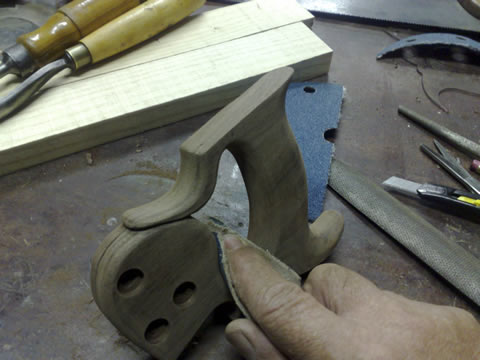
Work the inside curves by swiping the sandpaper around the curve, a bit hard to describe, sort of a rolling action, but dragging the sandpaper as you go.
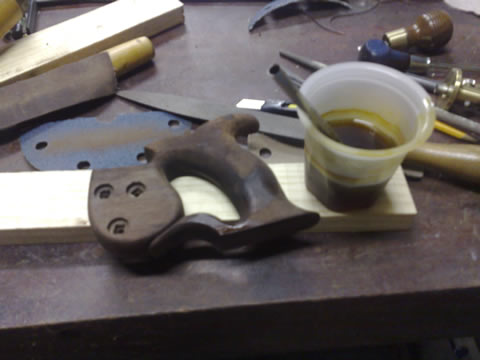
As the smoothing progresses, apply a light coat of shellac and then move to 120 grit
The shellac does a couple of things, initially it raises the grain, then later as more coats are applied it starts to fill the grain.
Move from 120 to 240, then finally 320 with light coats of shellac between grits. Keep looking for scratches and smoothing the curves.
The final coat of shellac,
This is then lightly sanded with 320 one last time, and a light coat of UBEAUT wax applied and the it's off to the buffing wheel to be polished with an inch of it's life.
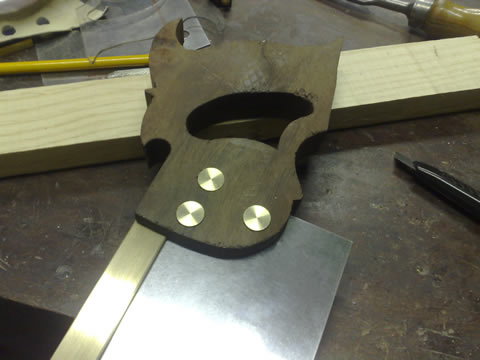
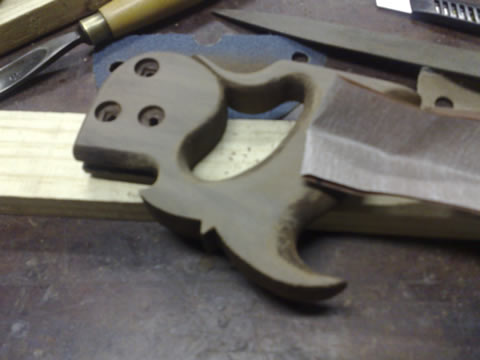
Then, here is the final assembly
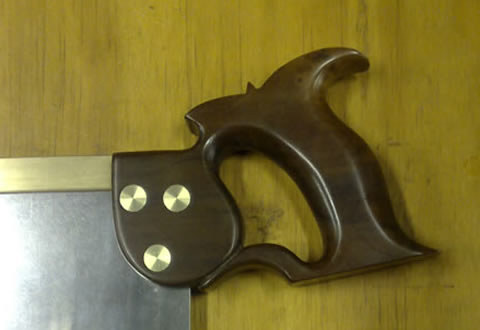
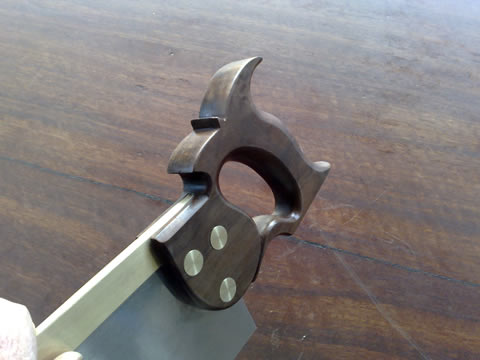
That rounded look, is not the only option, after looking at it for a bit, I decided to go for that crisper more "manufactured" look with a shadow line..... so....
To get that look, you need to flatten the sides a little, you could just very carefully touch it up on a linisher, or a sheet of 220 grit on a flat surface works as well, but you then need to do a bit of refinishing..
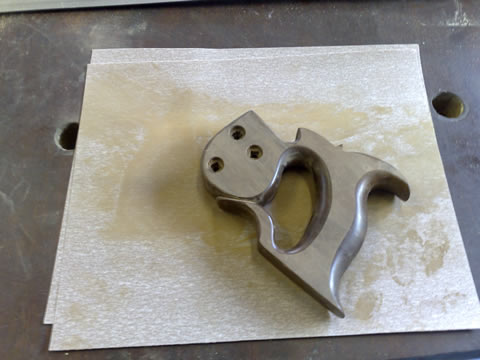
The end result is something like this,
I could have polished the flat side bits a bit more, but you get the idea.
That's it, now get out of here, and have a go yourself.... it's easy I promise....
Regards
Ray
Introduction:
This is an article by IanW on various aspects of saw design, thoroughly enjoyable reading, and sure to provoke some discussion on hang angles canted blades and tooth profiles, and some examples of the beautiful saws Ian has made over the last few months. Many thanks to IanW for submitting this article, I hope he makes some more of those "Kenyon inspired" dovetail saws, very nice. ..Ray
Handles & teeth on small Backsaws
This is not a ‘how to’ on saw making; that has been well covered by others with way more experience than I have, but I would like to draw attention to a couple of points that, if they are mentioned at all by saw makers, it’s usually very briefly covered, as if anyone keen enough to tackle saw making would know already. I certainly don’t claim any great wisdom, and wish to provoke some discussion rather than lay down any laws. The topics I’m referring to are, angle of the grip (with respect to the line of the teeth) and choosing tooth pitch & profile. It’s interesting to see those old adverts from 100 years ago when saws of every conceivable size could be supplied with any number of teeth per inch the buyer desired. At first that seemed a bit odd to me, I thought there should be well-established rules for what is “best”, given the number of skilled people wielding them on a daily basis. However, that is precisely why, I think, there were no simple rules. When you consider that saws were used by people of different skill levels, for many different purposes, in many different woods, it’s hardly surprising that practiced hands would find what suited them best & want tools that delivered their needs.
I’ll start with grip angles, because that’s the simpler topic & I think I have figured that one out to my own satisfaction. A long time ago, I remade the handle for a new 8” brass-backed Tyzack saw. The thing that came with it was hardly worth the dignity of the name ‘handle’ – it was crude, ugly & uncomfortable to hold. My replacement was a copy of one I saw on an old saw belonging to someone else. I gave it no more thought at the time other than I liked the look of it & it seemed comfortable in my fist. That little saw had very fine teeth & I used it for general crosscutting of small pieces, but after reading an article in FWW, I had it recut to a 15tpi rip pattern for dovetailing. I was amazed at the change in character of that saw – it went from a so-so tool to a very accurate and useable instrument. My clumsy efforts at sharpening meant the saw varied a lot in its cutting action, but gradually, I learnt how to keep a proper profile on the teeth, and just as importantly use a very fine set. Even though I subsequently acquired several small backsaws, I always reached for this one to cut dovetails, even when its state of sharpness was a bit dodgy, and it’s only recently that I realised why. It’s because the grip angle is just right for holding the saw comfortably for this process. Intuitively, I arrange the position of the piece to be cut at a height above the bench so that my forearm is more or less parallel to the bench. In this position, the saw sits easily, with my wrist at a comfortable & natural angle, which allows me to start a cut at the correct angle to follow a line perfectly from start to finish. This is important because the minimal set on this saw means it can’t be ‘steered’, you have to begin straight & remain straight for the rest of the cut.
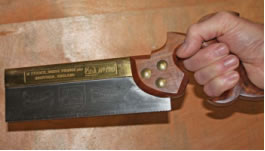
Fig. 1. On the left is the rehandled Tyzack held with my forearm parallel to the bench. With wrist in a comfortable position, the tooth line is more or less square to the bench top. The angle between tooth line & the centre line of the grip is about 65 degrees.
The next saw I modified was a cheap 18tpi backsaw bought new for the princely sum of $5 (though that would be more like $30 now). This was a surprisingly good little saw, but its thin steel back gave it little heft, and the red-painted knife handle was hardly a work of art. I saw a picture of Duncan Phyfe’s tool chest one day, & noticed these attractive pistol-grip handles on his small saws, so on a whim, I made a new handle from a scrap of figured walnut & stuck it on. I paid little attention to the angle of the grip – just made the handle to look like what I’d seen, & stuck it on (this was also when I discovered how difficult it is to drill saw plate with an ordinary drill bit). I failed to appreciate that the butt of the grip would hang down about 20mm below the line of the teeth until it was too late. It meant the saw was a bit awkward to use on a bench hook, but for nipping off corners of tails & small tenons held in a vise, it was fine, & has seen lots of use.
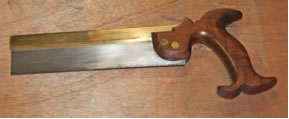
Fig. 2. The modified 18tpi saw with added brass back and pistol grip handle – note how the grip extends well below the tooth line.
The next raising of my awareness of grip angles came when I rehandled another old clunker. This was my closest approach so far to saw making – I also fitted a new brass back at the same time. I used a handle template I got from somewhere on the web – can’t remember where, but this one has been around for a very long time (Ray has it on his website now, I noticed). So I carefully tarted up my new handle, stuck it on, & took a test drive. Another revelation – this handle felt just right when crosscutting on my bench hook. A quick comparison with my other saws shows the difference – the grip on this one makes an angle of about 52 degrees with the line of the teeth – much more “kicked up” than the other saws mentioned, and keeps my wrist at a very comfortable angle when my forearm is angled down toward the bench, as it is in this operation. This was also the tipping point in my saw making career – Ray saw it when I put it up on a bulletin-board, and encouraged me to make a saw from scratch. He even most generously provided me with a good-sized chunk of saw plate – thanks Ray, but you don’t know what you started!
So my conclusion is, grips at different angles suit different operations – hardly rocket science, but I simply hadn’t thought much about it til then. I do most sawing with my forearm either parallel to the bench, in which case a grip that makes an angle of about 60-65 degrees to the tooth line is ideal for me, or with my forearm angled down to the bench surface, in which case a grip angled about 50-55 degrees to the tooth line works best. Doesn’t seem like a lot, but it makes a big difference to comfort. And here I can throw a match into the debate about canted blades– one effect of this is that when the handle is fitted with the fillets parallel to the back, as is usual, it throws the grip up slightly, giving it more clearance when used on a bench hook, as I found when I made my own copy of the Kenyon saw that was being touted around a while ago. But even larger saws, which have plenty of handle clearance, were canted, so I don’t seriously think there was a reason other than fashion.
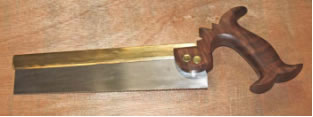 Fig 3. 220mm “Kenyon” style saw, 15tpi, with canted back. The grip makes an angle of 55 degrees with the tooth line, and is a good compromise for cutting at a range of arm heights. It projects slightly below the tooth line, but is ok for most cutting operations on a bench hook.
Now, onto more complicated and fraught issues – the tooth pitch and their preferred profiles. There is really no ‘right’ answer to these questions, of course – witness the endless variety you find in old backsaws. Skilled saw sharpeners like my old dad had no compunction in recutting & re-shaping teeth to make a saw more fit for some purpose, so I’ll bet it was a fairly common practice way back...
Now I was taught by my manual-training teacher at school that you should have a minimum of 4 to 5 teeth in the cut. I’ve seen other recommendations, but they are all pretty similar, and the idea is to have enough teeth resting on substrate that they don’t bite too hard & jam, or worse, rip the top off a tooth. As in just about every facet of life, the ideal is rarely attainable & we generally have more teeth than that in a cut, which means waste clearance & cutting is less efficient than it could be. In the sort of general joinery I do, & the typical width of saw cuts, I have found 12 & 15 tpi to be the most useful pitches for small saws. Until a few years ago, I tended to go for finer teeth, but now that I’m a much better sharpener, I realise that my preference for finer teeth was because my terrible sharpening didn’t create as much variation in tooth heights, which gave the illusion of smoother cuts. But now I can sharpen a saw so that the teeth are very much closer to even, I find a coarser pitch can cut just as smoothly, and much more quickly in most situations. The thinnest sections I would normally cut would be small drawer sides, at around 10mm, so that a 15tpi saw will have at least 6 or 7 teeth in the cut. Thicker pieces will support many more teeth, so to cut something over about 30mm wide, I would pick up one of my bigger 12tpi carcase saws. Although it would cut a wider kerf, it will cut more quickly and accurately in the longer cut.
Tooth profiles I’ve left to last. Here I found a bit of a surprise when I mucked about with a few different angles. I started out adhering to the recommended rake angles for crosscut & rip, but over time have come round to putting 5 degrees of rake on both. This makes ripsaws easier to start & smoother cutting, and gives crosscuts a bit more ‘bite’ so that they can be used for shallow ripping. I don’t find it makes the crosscuts any less smooth in their cutting action – as long as I give them about 15 to maybe 20 degrees of fleam, they seem to cut cleanly. With only one rake angle to set up & maintain I seem to be able to be more consistent, which is important for someone who doesn’t file saws every day.
So those are my thoughts after 50 years of wielding saws, but only a short time really thinking seriously about what they do. They are, naturally, a reflection of the types of woods & cuts I make with my backsaws (more traditional cabinet woods, not the really hard stuff). I haven’t tried to fool around with any larger handsaws just yet – for now I’m content to follow the profiles they came with.
And one last observation – for those whose eyesight is as chronologically challenged as mine, one of those 5x headband magnifiers is a godsend – it’s a bit of a nuisance having your snout so close to the action, but it’s so good to be able to see clearly what’s happening to those little teeth as you file!
For the record, here is my current stable of backsaws. All bar one recently made, but replacing similar saws, so although I haven’t had most of these saws more than 6 months, I have used the same lineup for some years now. With this lot, I rarely wish for anything more – they do everything I require very well.
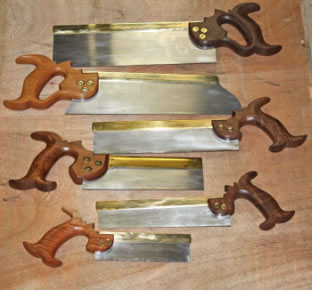
Fig. 4. From top to bottom:
1. A 300mm 12 tpi rip, from 0.5mm plate. A fast-cutting saw with a very fine kerf & a bit of an enthusiast’s tool as it takes some practice to control due to the minimal set.
2. My most recently-made D9 style, 310mm, 12 tpi xcut. This is made from 0.75mm plate, and has the first 25mm from the toe filed at ~15tpi – easy to start & cuts nicely.
3. A very comfy 250mm 15tpi xcut. This has the 52 degree “compromise” handle that makes it a very good little all-rounder.
4. The oldest & only commercial saw left – a 200mm, 15tpi rip. Formerly my ‘favourite’ dovetailer, but rapidly being squeezed out by the next saw....
5. This is a little beauty! My “Kenyon” style, 15tpi “semi-xcut” which crosscuts & rips thin stock with equal facility. The 55 degree grip is a very comfortable compromise for most bench work.
6. A somewhat whimsical 150mm 18tpi xcut – handy for small jobs like nipping off an end on lathe work or anywhere where a fine, slow cut is called for.
IanW June 2009
Page 1 of 2
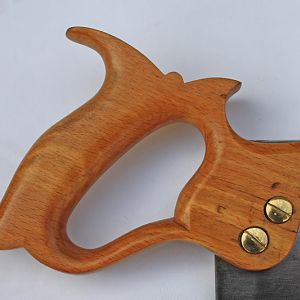
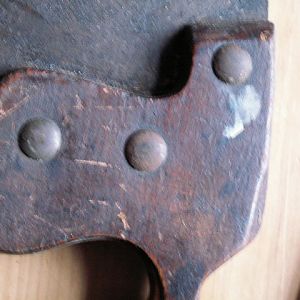
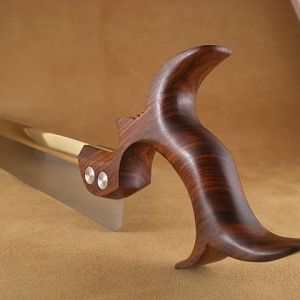
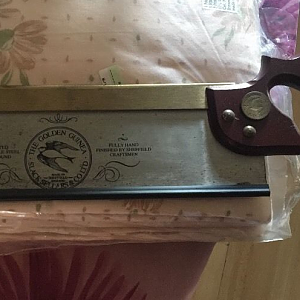
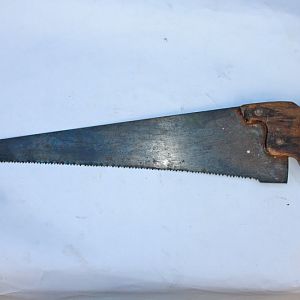
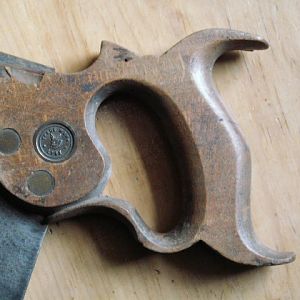
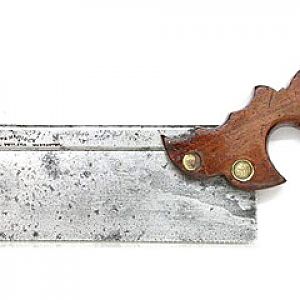
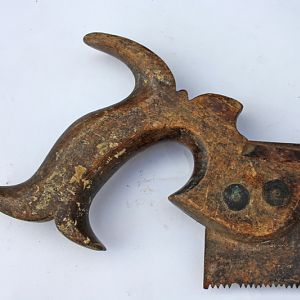
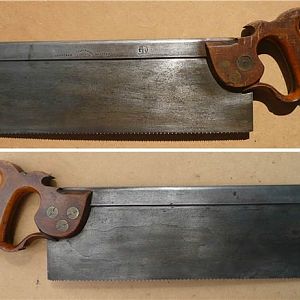
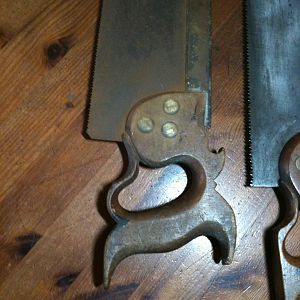
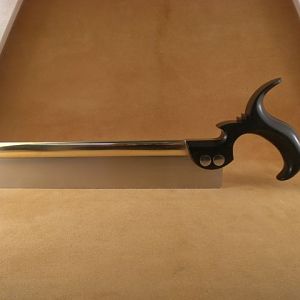
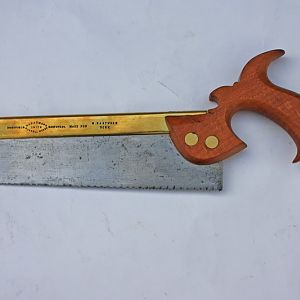
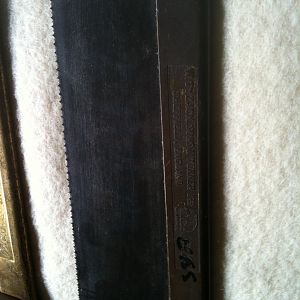
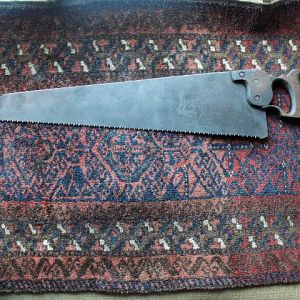
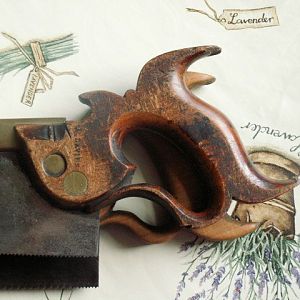
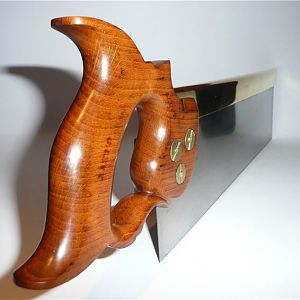
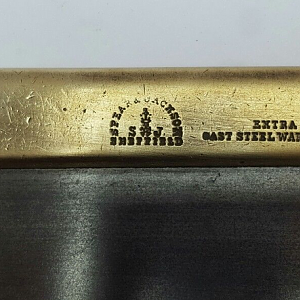
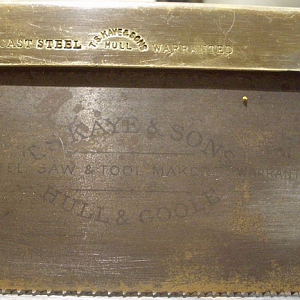
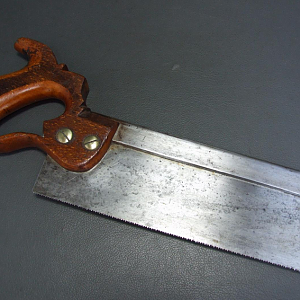
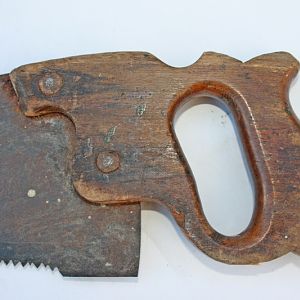
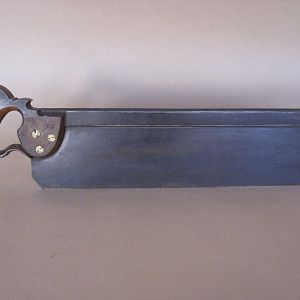
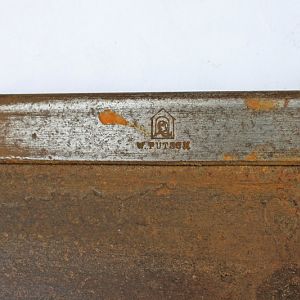
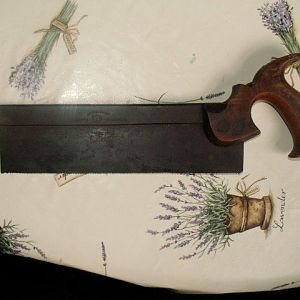
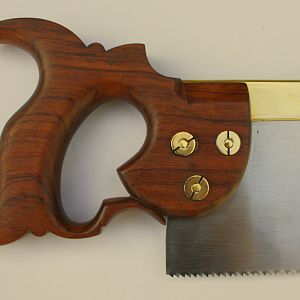
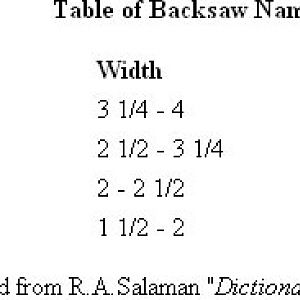
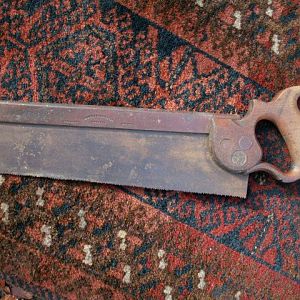
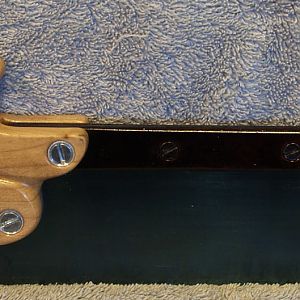
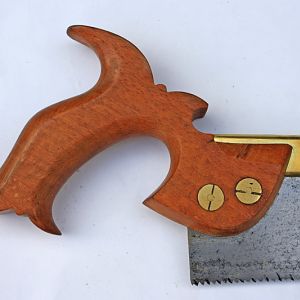
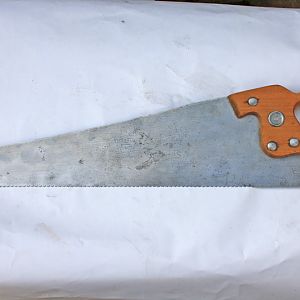
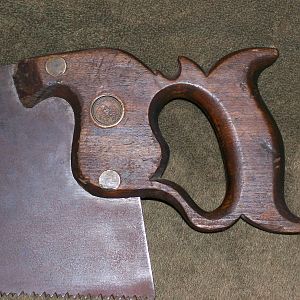
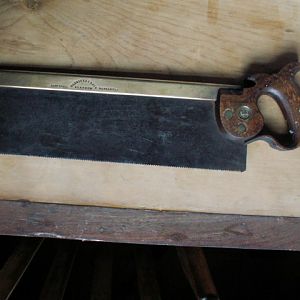
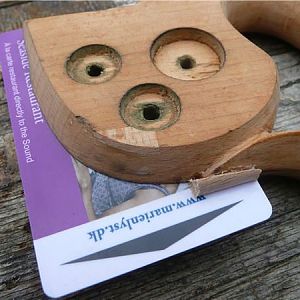
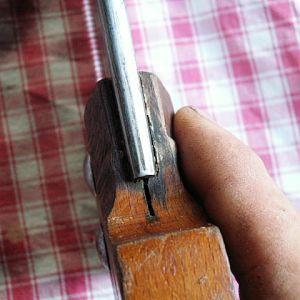
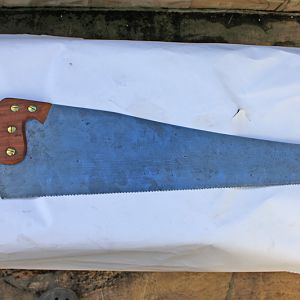
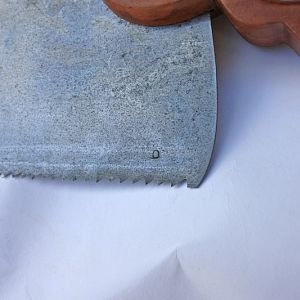
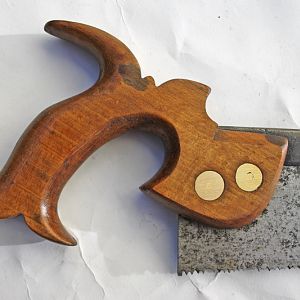
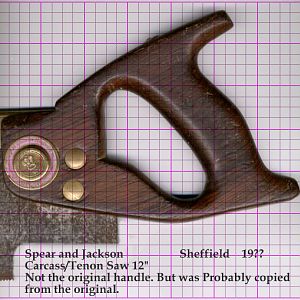
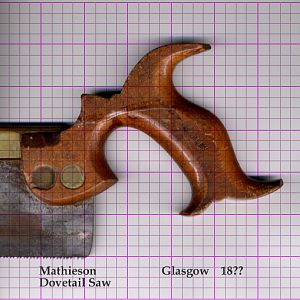
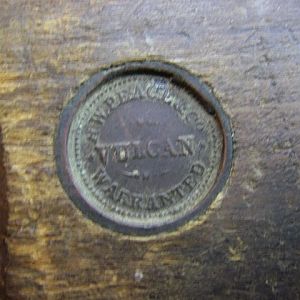
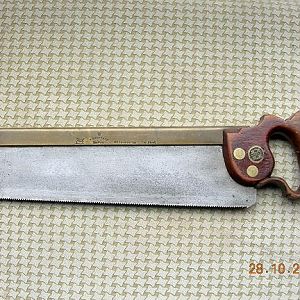
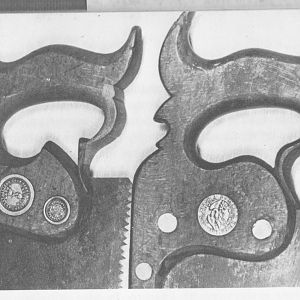
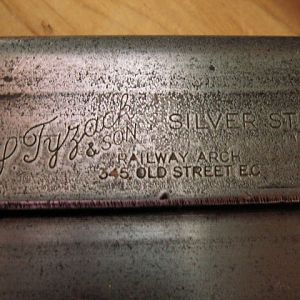
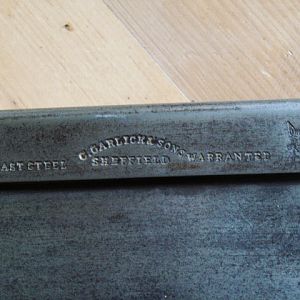
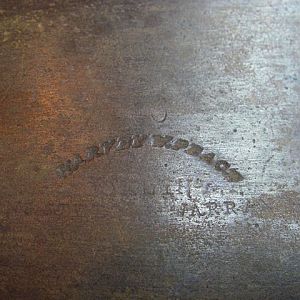
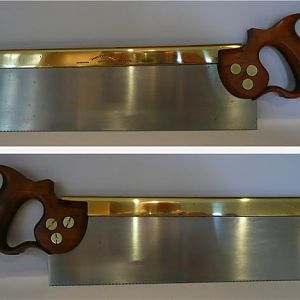
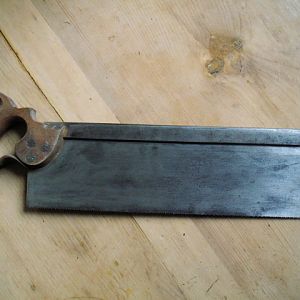
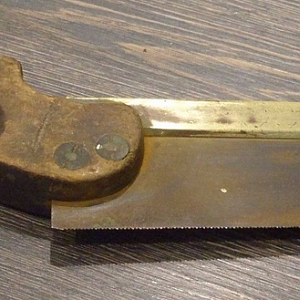
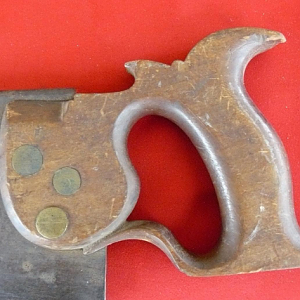
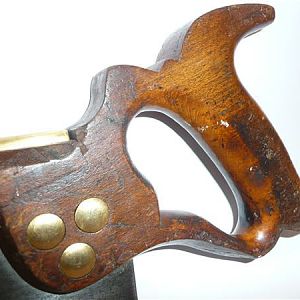
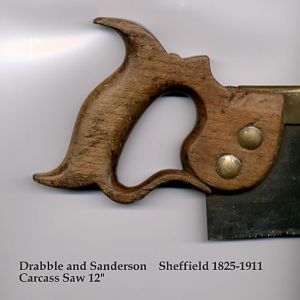
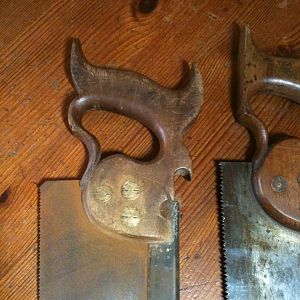
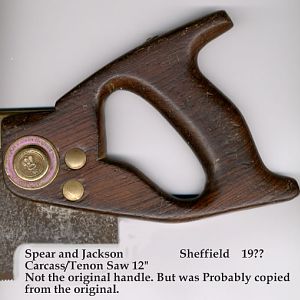
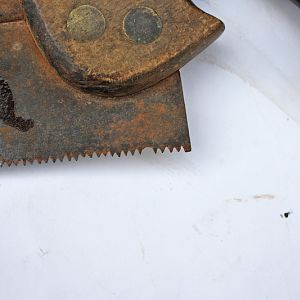
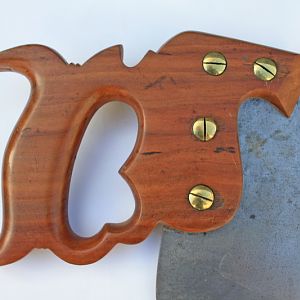
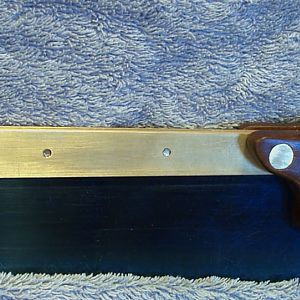
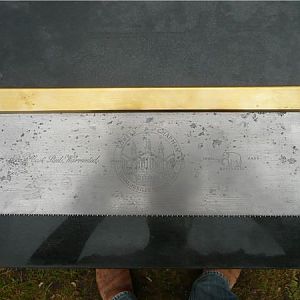
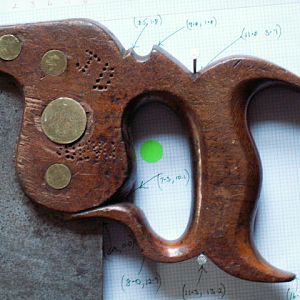
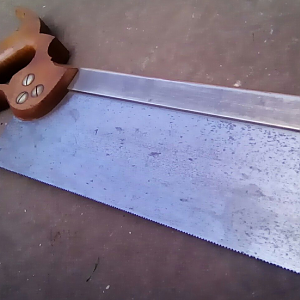
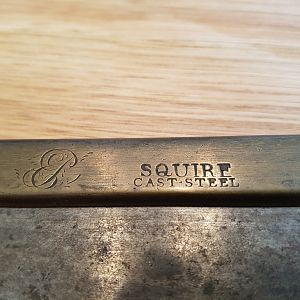
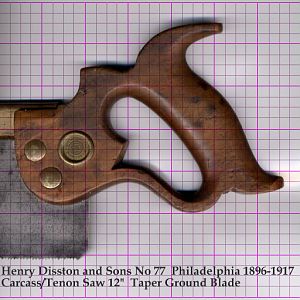
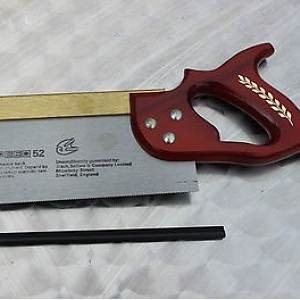
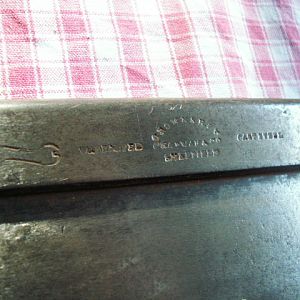
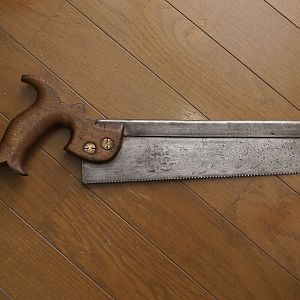
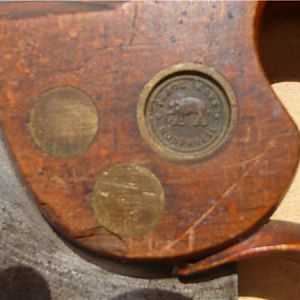
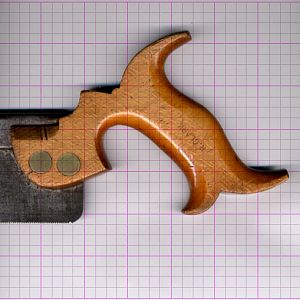
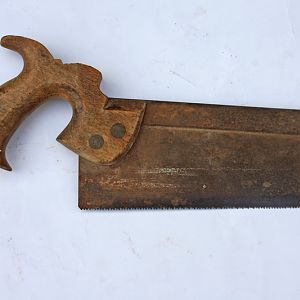
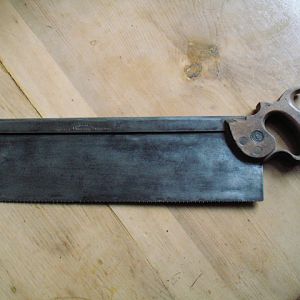
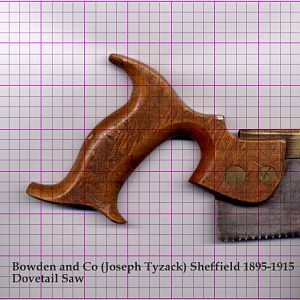
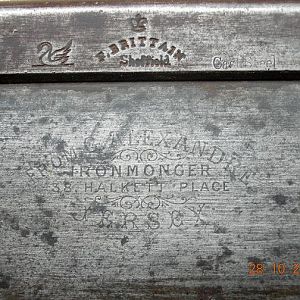
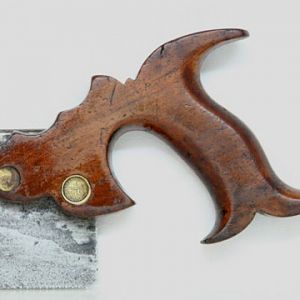
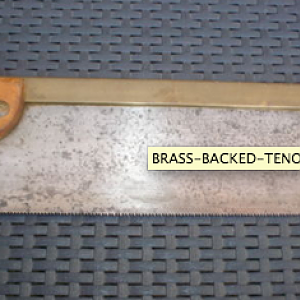
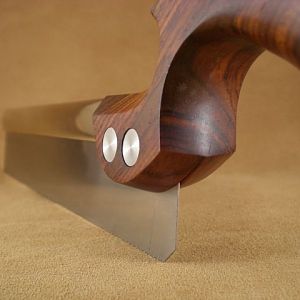
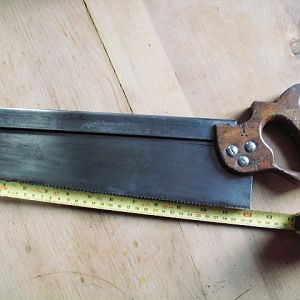
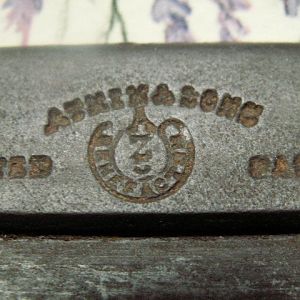
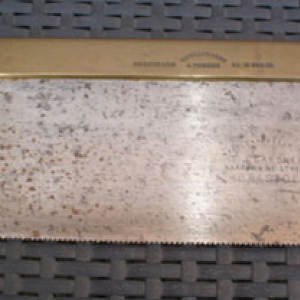
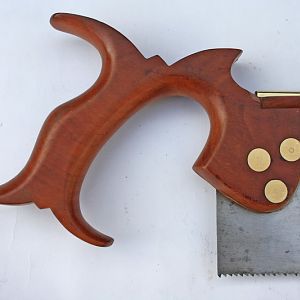
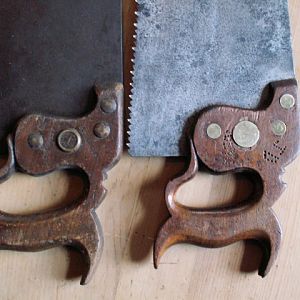
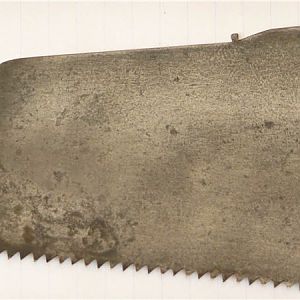
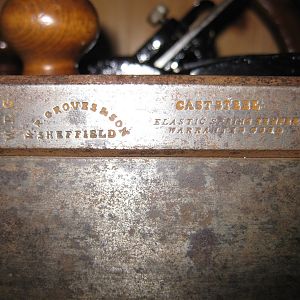
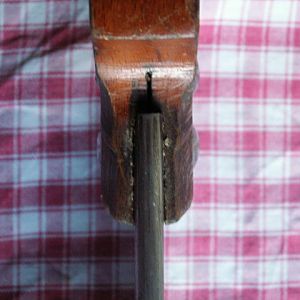
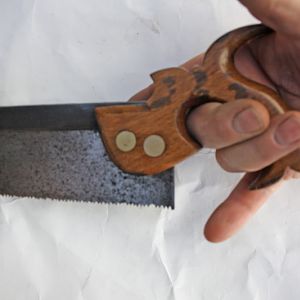
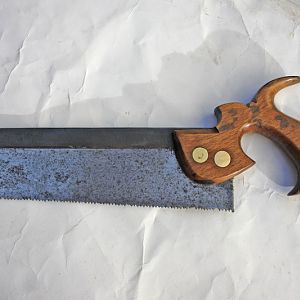
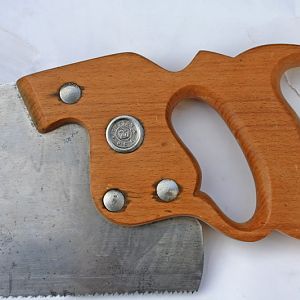
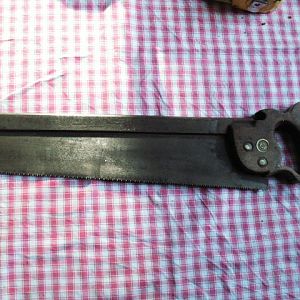
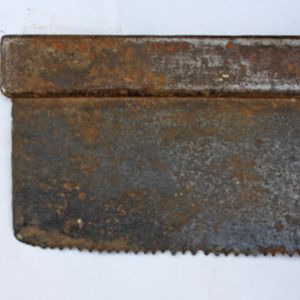
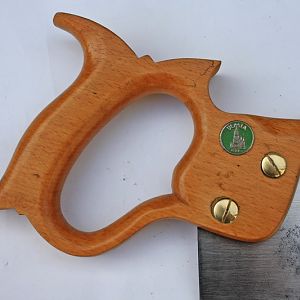
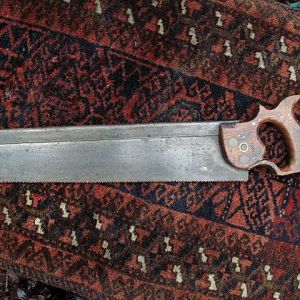
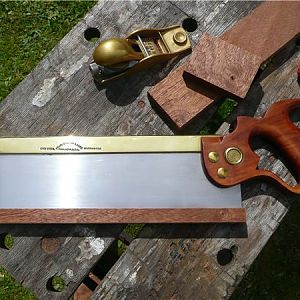
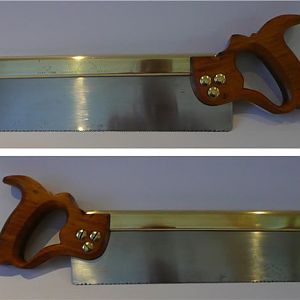
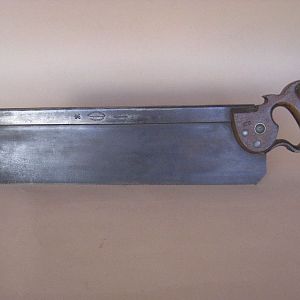
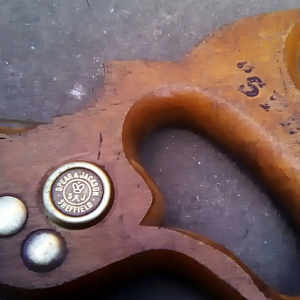
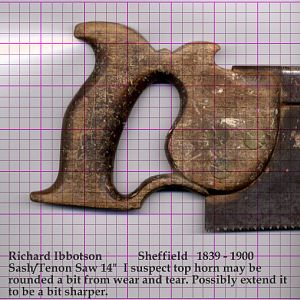
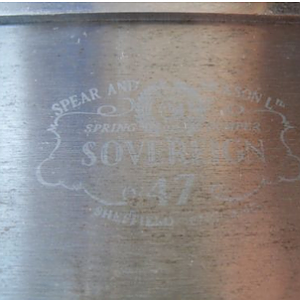
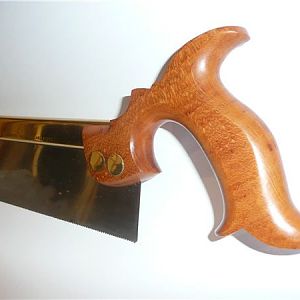
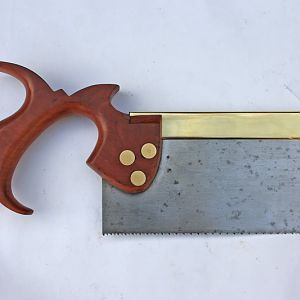
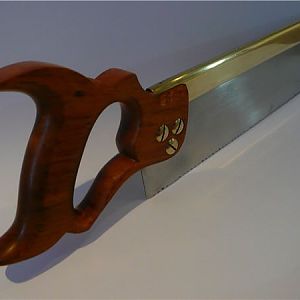
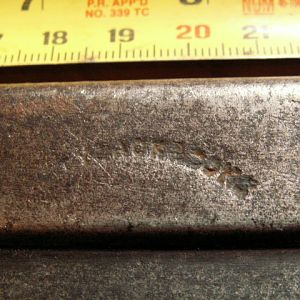
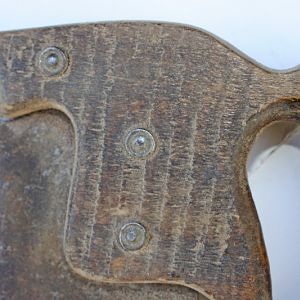
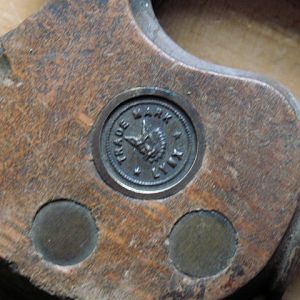
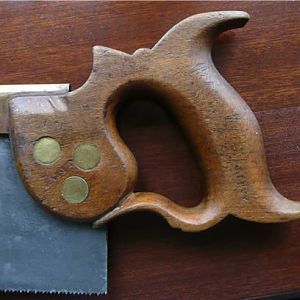
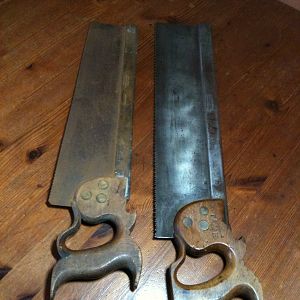
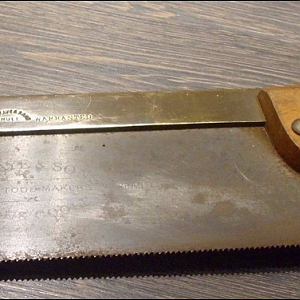
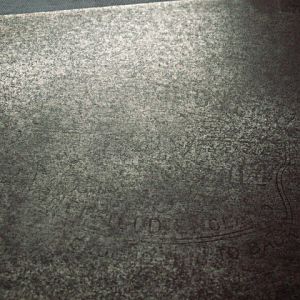
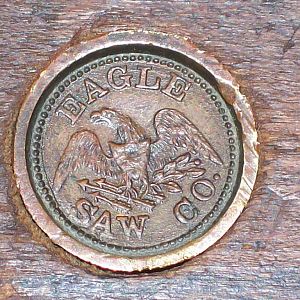
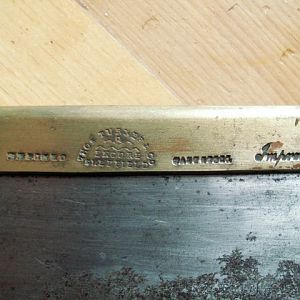
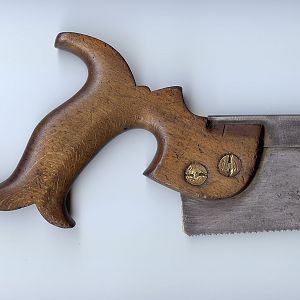
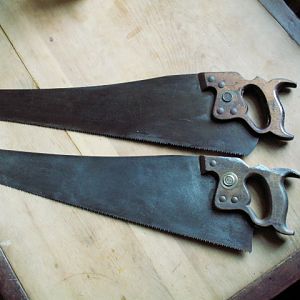
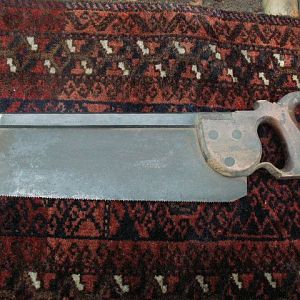
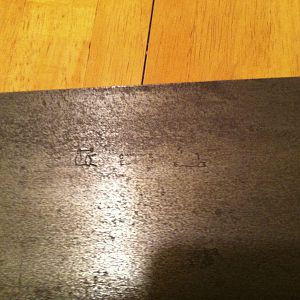
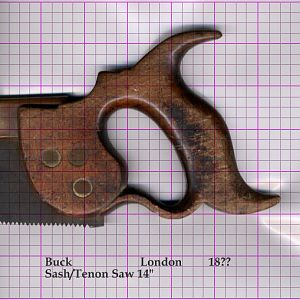
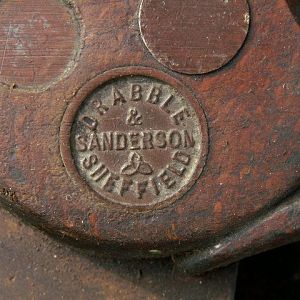
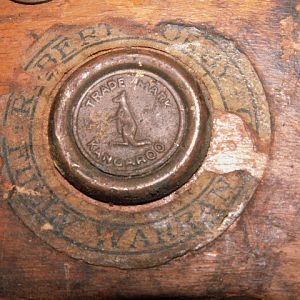
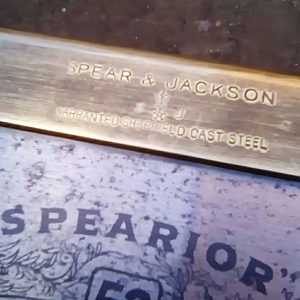
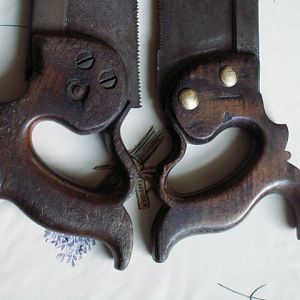
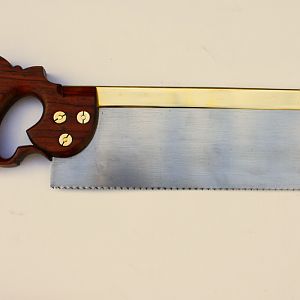
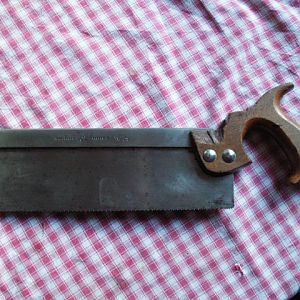
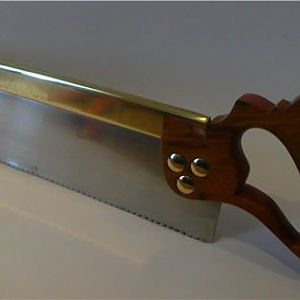
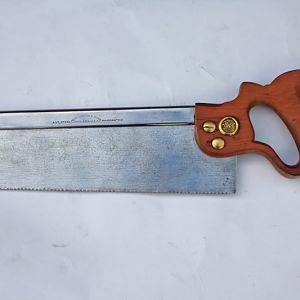
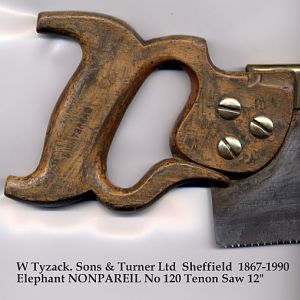
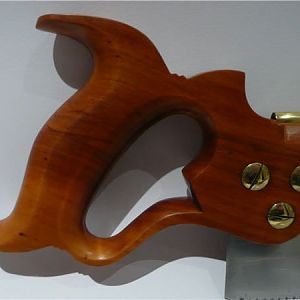
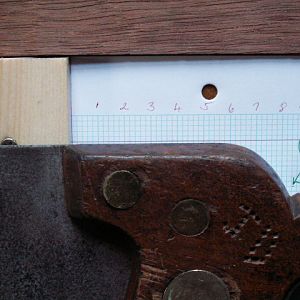
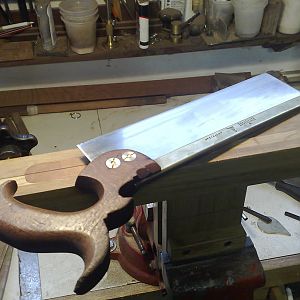
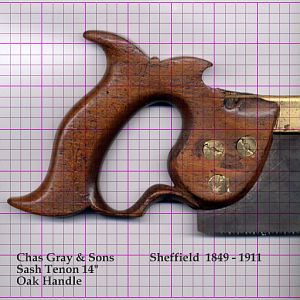
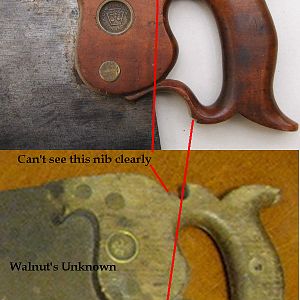
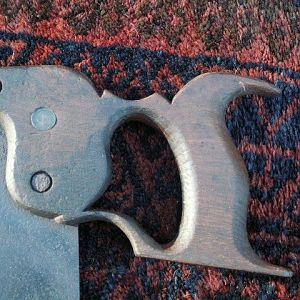
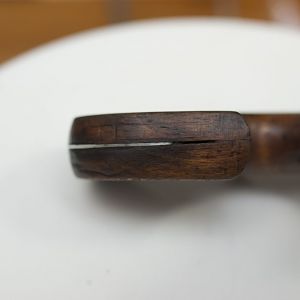
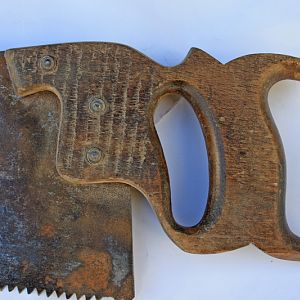
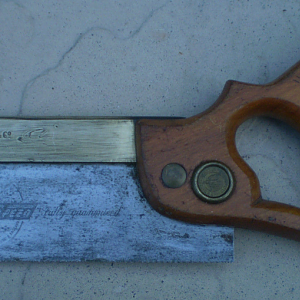
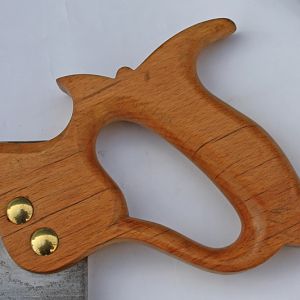
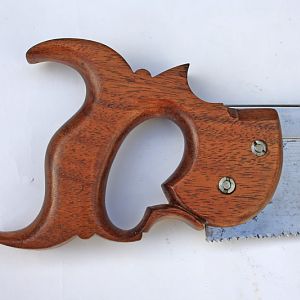
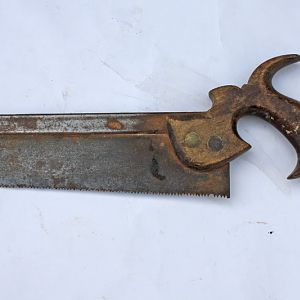
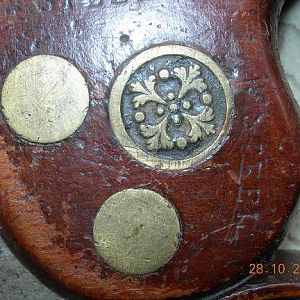
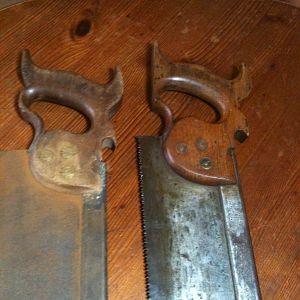
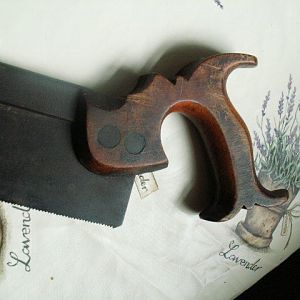
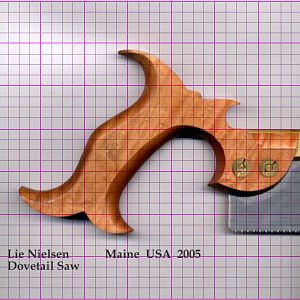
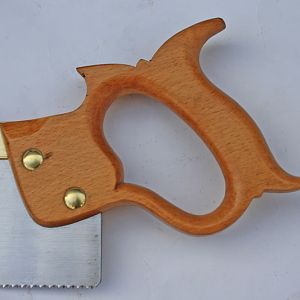
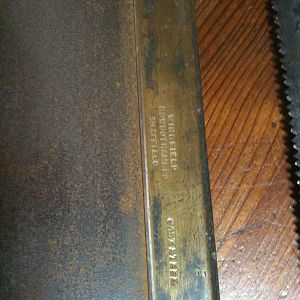
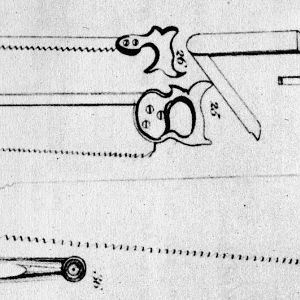
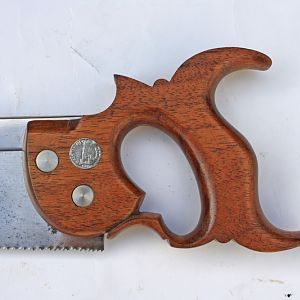
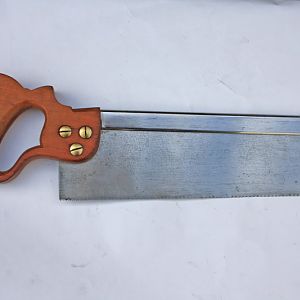
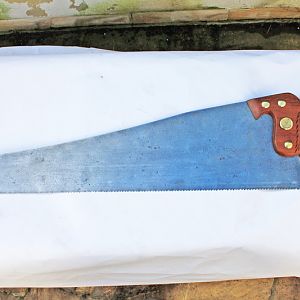
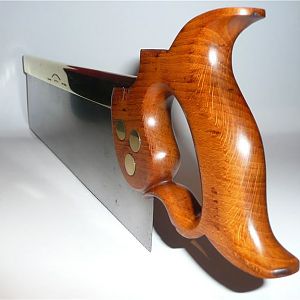
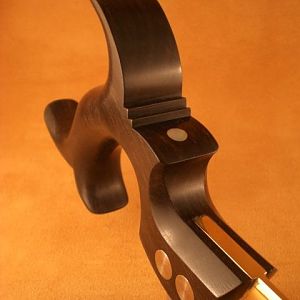
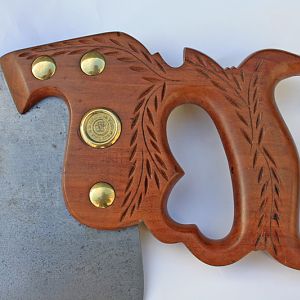
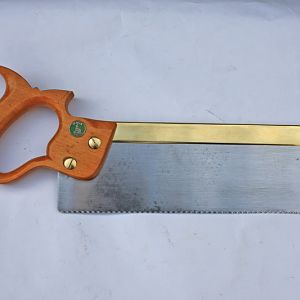
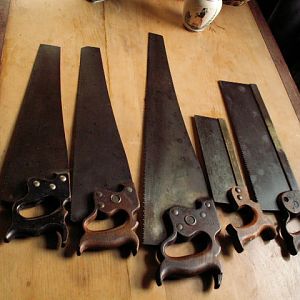
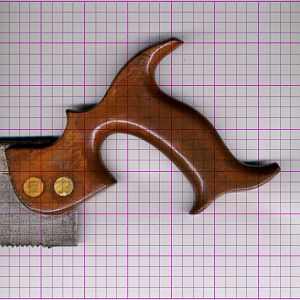
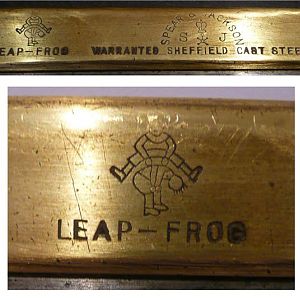
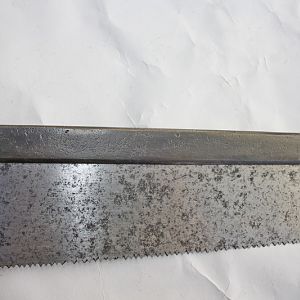
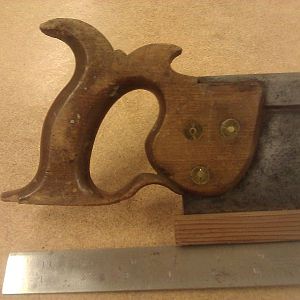
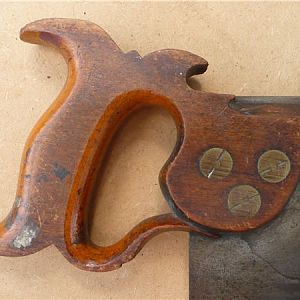
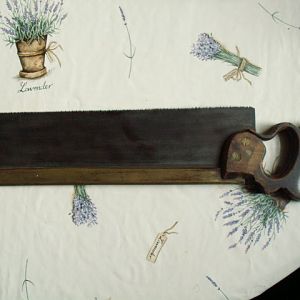
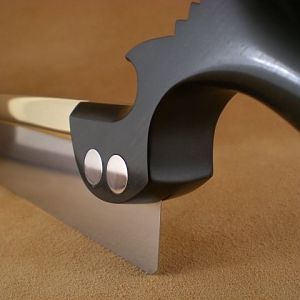
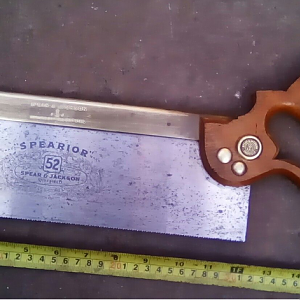
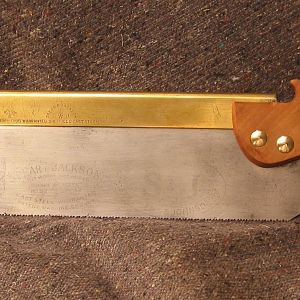
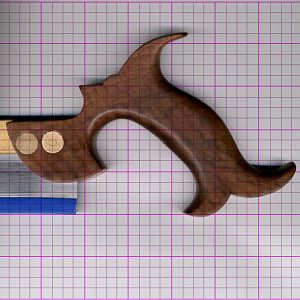
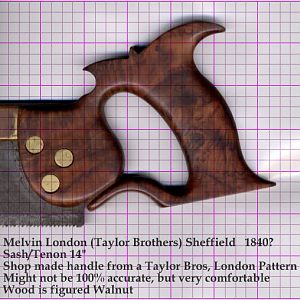
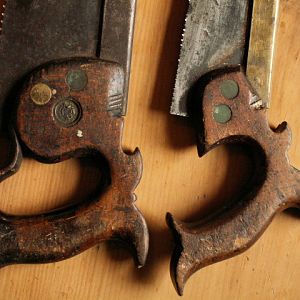
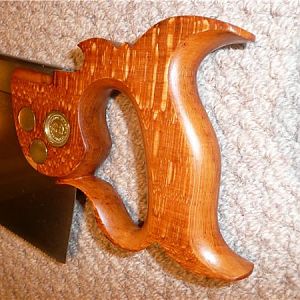
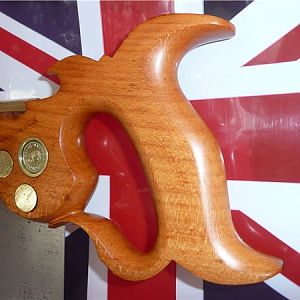
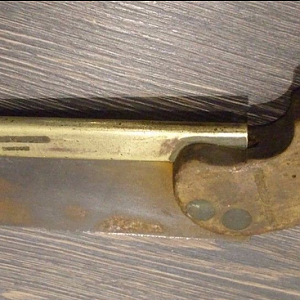
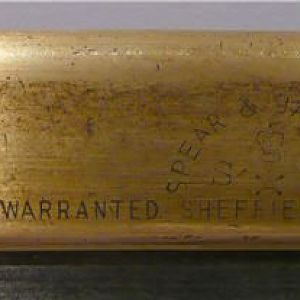
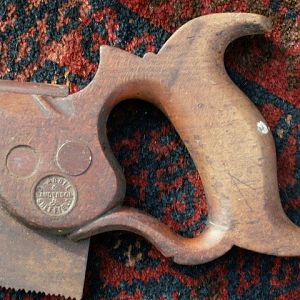
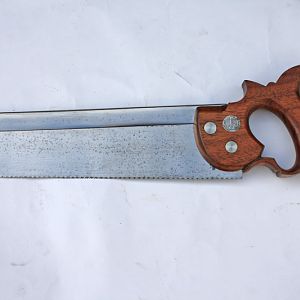
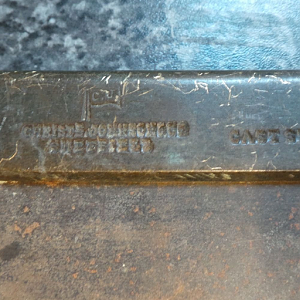
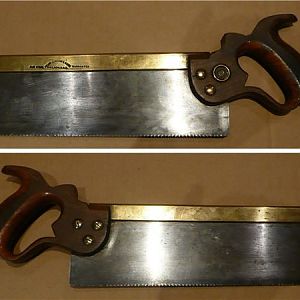
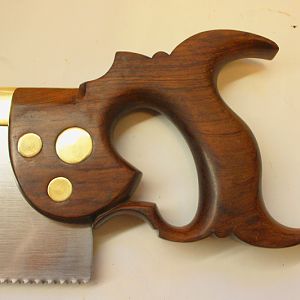
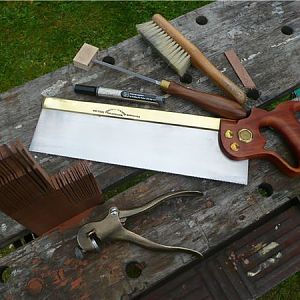
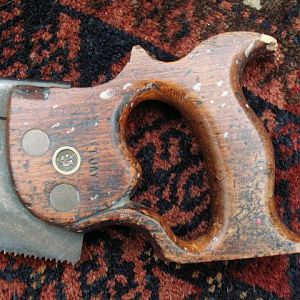
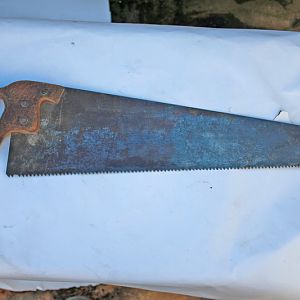
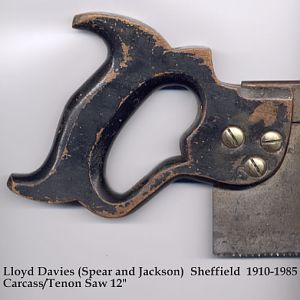
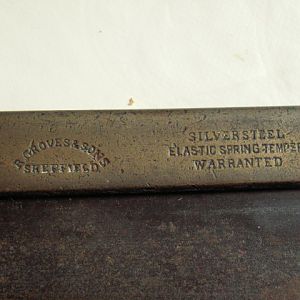
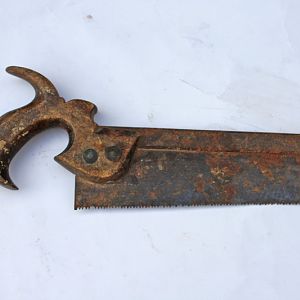
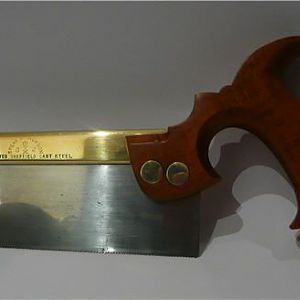
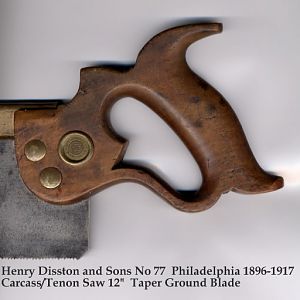
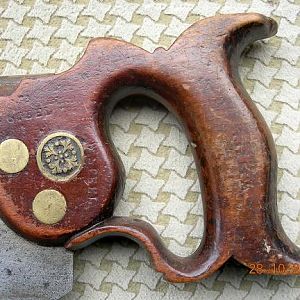
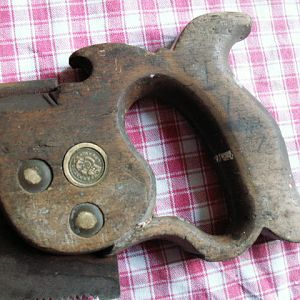
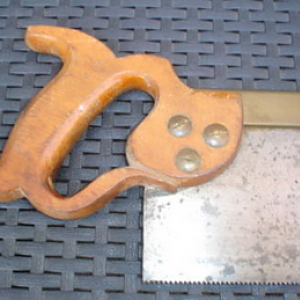
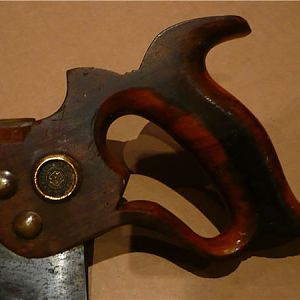
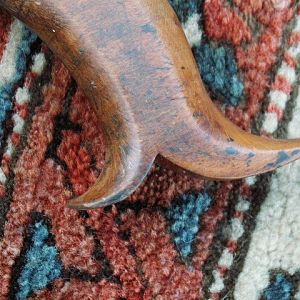
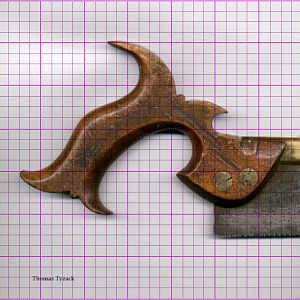
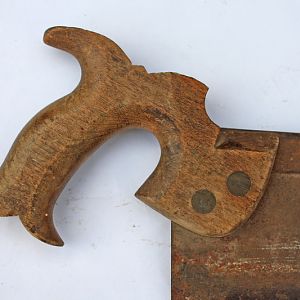
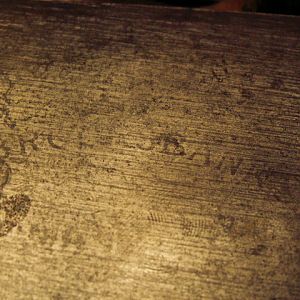
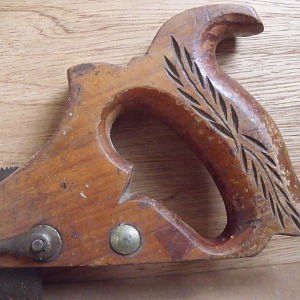
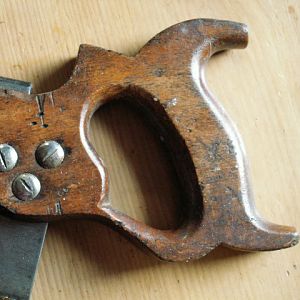
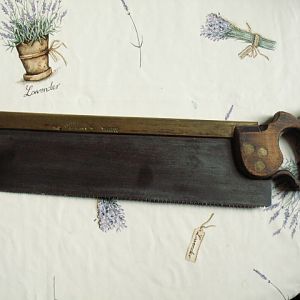
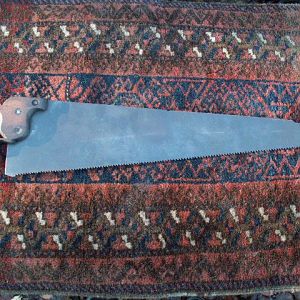
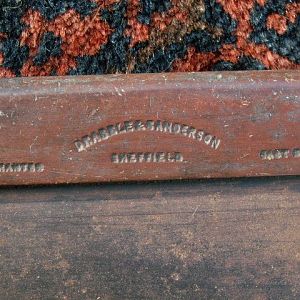
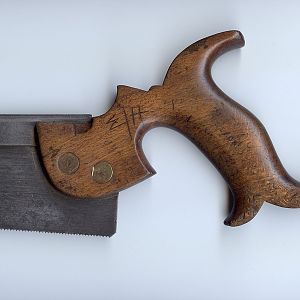
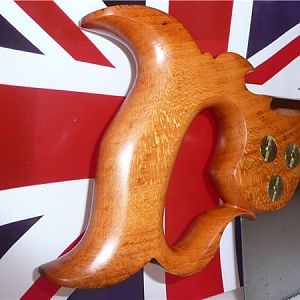
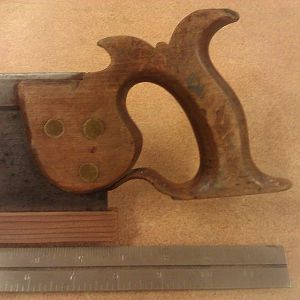
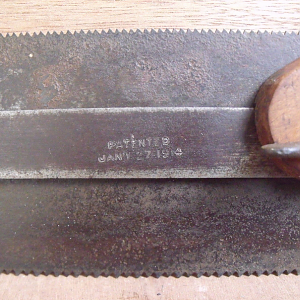
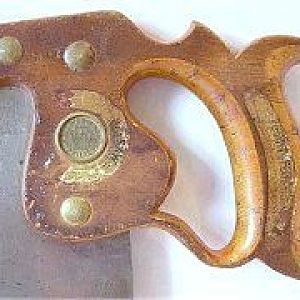
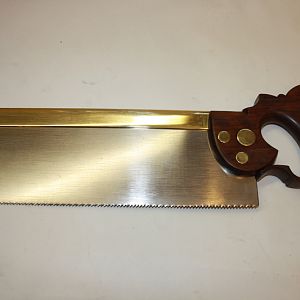
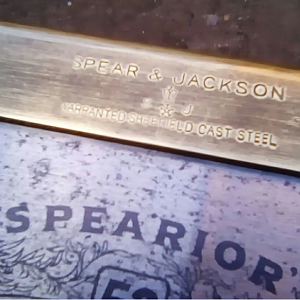
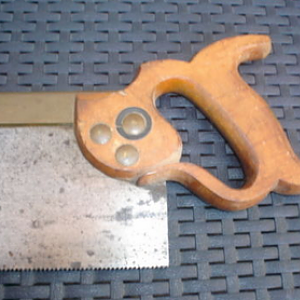
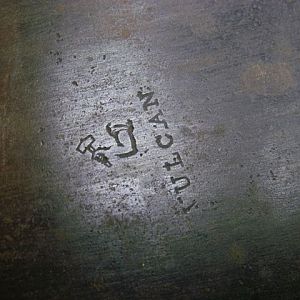
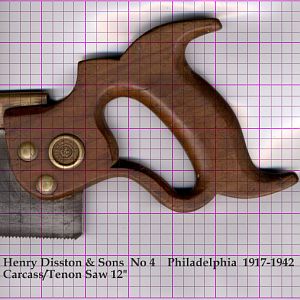
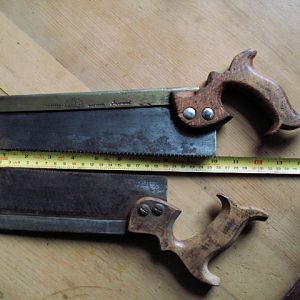
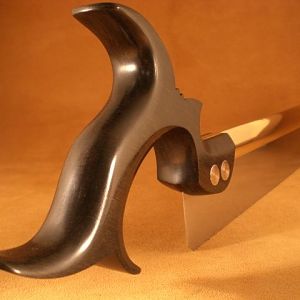
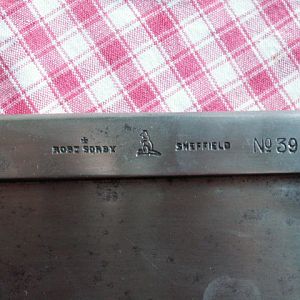
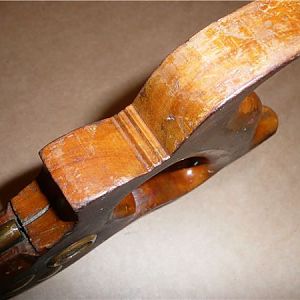
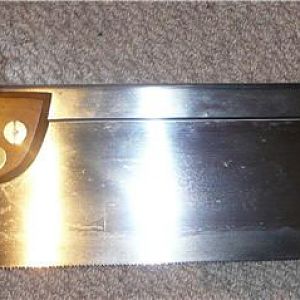
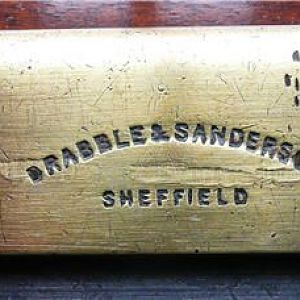
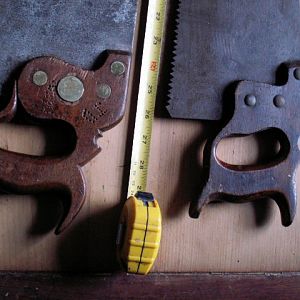
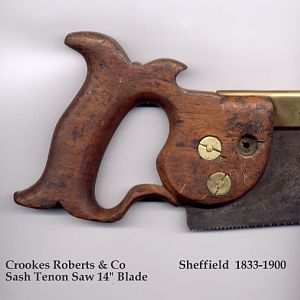
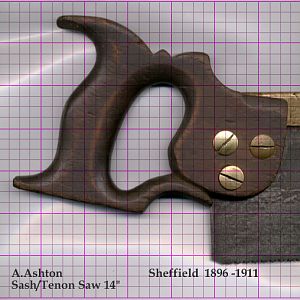
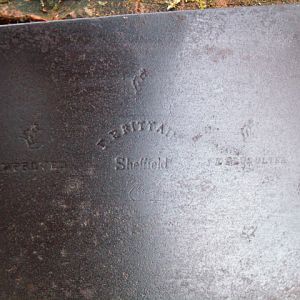
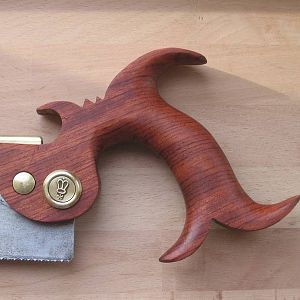
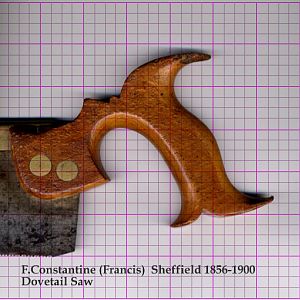
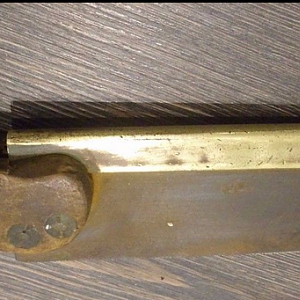
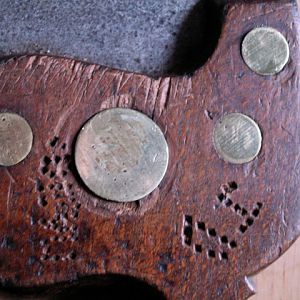
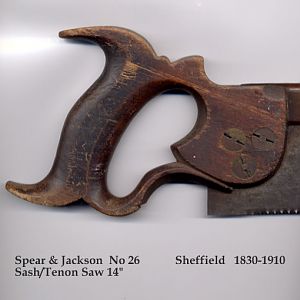
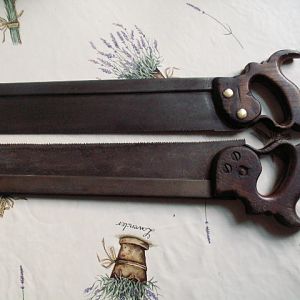
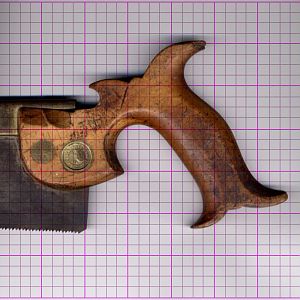
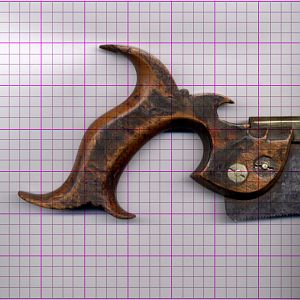
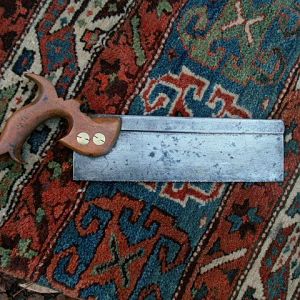
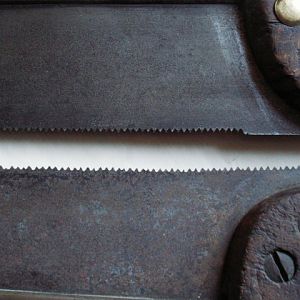
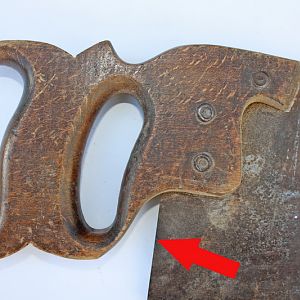
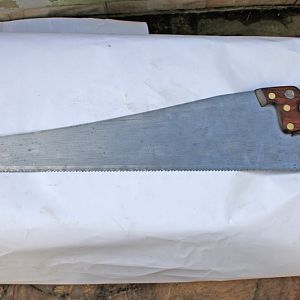
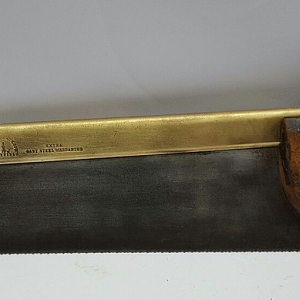
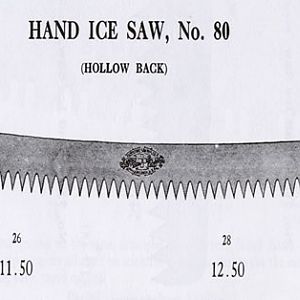
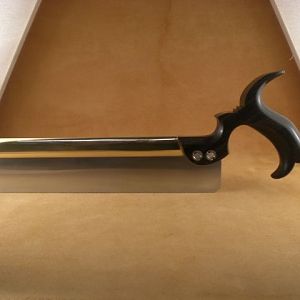
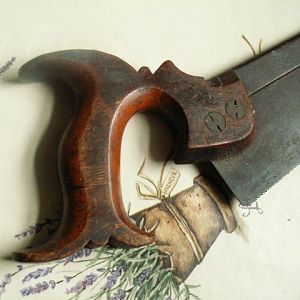
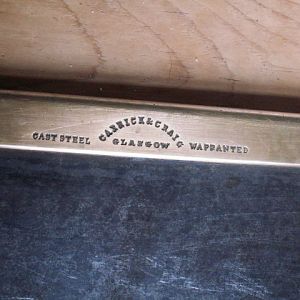
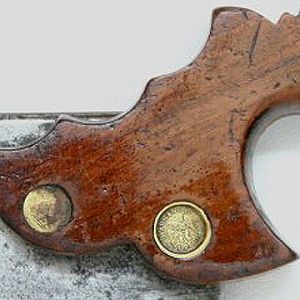
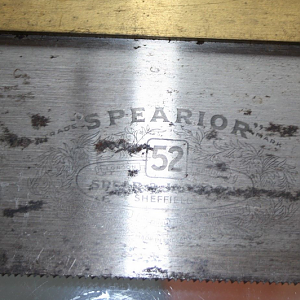
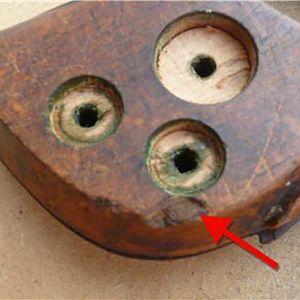
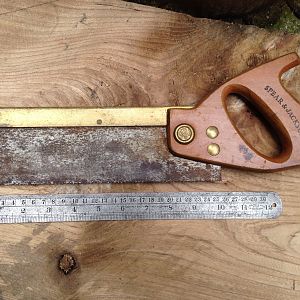
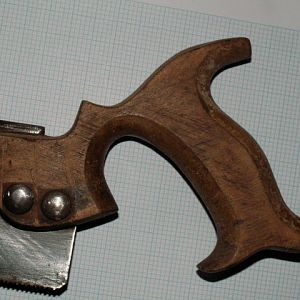
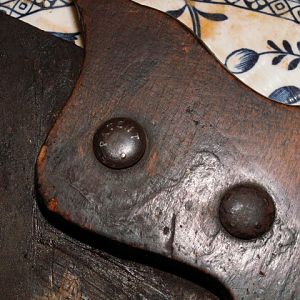
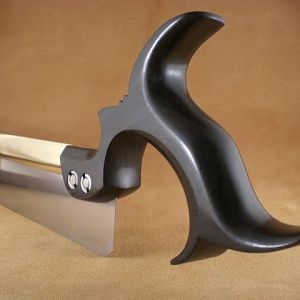
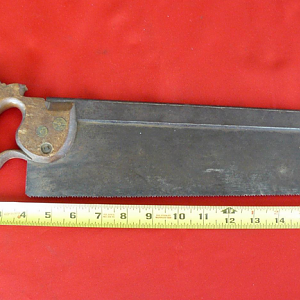
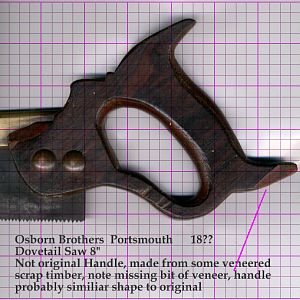
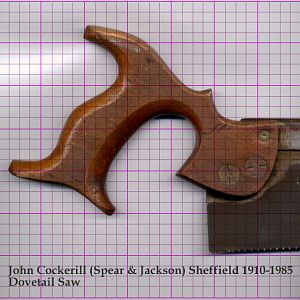
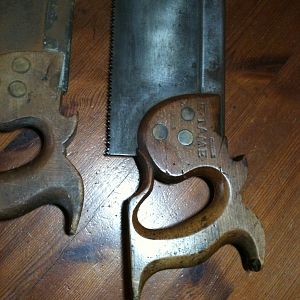
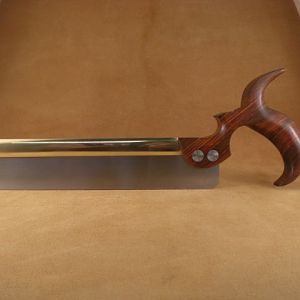
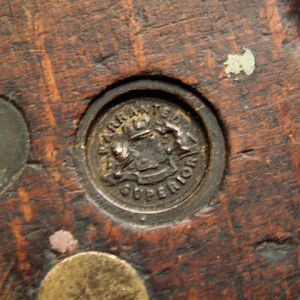
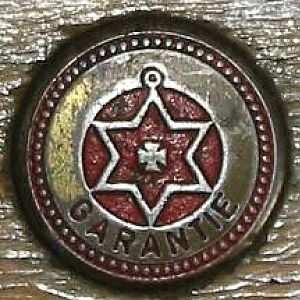
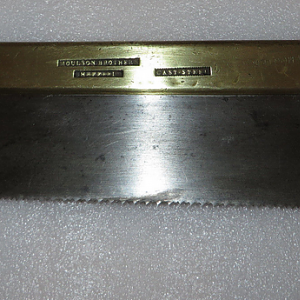
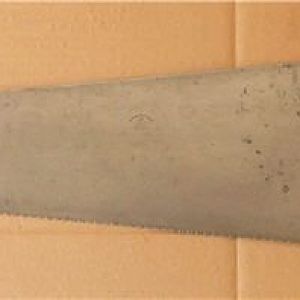
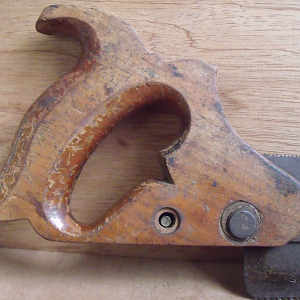
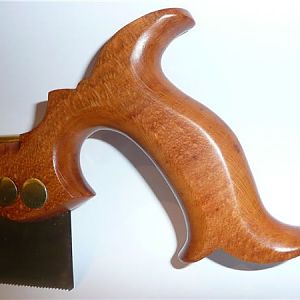
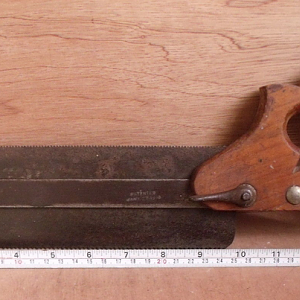
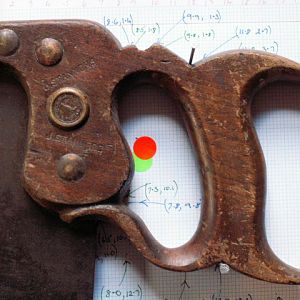
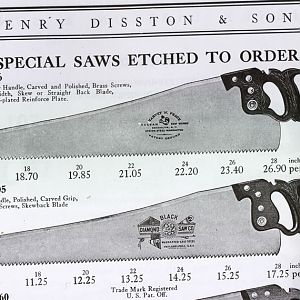
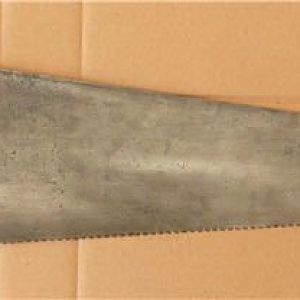
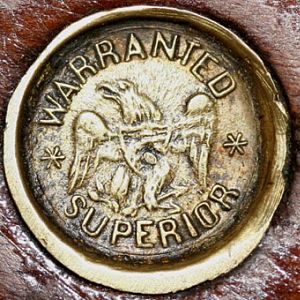
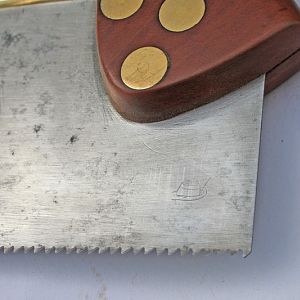
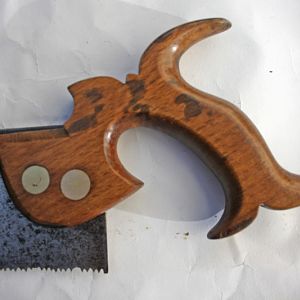
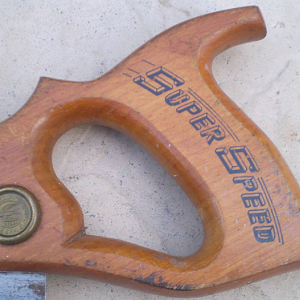
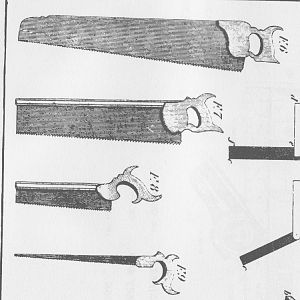
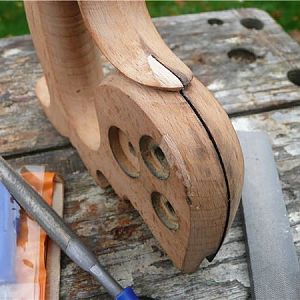
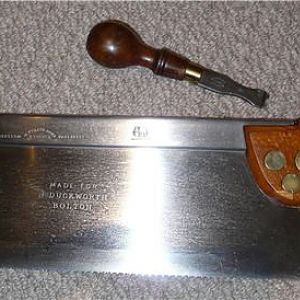
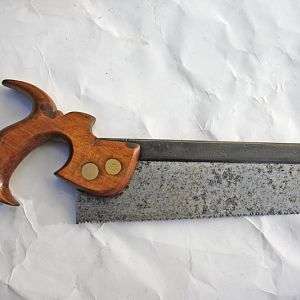
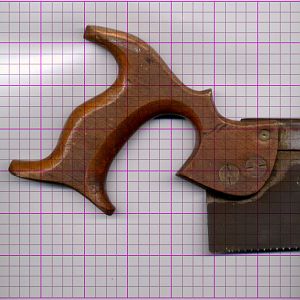
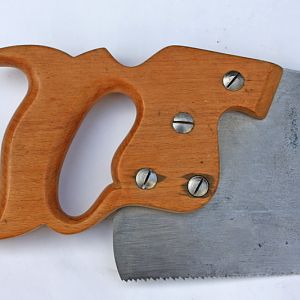
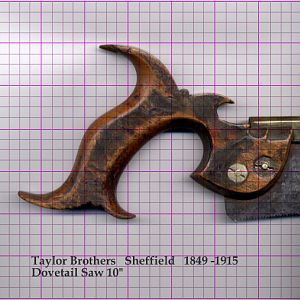
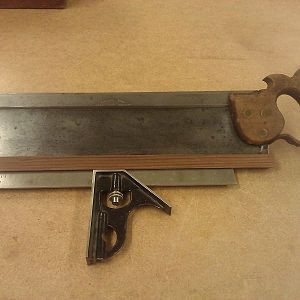
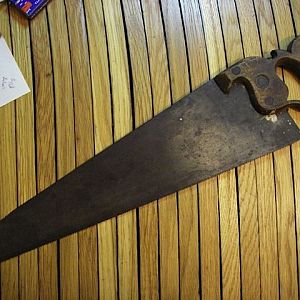
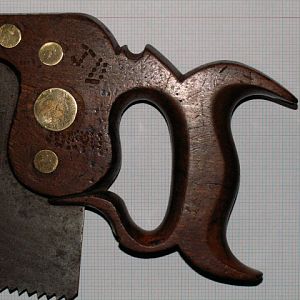
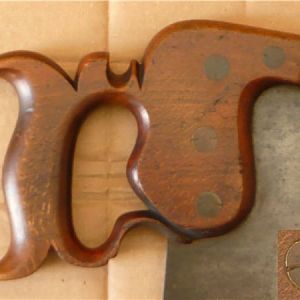
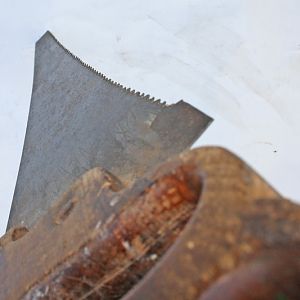
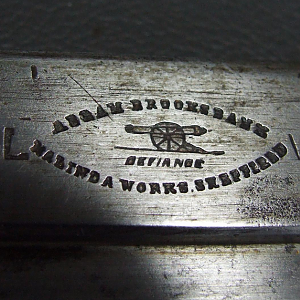
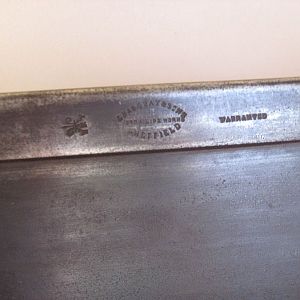
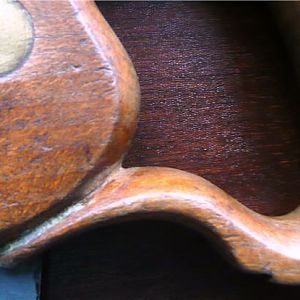
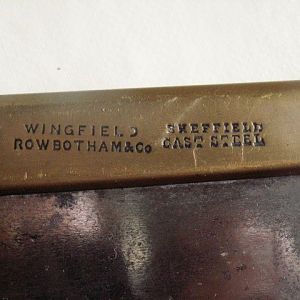
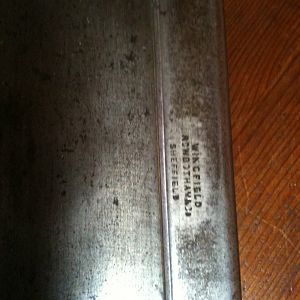
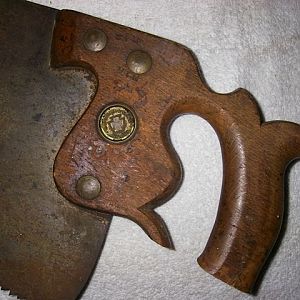
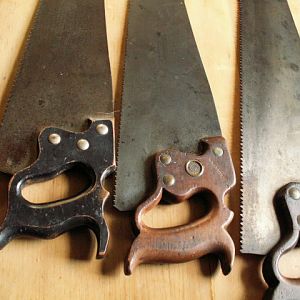
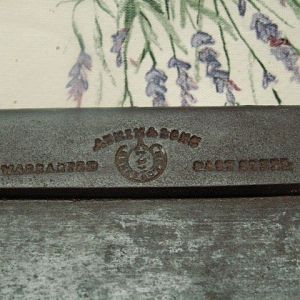
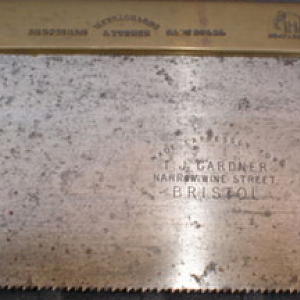
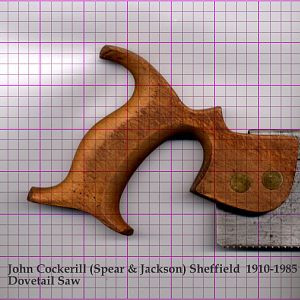
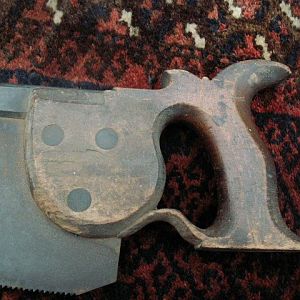
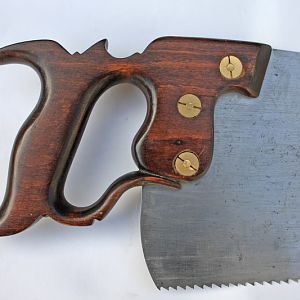
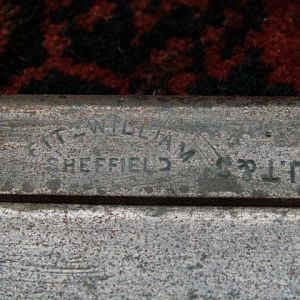
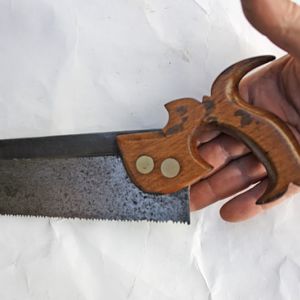
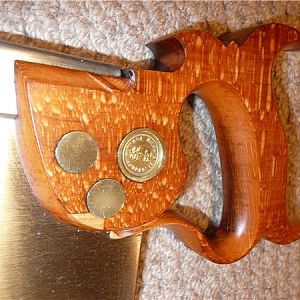
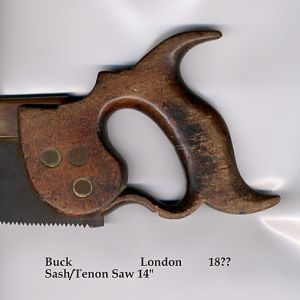
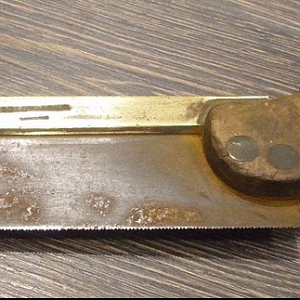
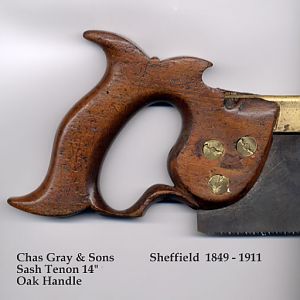
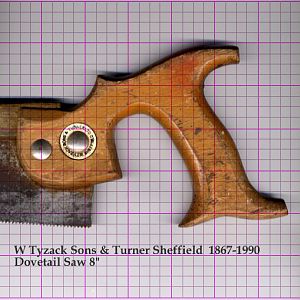
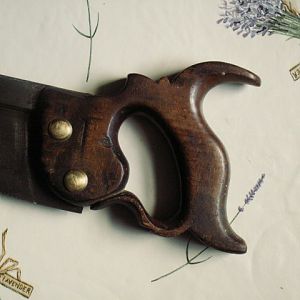
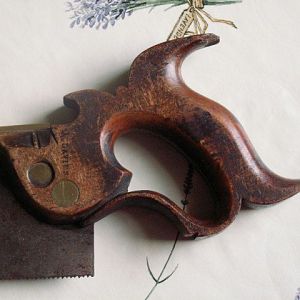
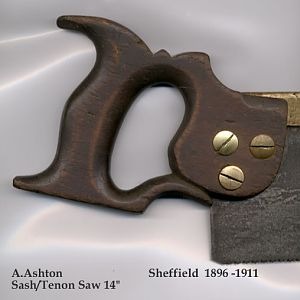
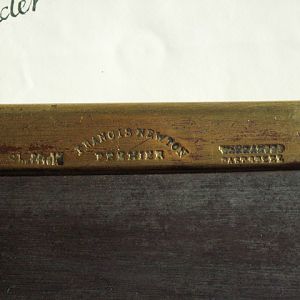
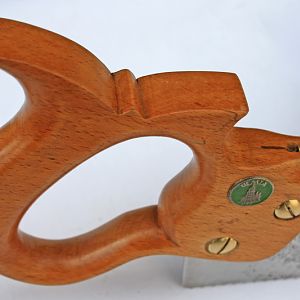
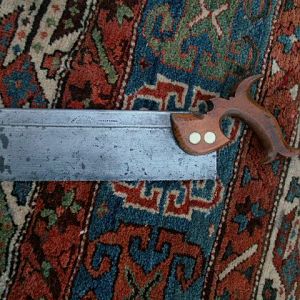
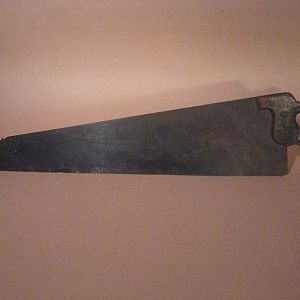
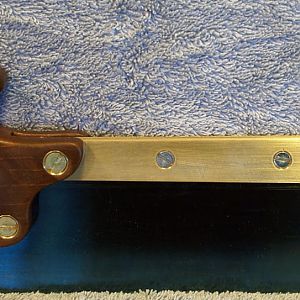
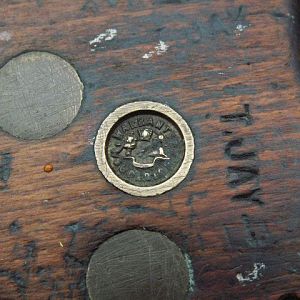
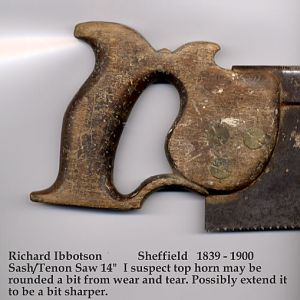
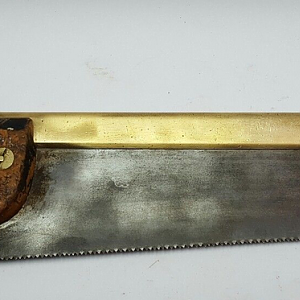
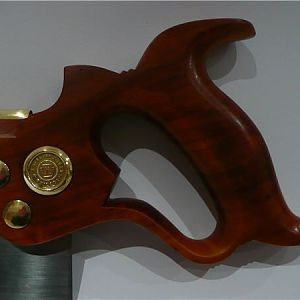
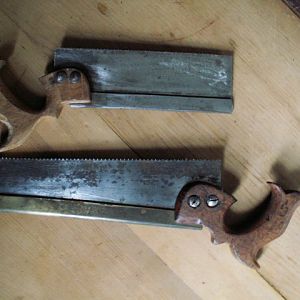
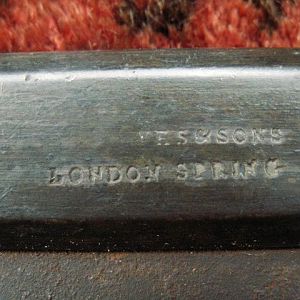
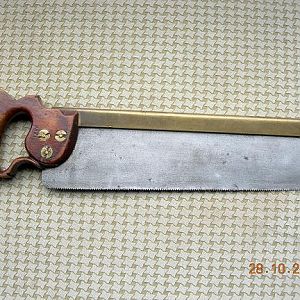
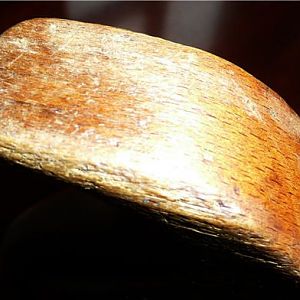
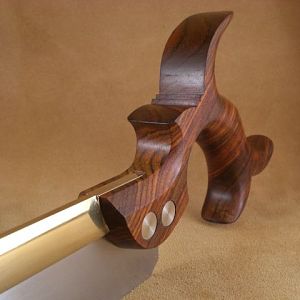
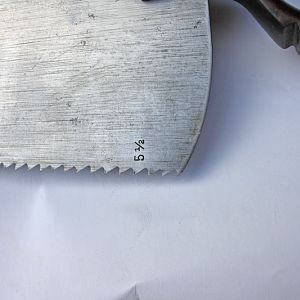
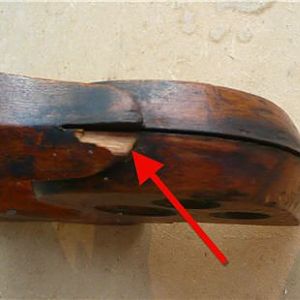
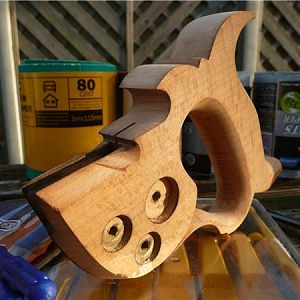
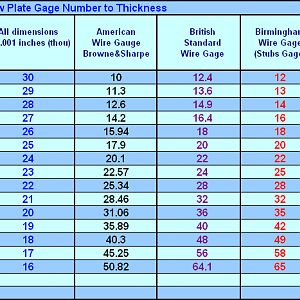
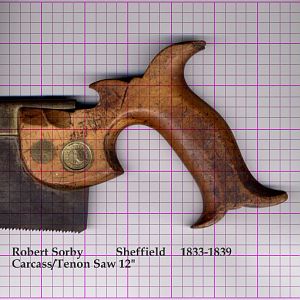
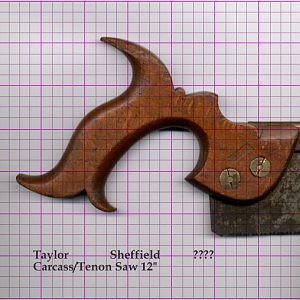
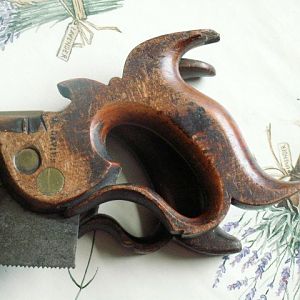
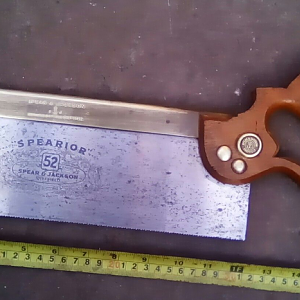
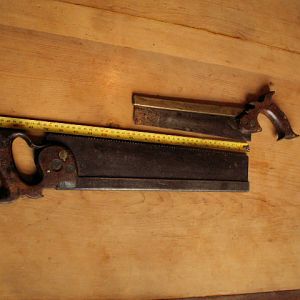
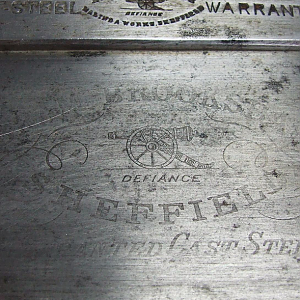
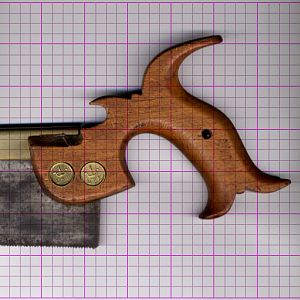
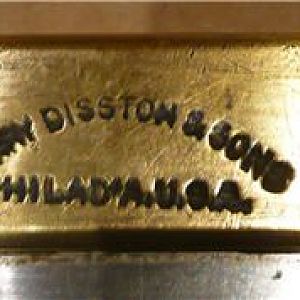
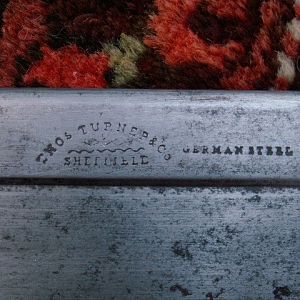
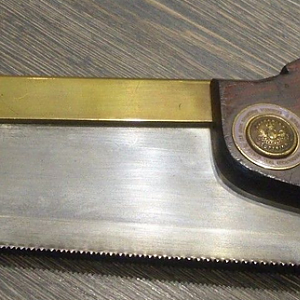
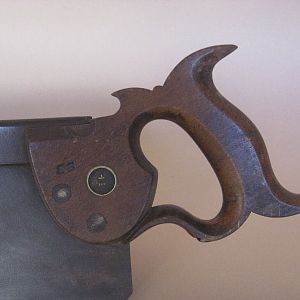
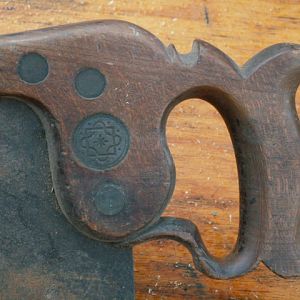
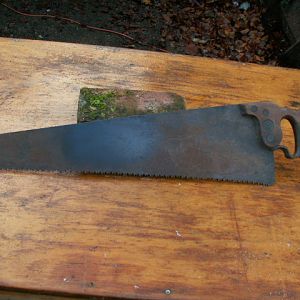
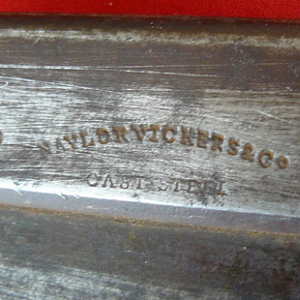
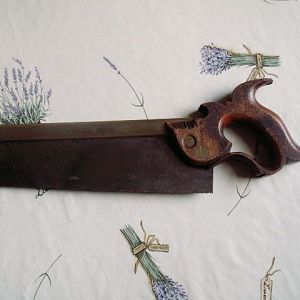
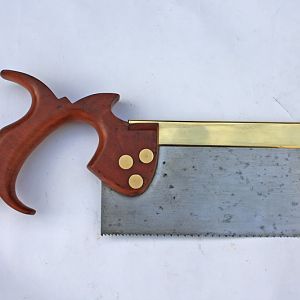
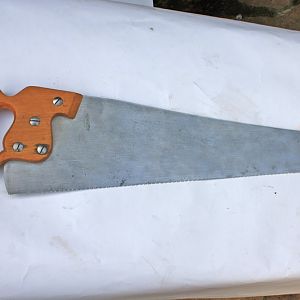
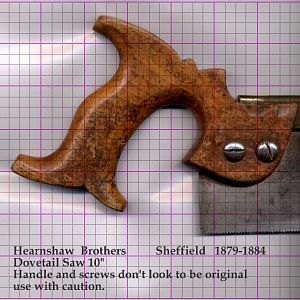
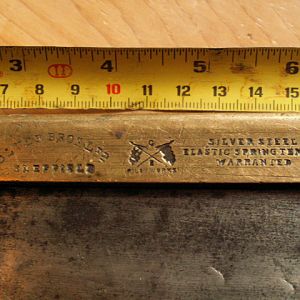
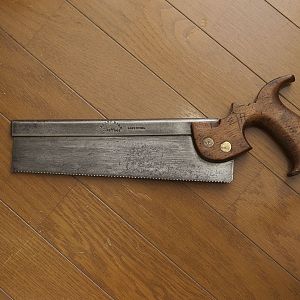
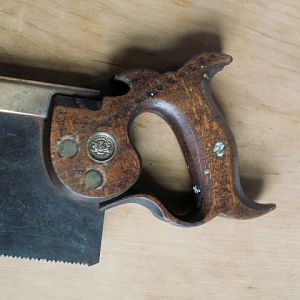
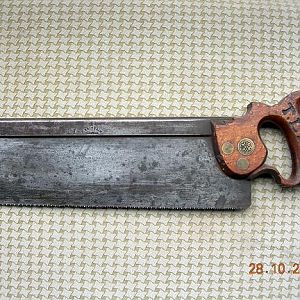
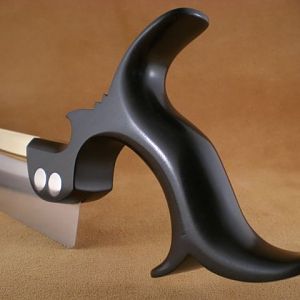
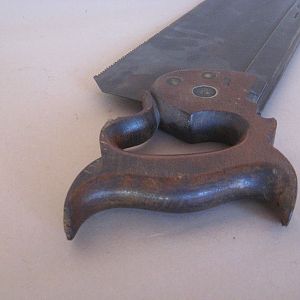
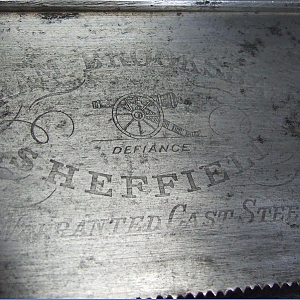
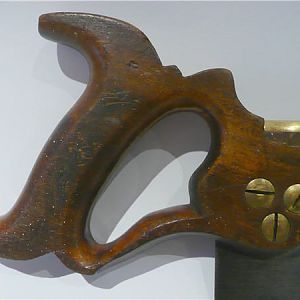
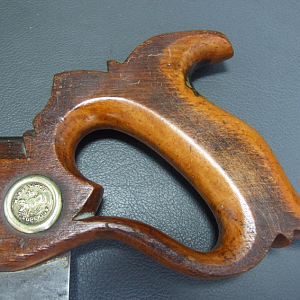
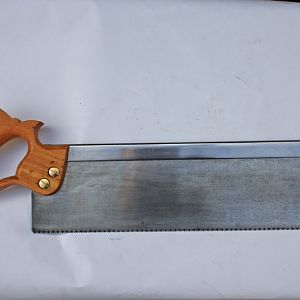
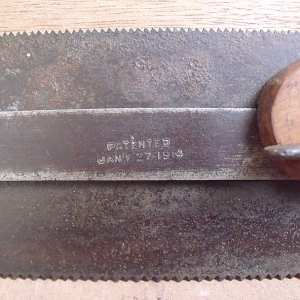
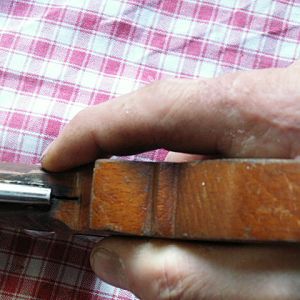
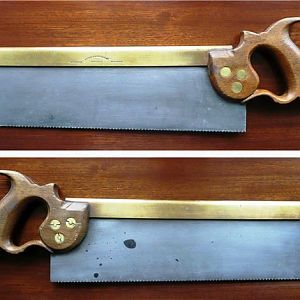
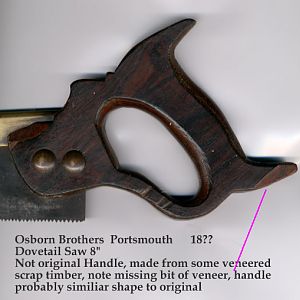
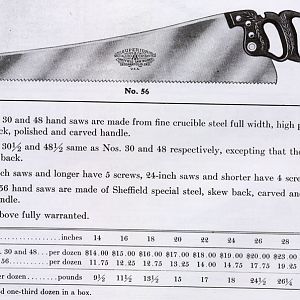
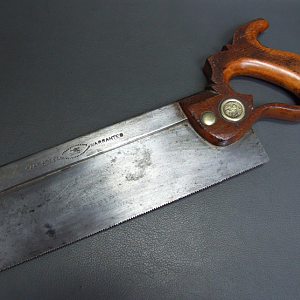
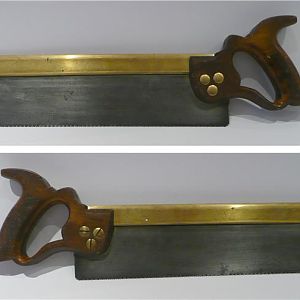
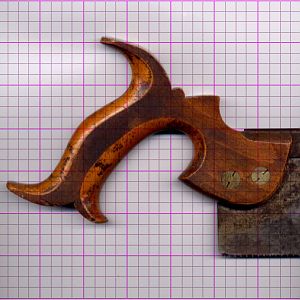
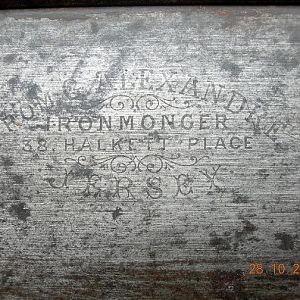
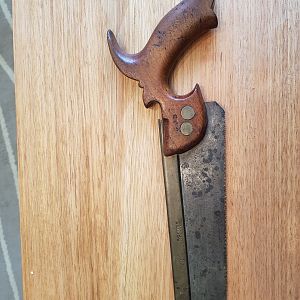
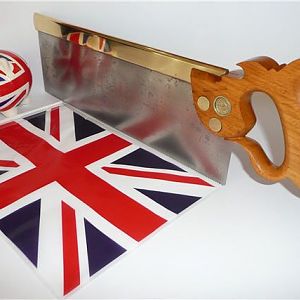
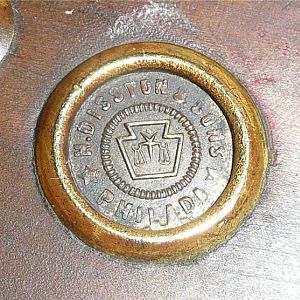
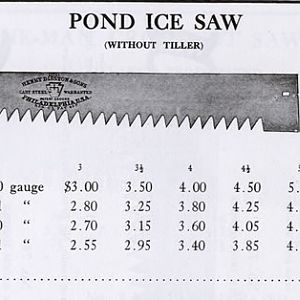
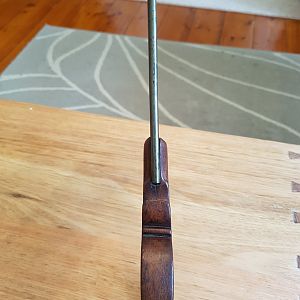
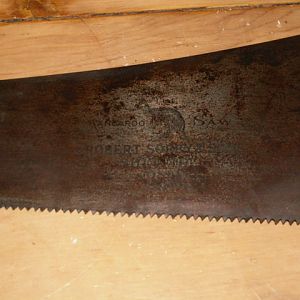
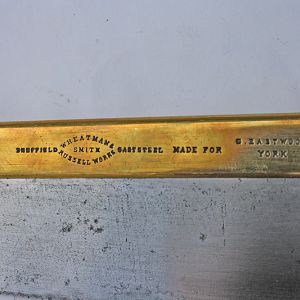
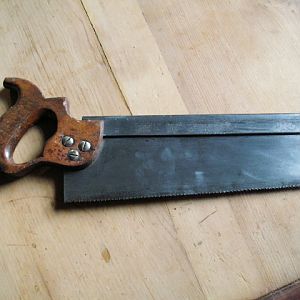
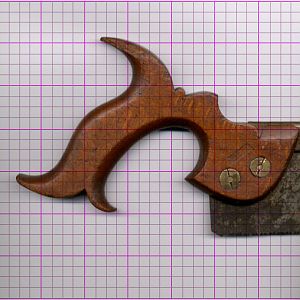
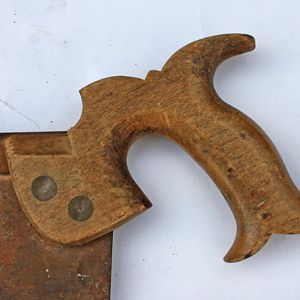
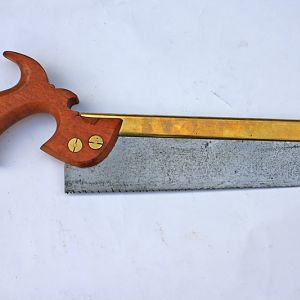
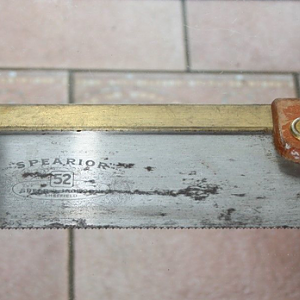
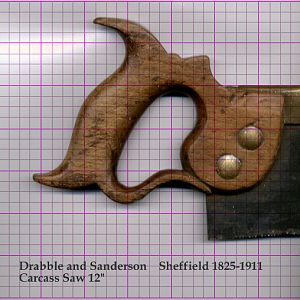
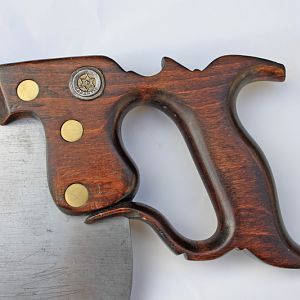
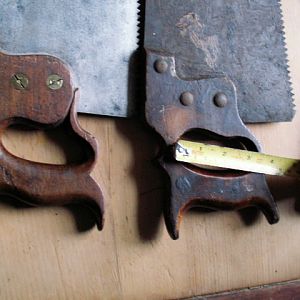
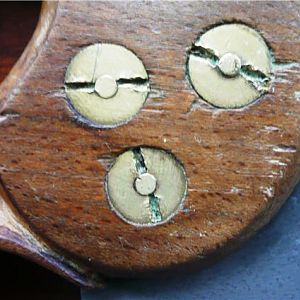
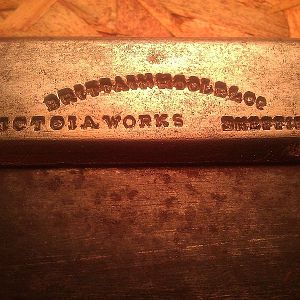
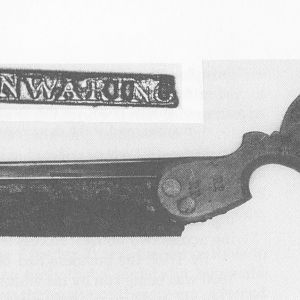
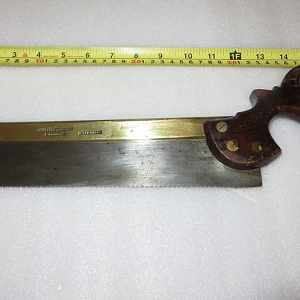
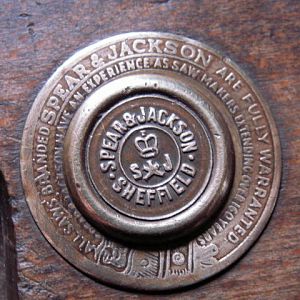
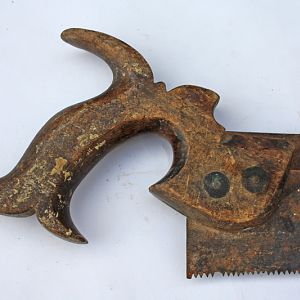
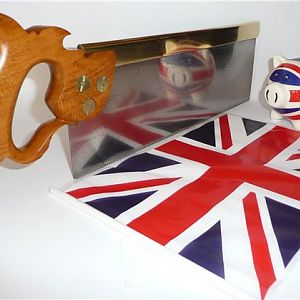
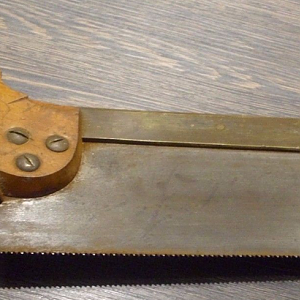
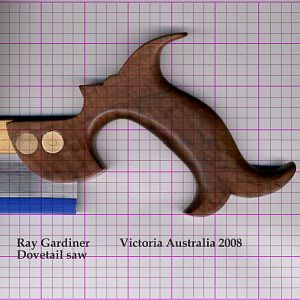
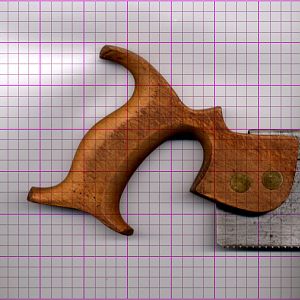
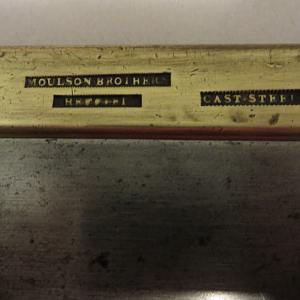
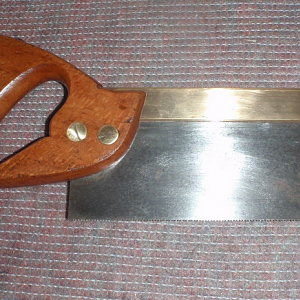
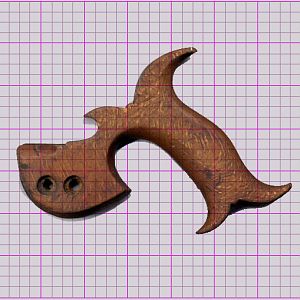
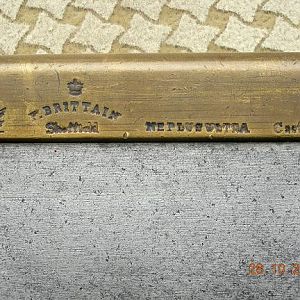
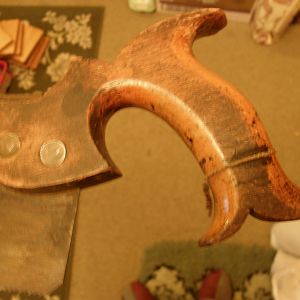
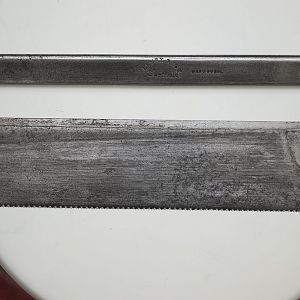
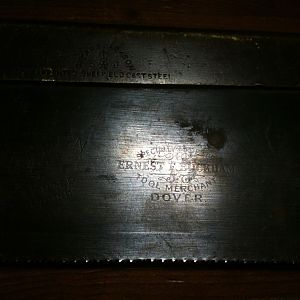
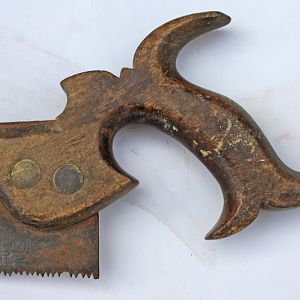
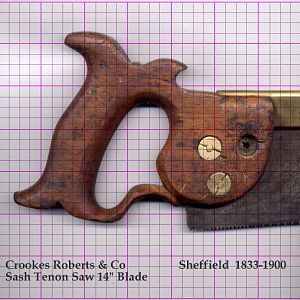
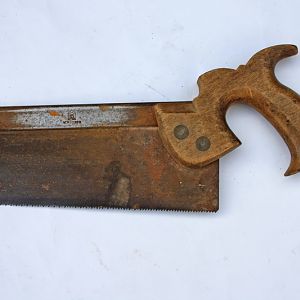
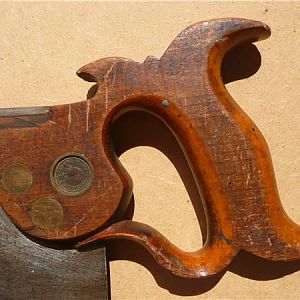
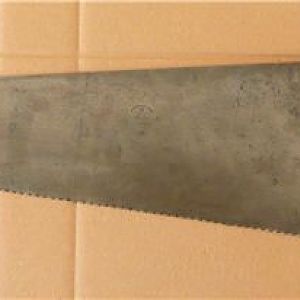
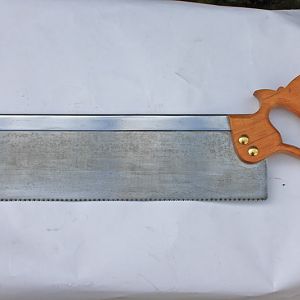
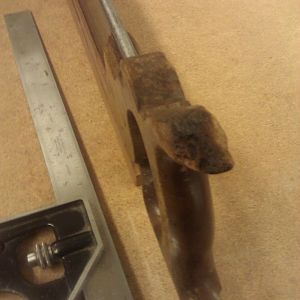
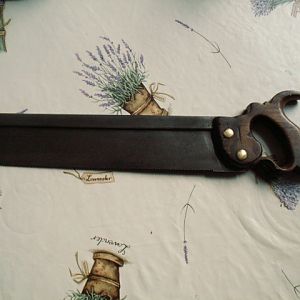
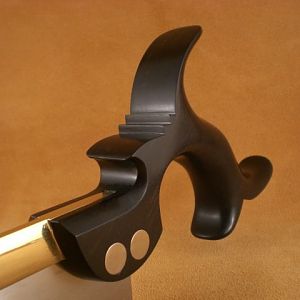
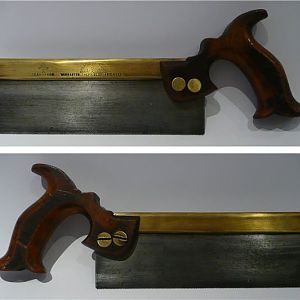
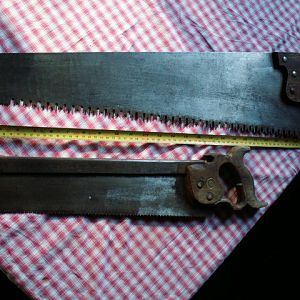
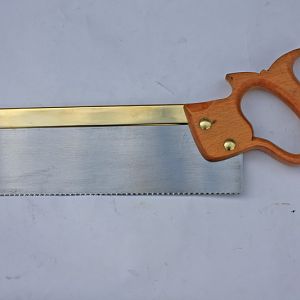
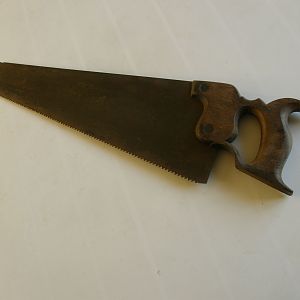
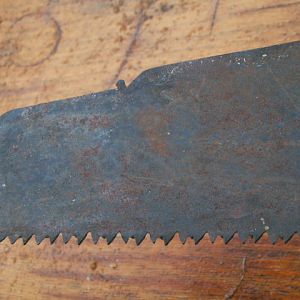
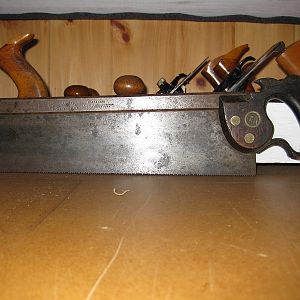
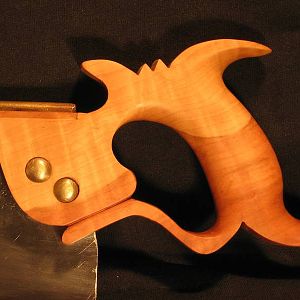
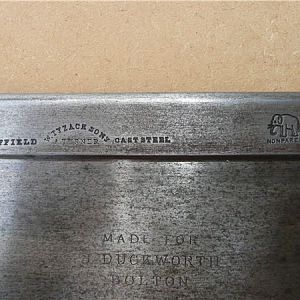
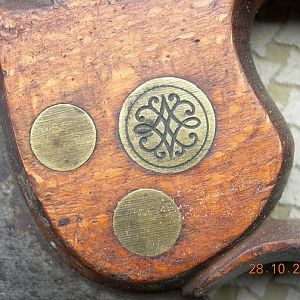
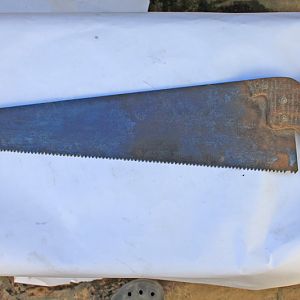
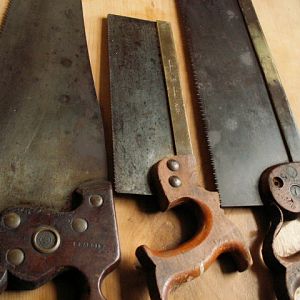
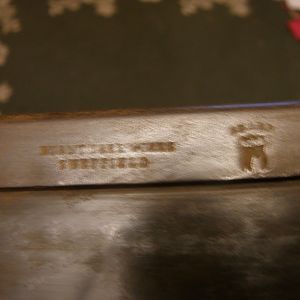
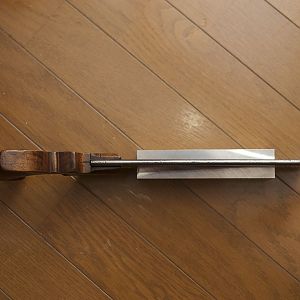
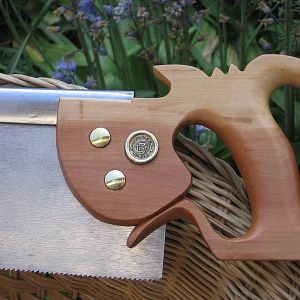
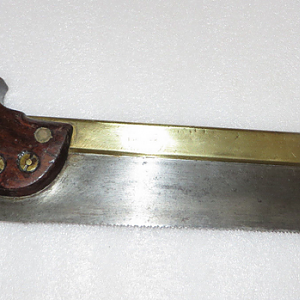
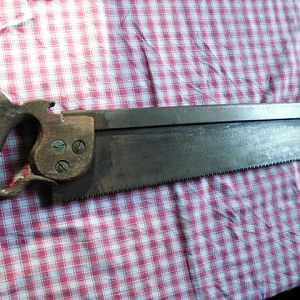
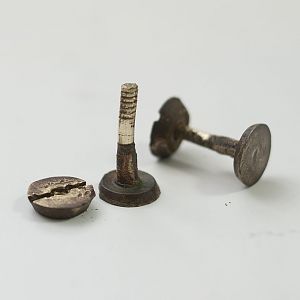
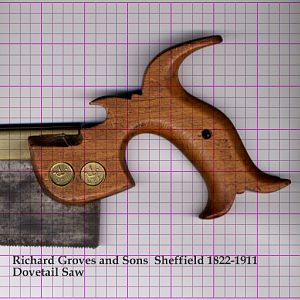
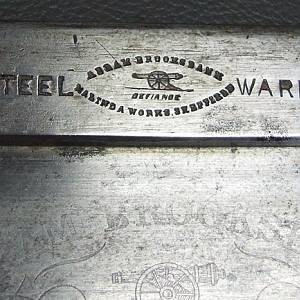
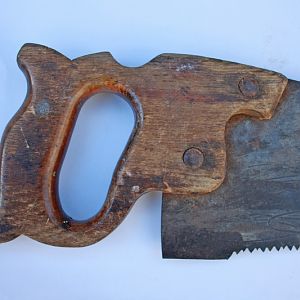
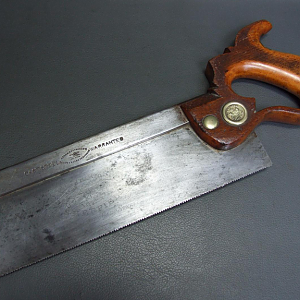
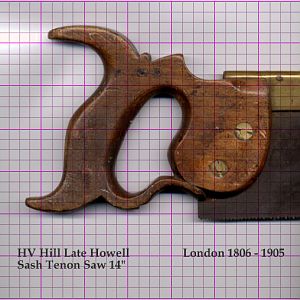
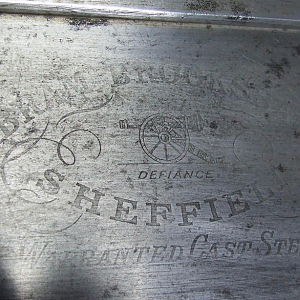
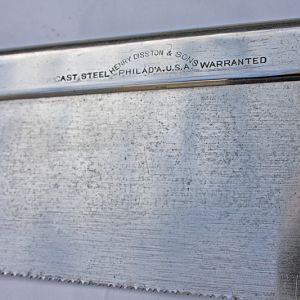
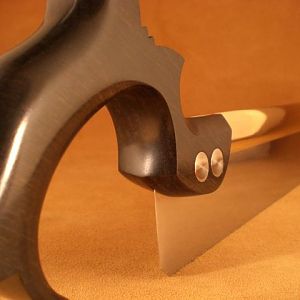
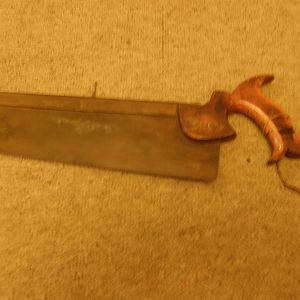
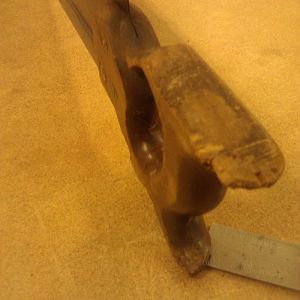
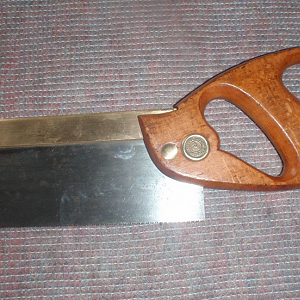
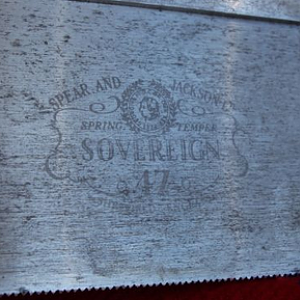
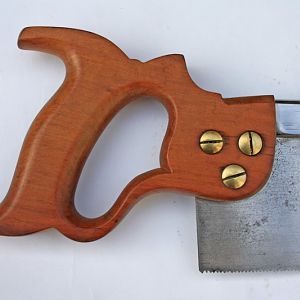
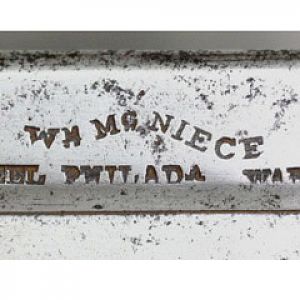
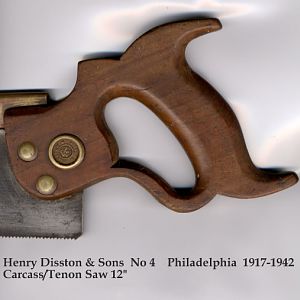
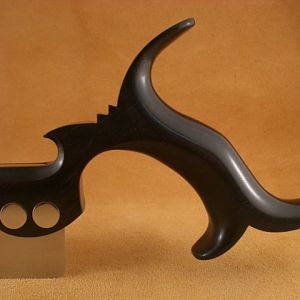
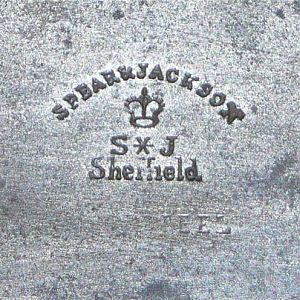
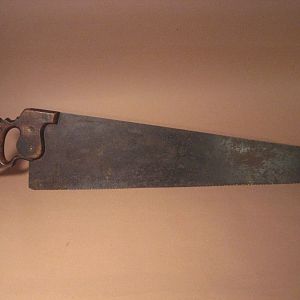
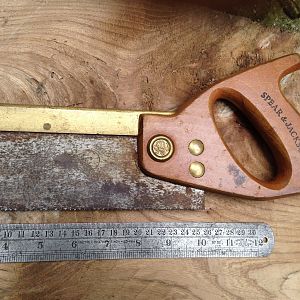
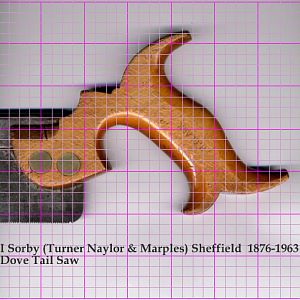
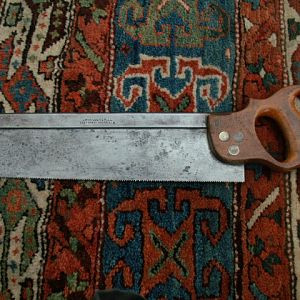
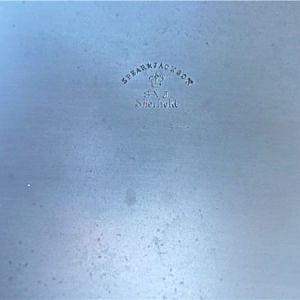
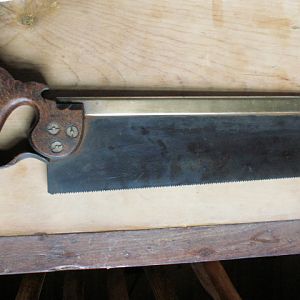
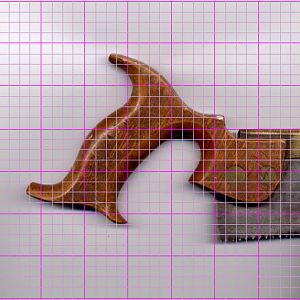
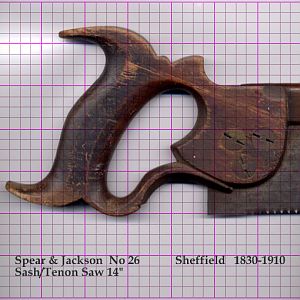
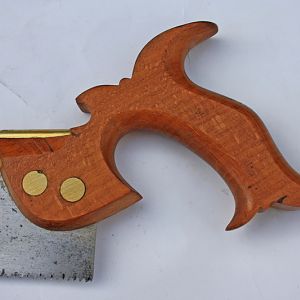
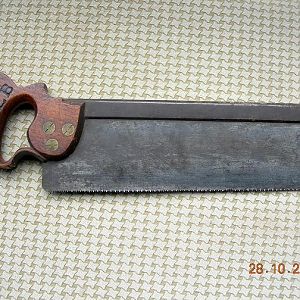
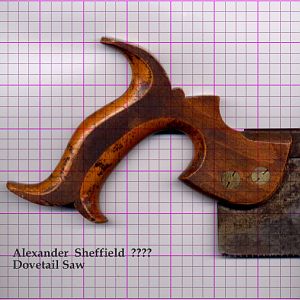